Guide to Product Photography is the one thing people search for online very often. Because many people are willing to take good product photos. Do you also want to make the best product photos but somehow every time you end up with an average result?
Are you a little confused about the tricks and techniques of the product photos? I will share some product photography ideas and tricks that can assist you in making more accurate product photos. By using these tips, you can become more professional in product photography.
E-commerce sites and product photography are closely connected. You won’t find a single e-commerce site without displayed product photos. The main component of an e-commerce site is the product photo. So, the photos have to be the best in Outlook.
Besides that, buyers should understand the basic features of the product at first sight. Therefore, while taking product photos, you have to be attentive, creative, and professional. Stick to the article.
Let Me Explain A Simple Guide to Product Photography
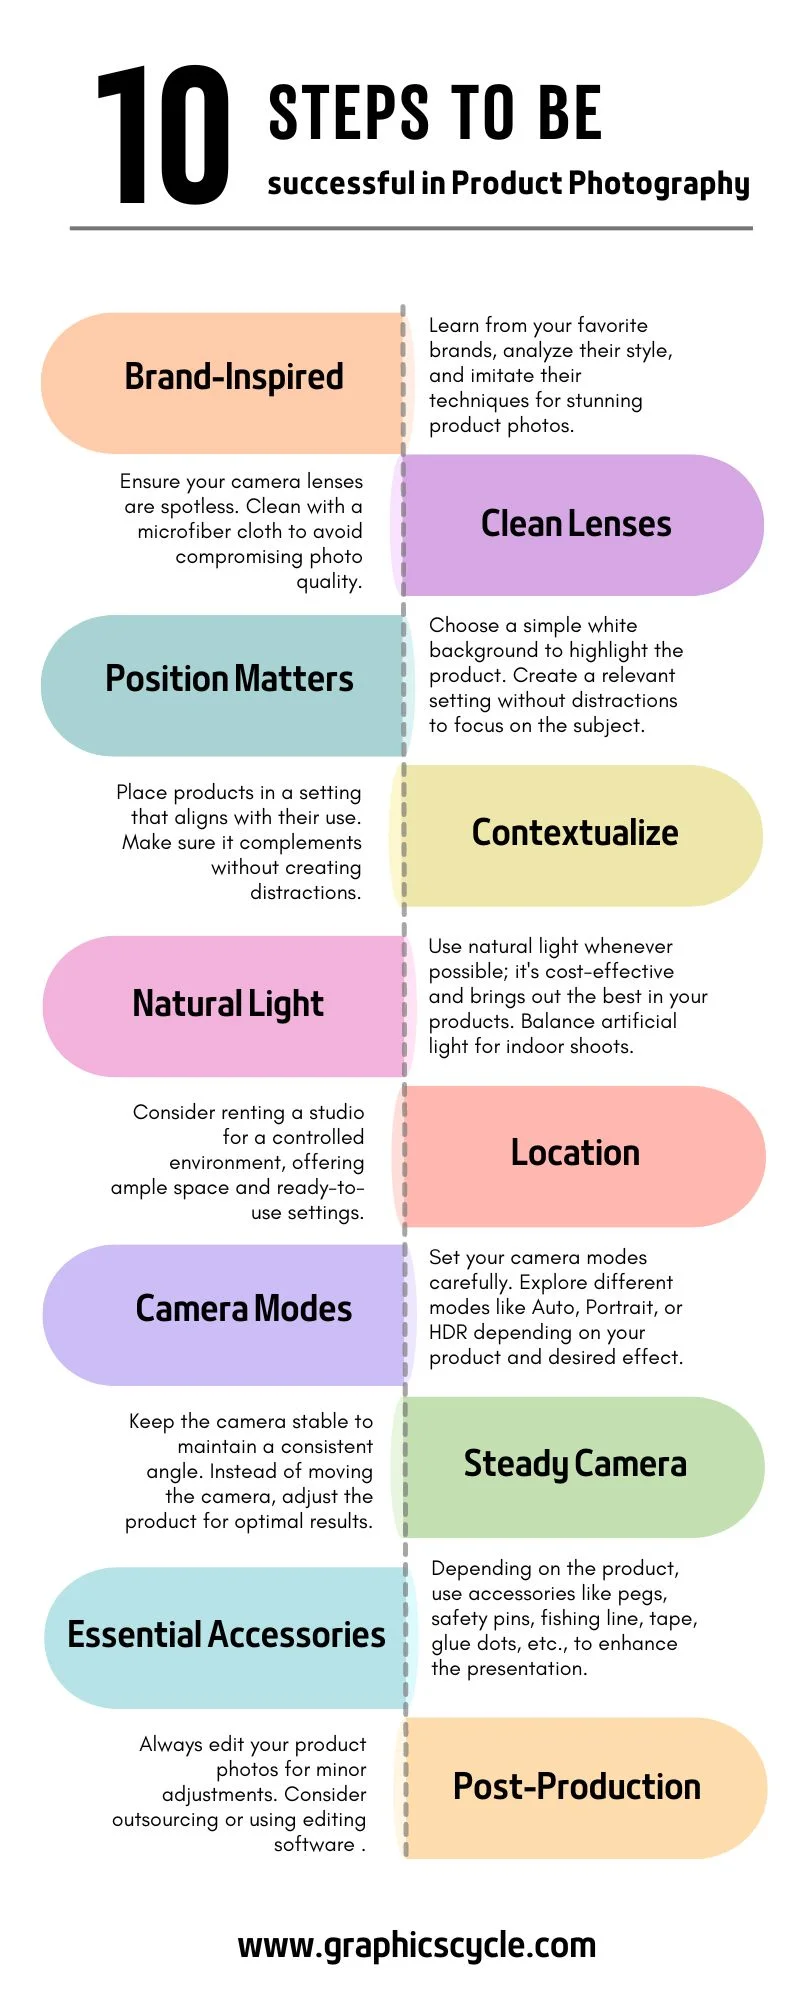
01. Follow the Brands You Like
As you are intending to become a product photographer, you must like some brands. Their photos attract you and inspire you to be a product photographer. Use this fascination as an inspiration. Analyze their works. Scrutinize the photos so that you can understand every bit of it. Try to find out the angles, the color scheme, and the amount of lighting they use.
Imitate what you learn from them. You can learn a lot of product photography techniques. Or you can read their product photography blog from experts. For example, if you are about to shoot a women’s boutique. Now go and search for the best boutique brands and follow how they have shot the pictures. Reflect on your photographs.
02. Clean Up Your Camera Lenses
Well, cameras are the most important thing for shooting photos. Camera quality is a major issue. You have to know about the quality of the best camera for product photography. Besides that, a clean lens. Dirty lenses damage the quality of a photo.
Before shooting make sure your lenses are clean. If you are shooting on a smartphone, confirm that there is not even a fingerprint on the lens. I would recommend a microfiber cloth that we use to cleanse our glasses. Also, you can use a simple rag that you use to clean up your laptop screen.
03. Fix a Position for the Product
The best product photos are those that you take focusing on the subject most. The first step towards a good photo is to create a setting. To create an impressive setting for the subject, you should follow these helpful hints for product photography.
Select a simple white background. The plain white background is best for the maximum product photos. You can easily bring your subject into the spotlight by just clicking it with a simple white background. Because a white background causes no distraction.
04. Contextualize product
You can contextualize the subject by creating a relevant environment. For instance, if you are shooting cooking appliances, you should shoot in a kitchen. While creating context make sure they don’t create a distraction.
The target customer should understand the use of the product from the photo. Professional product photography follows a context. Contextualizing product photos lessens the editor’s workload. If not okay then you can take photo editing services.
05. Make the Best Use of Light
Natural light is always free of costs, and much more comfortable to work with. On the contrary, artificial light requires a budget. When you are shooting indoors, stay close to the window so that you can use the natural light. Especially for images for social media uploads, the use of proper light plays an important role.

06. Flash and Lights
In the faint light, flash has no competitor. Perhaps it is the best idea to use flash in that light situation. Otherwise, it is better to turn the flash off. However, we are trying to click product photos. So, we don’t need to flash here. Let’s talk about lighting now. Without lighting, it is impossible to shoot.
Whether natural or artificial, you will need a certain amount of lighting. When it is product photography, lighting becomes much more crucial. For this reason, the best product photographers maintain a balance when it comes to using flash.
Clients don’t like product photos that are not clear, concise, and definite. Sometimes, it’s better to use natural light but in some cases using a Product photography lighting kit is mandatory. Especially in indoor shooting using a reflector is a good way to keep the light within the frame.
07. Select a good location
Now it’s time to choose a location for your photoshoot. I would suggest you rent a studio. Because there you will get enough space. You don’t need to worry about the other settings. A studio keeps everything ready you need for the photoshoot.
08. Set Camera Modes
You might think it’s obvious that everyone will set the camera mode before shooting. Then why am I writing about it? Yes, you are right. But I need to mention this just to remind you. Every kind of camera has some default modes.
Auto, Portrait, Macro, Landscape, Sports, and Night Portrait, are some of the modes of DSLR cameras. You can take the benefit out of these modes while shooting product photography. If you are using an iPhone for shooting products, you can activate HDR mode.
HDR mode helps adjust the color balance. As camera modes can have an impact on photos, you should set your camera modes carefully.
09. Use of Zoom
One of the common product photography facts is you have to show the product details. A great way to show detail is to use zooming technology. For this, you should choose a camera that is capable of taking standard close-up images.
In the current market, it is easy to get a camera that can take high-quality zoomed-in photos. Some other settings also contribute to getting the best zooming result. When you use Shutter speed, ISO, and Aperture together it gives amazing results.
Similarly, using a tripod can help you to take close-up shots. The first thing is, it is a matter of ethics. The second thing is, that one may buy or reject the product after seeing the flaws. If he buys the product after knowing the defect, there will be no claim for a refund.
10. Set the Camera Firmly
A professional photographer finds a suitable angle that works. While shooting, he keeps that angle stable. On the other hand, an unprofessional photographer may find an accurate angle but cannot give it a proper finish. Because he moves the camera while shooting.
The key factor in product photography is consistency. To keep that balance you cannot move the camera every now and then. Instead of moving the camera, you can move the product. You can expect a better result in applying this little advice.
11. Product Photography Accessories
The need for product photography accessories depends on the item you will shoot. For example, you will need pegs and safety pins to keep clothing in place. The fishing line works perfectly while shooting jewelry products to keep the works stand straight.
Tape and glue dots do quite a similar job. Some product photography accessories examples are coat hangers, iron, scissors, hooks, clamps, batteries, chargers, etc. You may need some or all of them according to the type of item you are shooting.
12. Editing Photographs
No matter how perfectly you shoot, you should always edit your product photos. Even if you think your photos are exactly as you wanted, never ignore the importance of editing. Minor editing can improve your photos. So, if it is not possible for you to edit then take photo editing services. If you are going for simple editing keep that consistency.
As a result, it will make navigation of your website easy. You can find thousands of editing software out there online. Or, you can outsource editing. Background removal, and color correction, are the most common editing you will need in product photography. You can even have product photography services near you. They also provide editing along with shooting.
Conclusion
Before wrapping up the article, I would say that these are not the ultimate guide for product photography. Every type of photography has its kind of problem. Product photography is no different thing. You will face many challenges in product photography as well. You can overcome these by taking some simple steps. Your photographs can be the best product photography examples.


