


Hello, Photoshop users! How is your time going? Do you have any ideas about advanced photo editing services? It includes color correction, image masking, and high-level photo restoration services. During this time, we need to adjust the color temperature and make it photo-realistic.
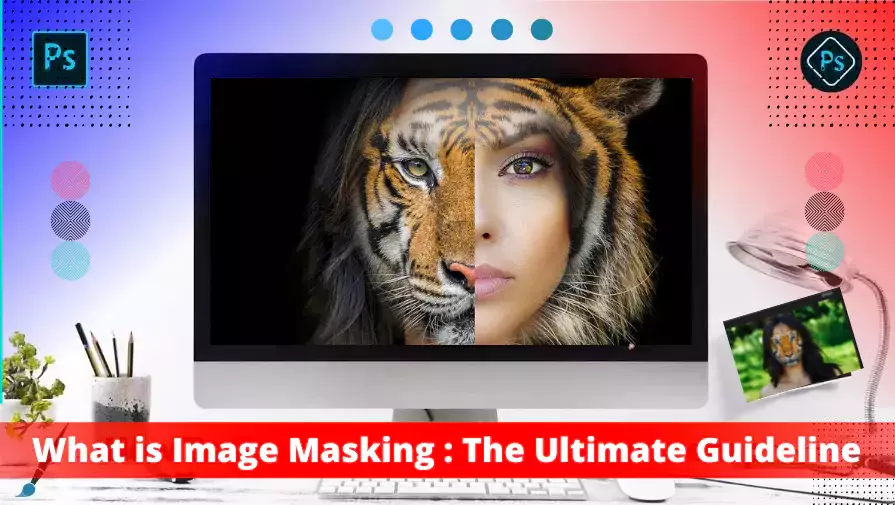
This tutorial will discuss several image masking techniques and “what is an image masking service.” Let’s go for a detailed discussion.
Definition: Image Masking
Image masking is the photo processing method that will help us define small image pieces, and later on, we will modify them into larger pieces.
Masking is an extensive photo processing niche that includes motion, noise, and, most importantly, edge detection. Photoshop image masking techniques are essential parts of the image editing process.
Who needs an image masking service?
In short, when all other photo editing elements fail to connect with users, we take the help of an image masking service. When we need advanced photo editing services, our traditional methods will not work correctly, and we will get stuck in many ways. During this time, we need the help of image masking services.
If there is a photo with more critical details, an image masking service will be the best option to separate the subject from the given background. We can call the masking service the complex photo editing service.
The masking process will allow us to brighten the subject when we leave the background. It will enable us to control how photo editing adjustments take place. The Photoshop image masking service is essential to the clipping path business.
What Is Meant By “Masking” An Image?
By using the image masking technique, we can isolate an image. The process might change slightly depending on the software we frequently use. However, the outcome of this task will be the same.
While working with Photoshop, you will enjoy a dedicated layer mask. Here, you can make selective changes to the images, like changing color, adding transparency, etc.
By looking closely at this image, you will see the different sky versions by implementing the layer masking techniques.
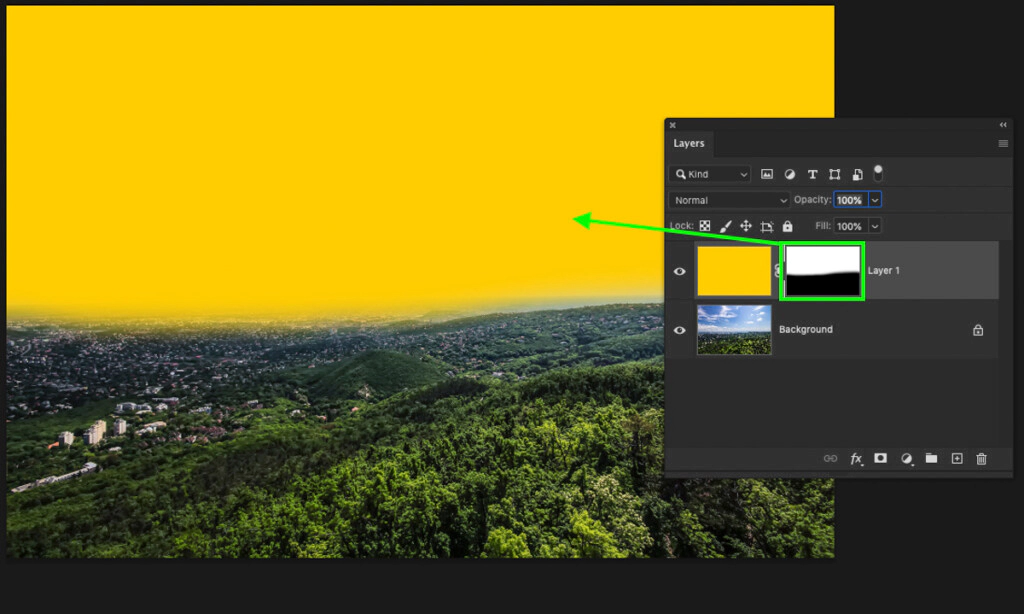
100% visible masks in the sky portion of this image
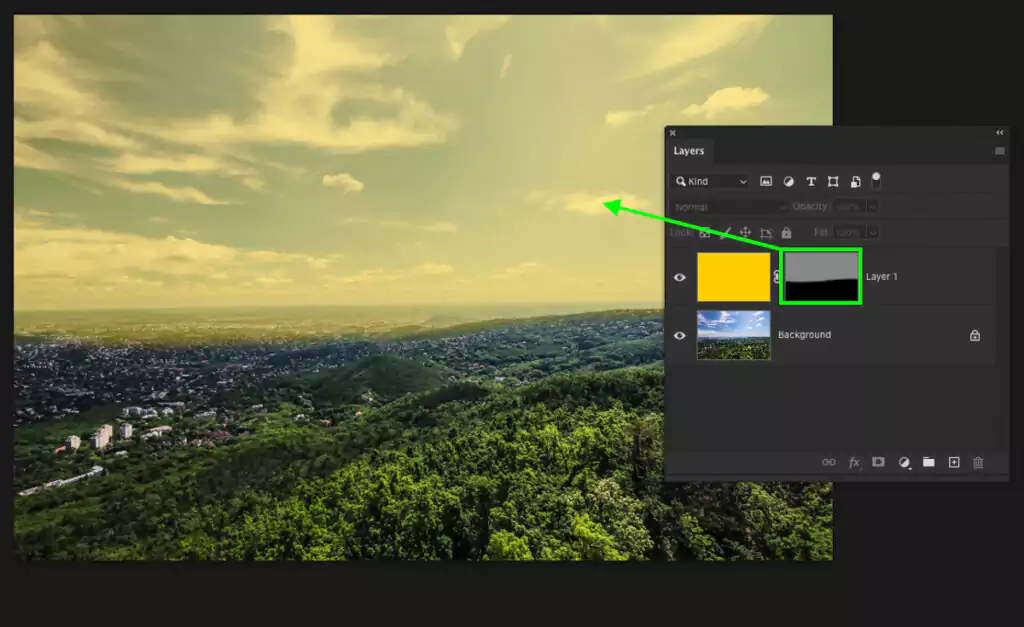
50% visible masks after editing them properly
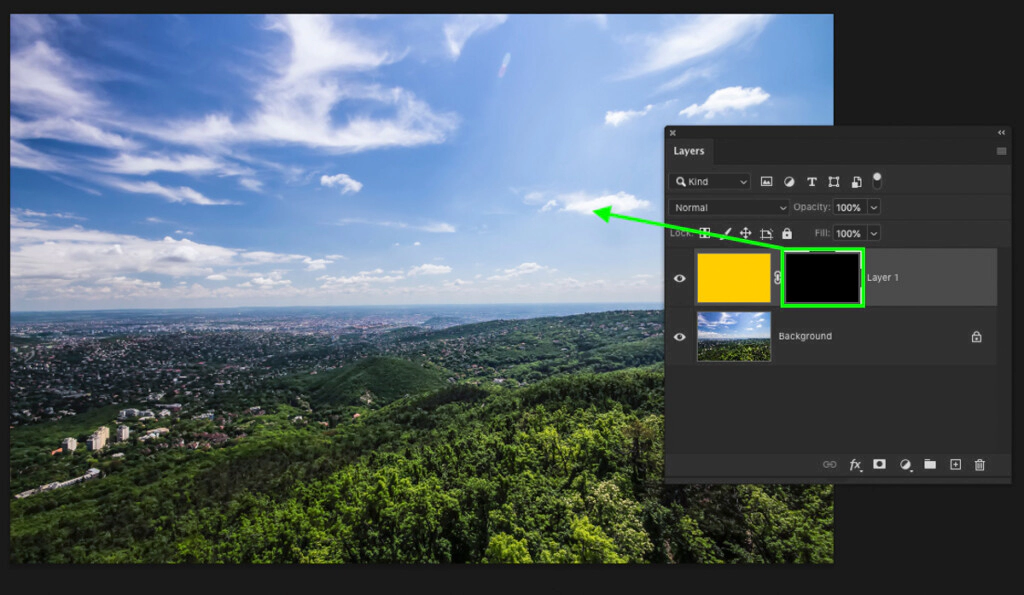
At the beginning of this mission, 0% of visible masks
Different Types of Methods of Masking
As a designer, we can use various masking techniques for photo post-processing. To do that, we need different skills and practice to be accurate in photo editing. Let’s discuss the different types of masking techniques that we use frequently.
A. Layer Masking Technique
Layer masking is a non-destructive way to hide different parts of the image or layer. The exciting thing is that we do not erase them. However, it will meet all the requirements.
We frequently use the layer masking technique for a composite image, meaning two or more photos will be combined into a single frame. We use layer masking techniques to cut out the object and edit a particular image portion.
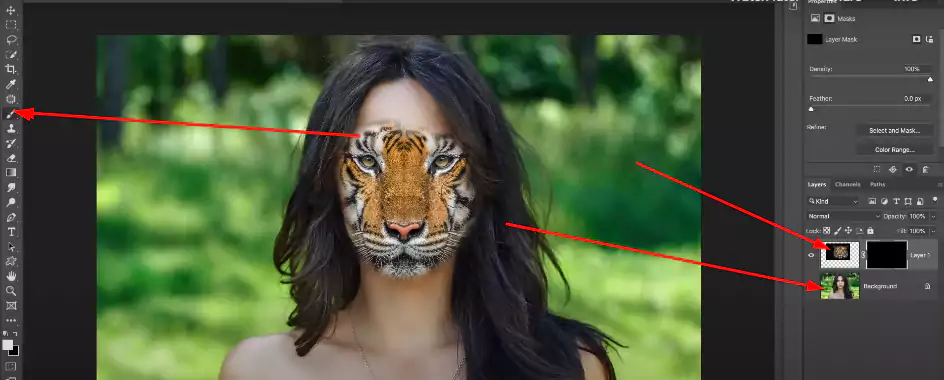
Step 1 – Create Two Different Layers
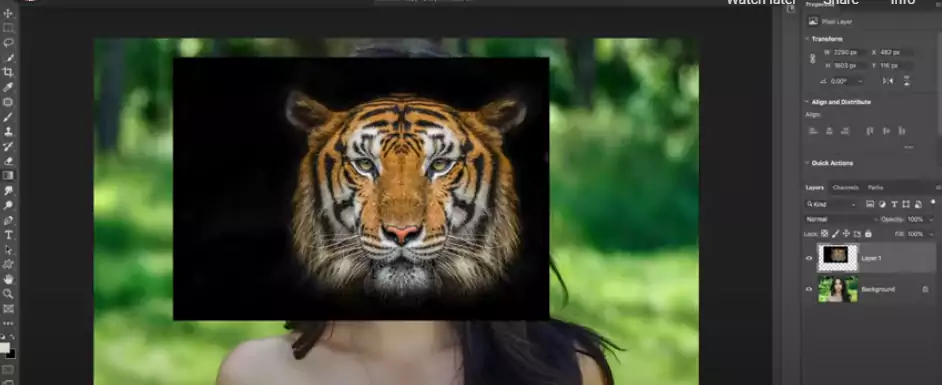
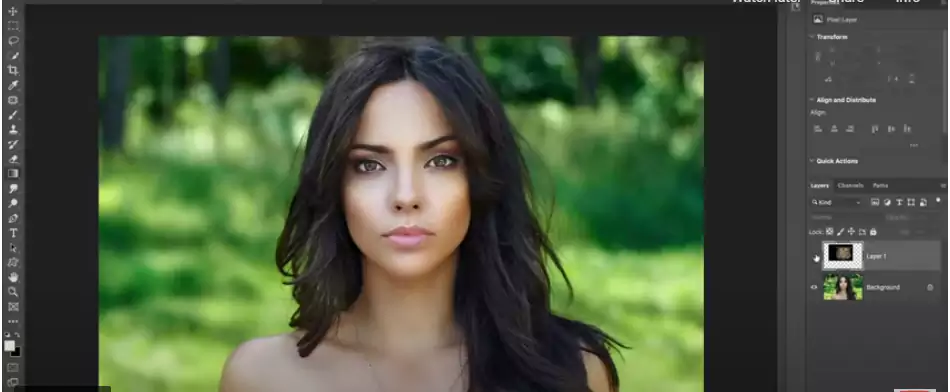
Firstly, we place the tiger image over the lady and see them in two different layers. After that disable the tiger layer and highlight the model that we want to mask.
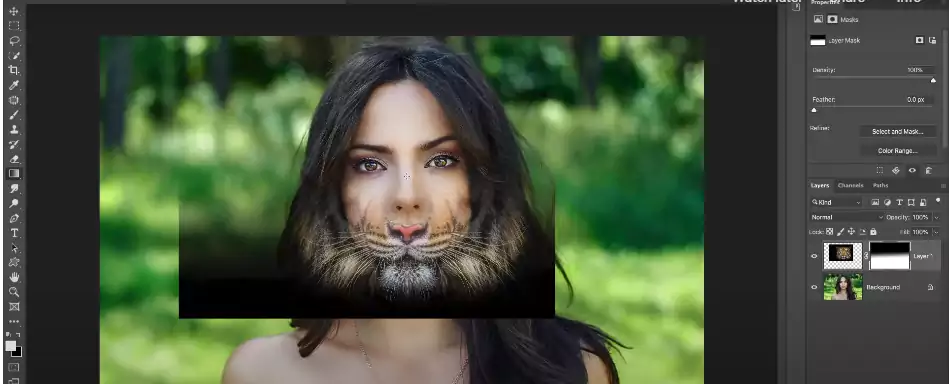
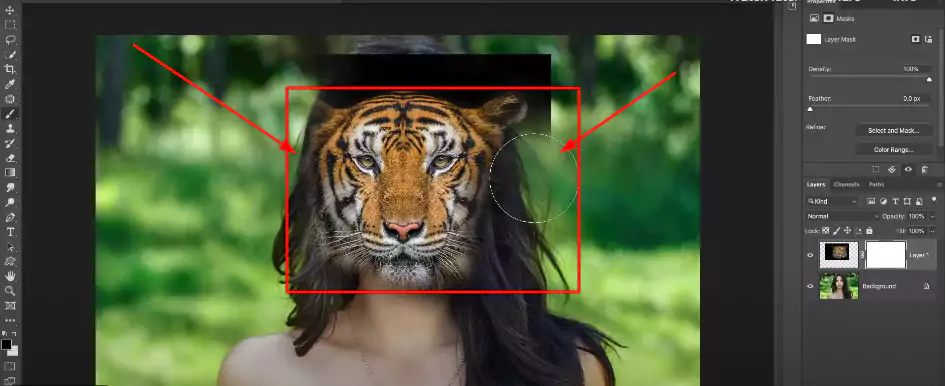
Step 2 – Placed A Portion in the Image
We have placed a portion of the tiger image and pasted the black color around it. Then we adjust the background layer with half of the head.
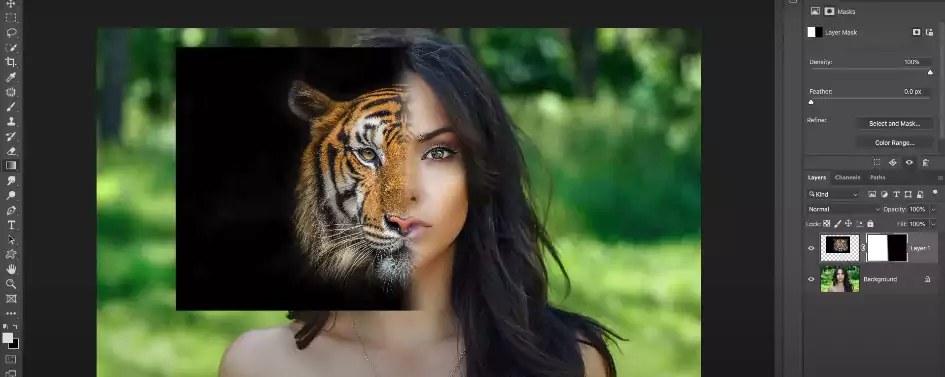
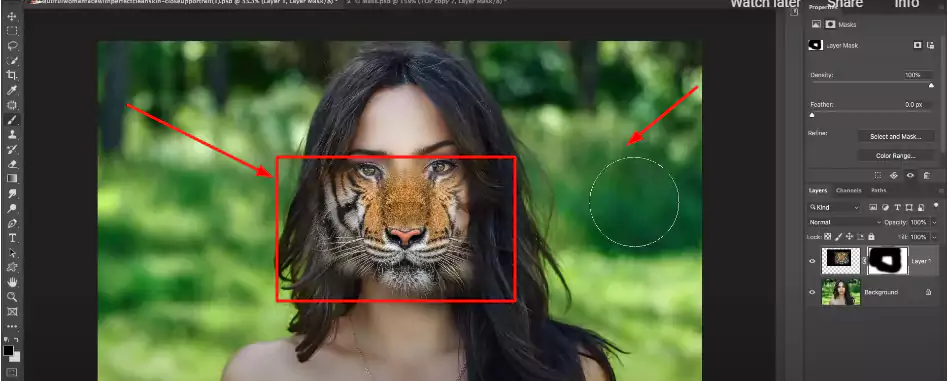
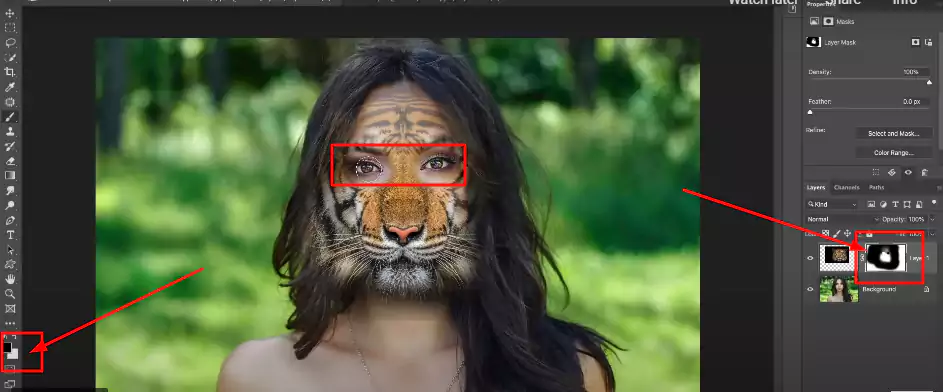
Step 3 – Adjust Layer Masking
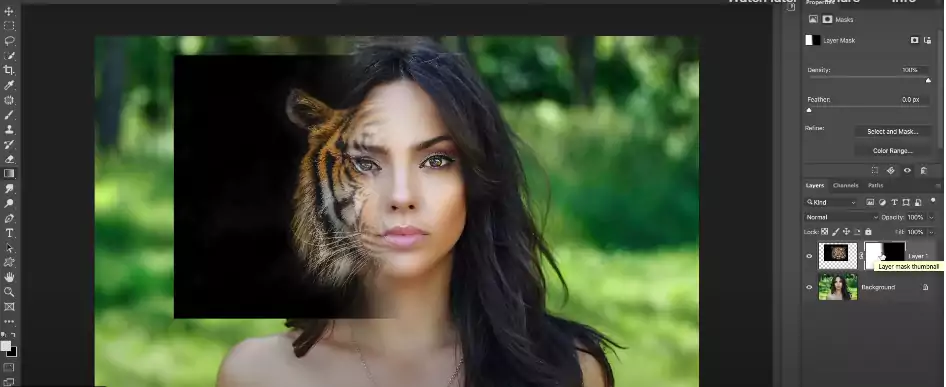
Now we have put down the layer masks and tried to adjust them with the face. And then we are adjusting the side with the previous layer. Fully set up the tiger face over it.
Step 4 – Inverting The Mask
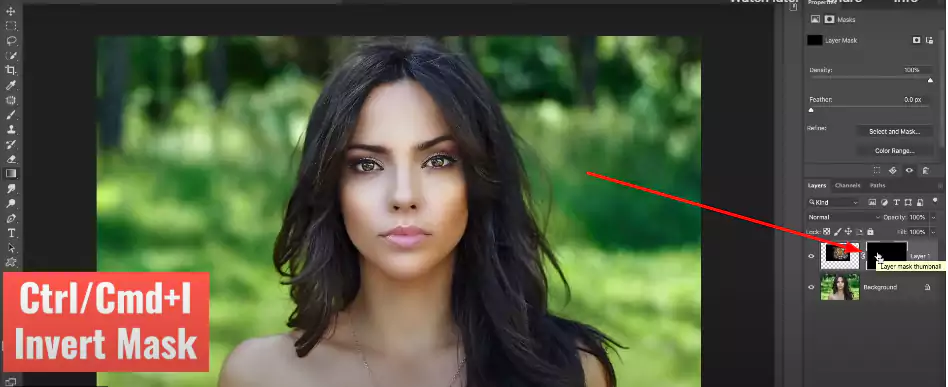
Press Ctrl+Cmd+I to invert the mask.
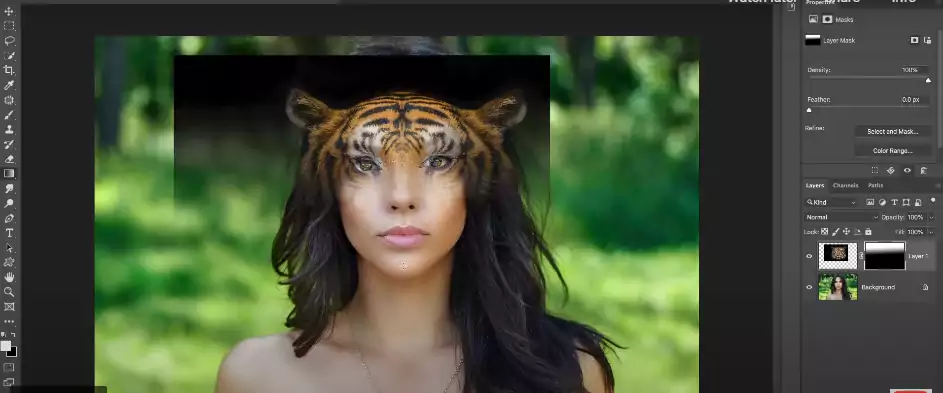
Step 5 – Use of Eye Dropper Tool and Eraser Tool
Use the eyedropper tool to adjust the eyebrow. We need to do it perfectly. After that, we used an eraser tool to remove some other unnecessary parts of the image.
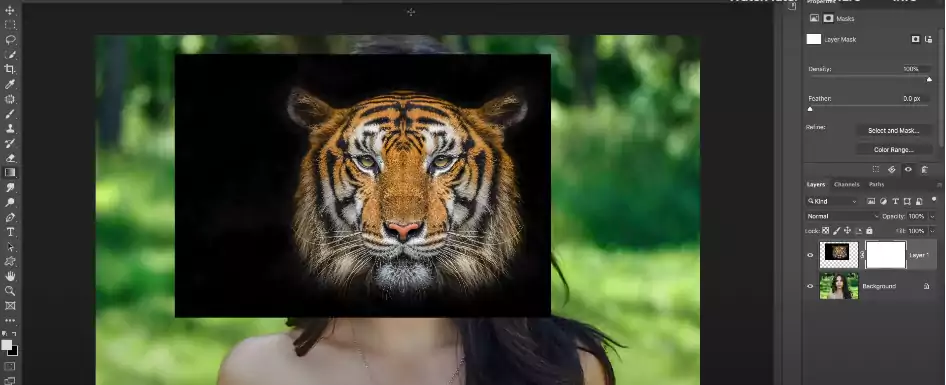
Step 6 – Placing the Jaw Part of the Tiger’s Face
Here we are placing the jaw part of the tiger’s face. Next, again, we are adjusting it with the face.
Step 7 – Placing The Eye
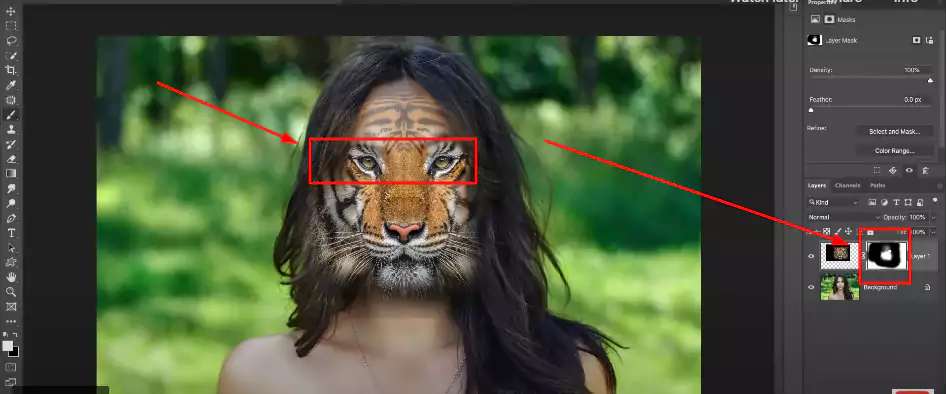
Now, we are placing the eye perfectly so that the eyes are more attractive than before.
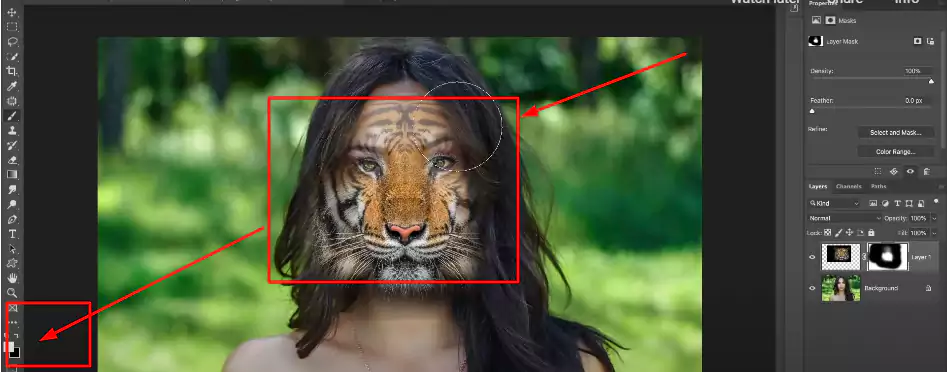
Step 8 – Clean The Forehead Using a Brush Tool
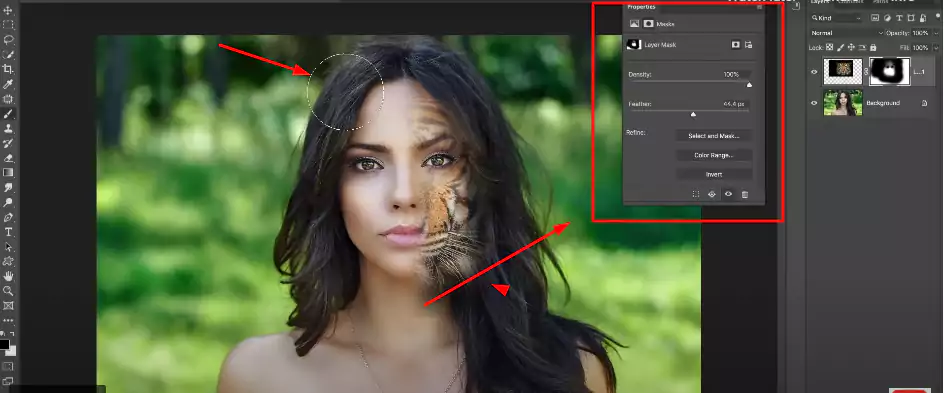
Use the brush tool and clean up the forehead.
For perfection, we are adjusting the tiger’s face with half of the face.
Step 9 – X Key Swaps
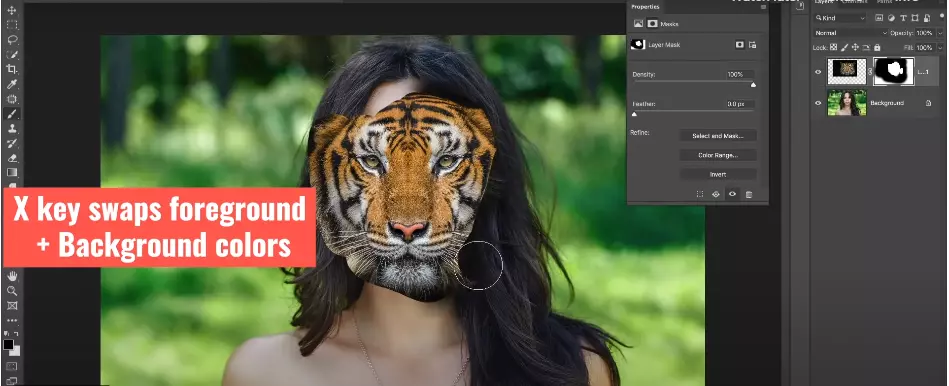
X key swaps foreground and background colors.
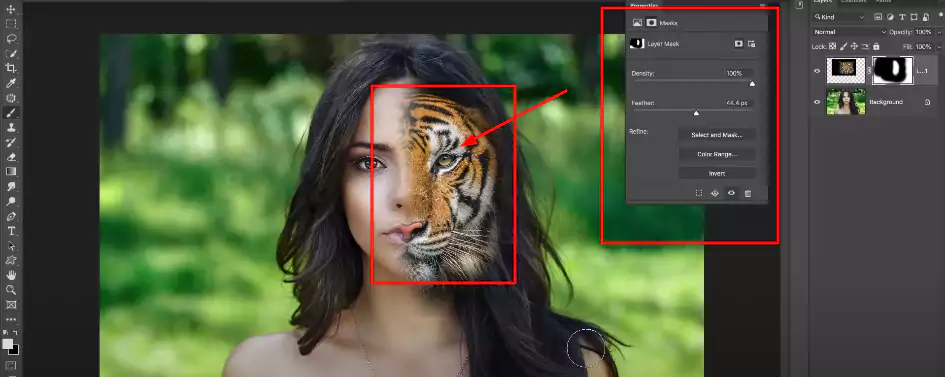
Step 10 – Final Result
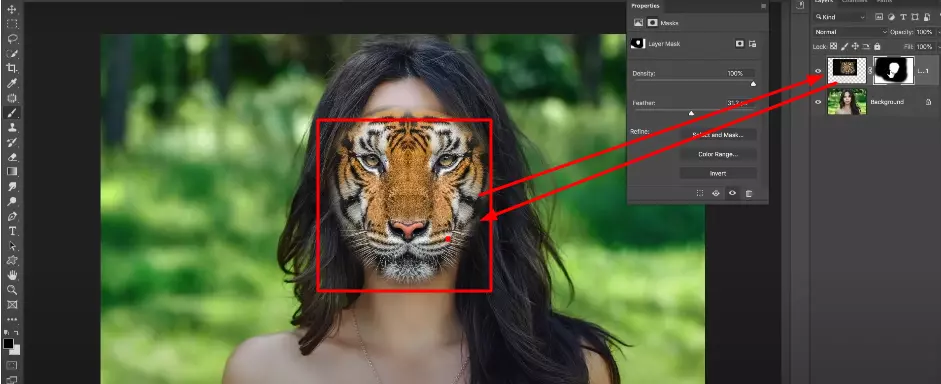
Done!! The tiger shape perfectly matches the lady, and we complete the mission. Follow this tutorial to do the layer masking. If you are a beginner, it will help you a lot.
B. Clipping Mask Technique To Apply To The Users
In this masking technique, the designer will use one layer to determine the visibility. When we do clipping masks, naturally, we place a layer at the bottom of the layer. After that, we will apply for transparency.
The bottom layer is essential for us; here, we will control the visibility from above. For beginners, it might be a little bit confusing. However, if you practice it several times, it will be okay.
The top layer will be invisible or transparent if the second layer doesn’t have any pixels.
C. Alpha Channel Masking Techniques To Apply
In reality, there are millions of images, and they are in different shapes and colors. So, we do not implement the same procedure for every image.
The layer masking and clipping masking techniques are pretty simple. It becomes time-consuming to work with brush strokes when we mask the hair and furry areas.
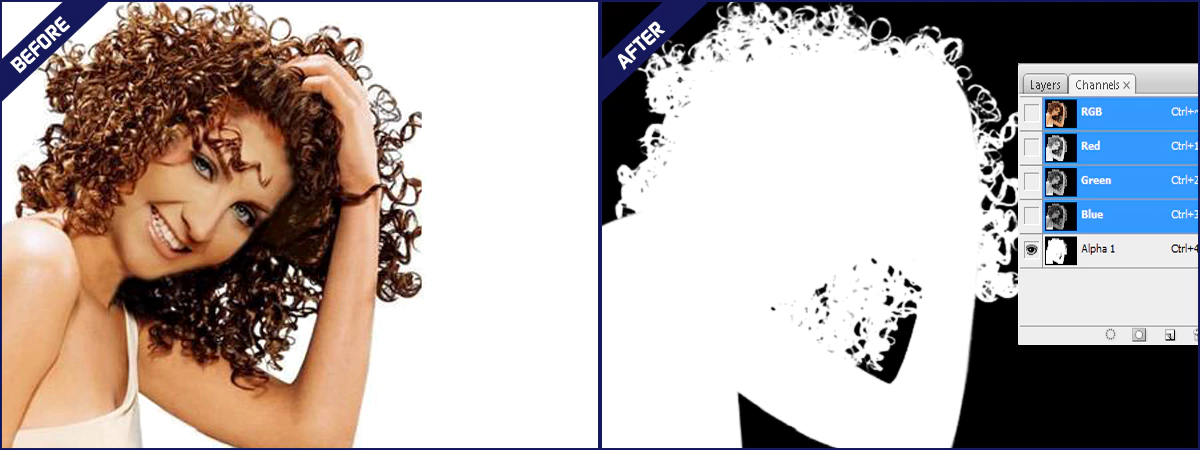
Firstly, you must notice whether the image and object have sufficient contrast. If yes, then we need to apply the alpha channel masking techniques.
Firstly, we will make a duplicate copy of that channel and apply the level to increase the contrast sufficiently. We will paint the new blue channel black. After that, we will make it inverse from white to black and black to white.
Our next task is to copy the channel and paste it into the new layer tab. We can use the dodge and burn tool from the tool menu to make it more perfect. It will reduce the contrast portion of the image.
Here we have the option to decontaminate the color. From the Layer menu to matting, we can do that and then choose the color option. There is a chance that it will provide you with a good result.
Why are We Taking Help from the Image Masking Technique?
There are several reasons to choose image masking techniques. It will make our regular work a lot easier than before. Let me share with you some of the principal reasons for choosing it.
01. Image Masking is A Non-Destructive Method
By using the image masking technique, you can do the proper post-production for your images. It will help us edit those images when we wish to do that.
If we cut a specific area of your image, it will not be an easy task to adjust it perfectly. However, using the image masking techniques, we can easily change that by using another layer.
Using an image masking technique will never hurt you and save you valuable time for photo editing.
02. Hide and Show the Specific Portion of the Image
Using the image masking technique is a blessing. Using it, we can hide and show the specific portion of an image. It will help you to edit that portion perfectly.
03. Modifying a Specific Area of an Image
Let me give you a live example. You have a group photo of five members, and here the central one is beautiful, but there is a problem with her dress.
It would help if you changed the upper part of his shirt. Now, how do you do that with the help of a photo editing technique? You need the use of a color mask or layer mask.
04. Collage Images
You wish to make a collage image of a cartoon, but you didn’t find the perfect couple to do that. Now you have to cut the ideal two pictures and then combine them.
Wrapping Up | What is Image Masking?
When talking about the post-processing of an image, masking refers to the practice of using a mask for a particular portion of an image. We have tried to discuss this topic in detail, and if you want to know more about different masking techniques, do not hesitate to leave your comments below.
Check Out the Relevant Tutorials
- What Is Image Masking And Its Common Uses It
- What Is The Difference Between Image Masking And Clipping Path
FAQ
What is a Mask in Graphic Design?
Photoshop image masking uses graphic software to mask a portion of an image for photo editing purposes. Graphic designers describe this as a non-destructive process.
What is the Best Masking Software?
As we know, masking techniques are critical, and you must put a plethora of effort into completing them successfully. Let me tell you the top 3 masking software that will help you to edit them in good ways.
- Adobe Photoshop
- Imagine
- Photo Director
Why is Data Masking Necessary in the Field of Photo Editing?
Data masking will help protect the information from international and accidental threats by ensuring the most sensitive information is unavailable beyond the production environment. In this way, we will create a similar data version for the users.