On 18 May 2023, Forbes published a report that mentioned 4.9 billion people use social media. That means 60% of the total population uses social media from different parts of the world. So, as marketers, we have a huge opportunity in hyperlocal social media marketing.
As a new marketer, you might not be familiar with this marketing term. No worries, in this comprehensive guide, I will share my 9 years of hyperlocal marketing experience. I have helped a lot of small businesses to get specific local traffic by crafting specific content. So without further delay, let’s explore the hyperlocal marketing world.
What is Hyperlocal Social Media Marketing
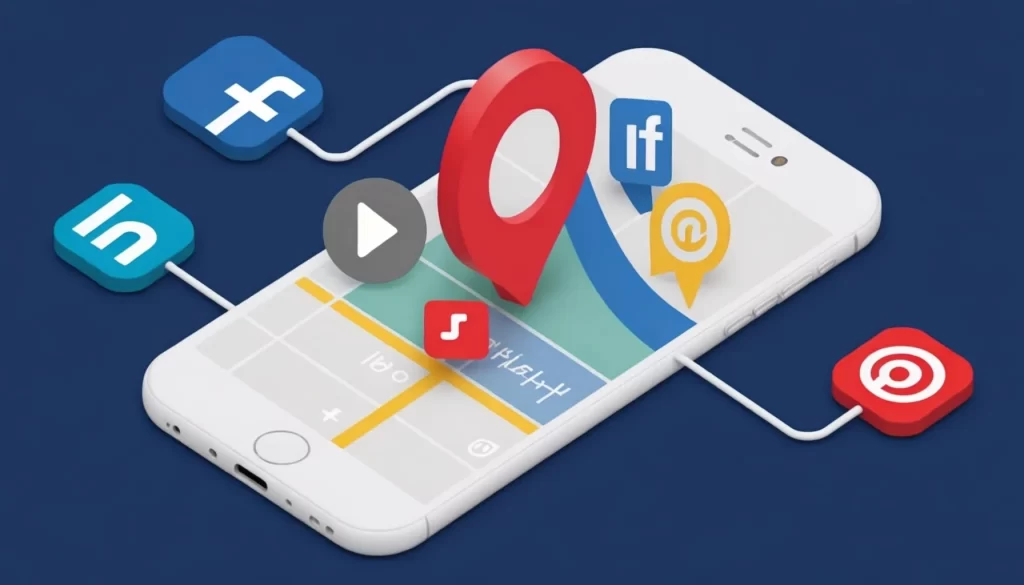
Hyperlocal social media marketing means creating content or campaigns for a location-specific audience at the right time. Most small business follows this marketing method to grow their business. The hyperlocal marketing can connect a community or neighborhood with a brand.
Remember that all these processes will be through using social media. And, it can target such audiences who are high-potential customers of the brand.
For example, you have a Pizza shop or restaurant in Texas. Now, if you run ads in the whole USA, you will not get leads or profit from the campaign. Because you have spent your money on the wrong audience.
In the right way, if you target only the Texas city, you will reach potential customers, and they will visit your shop. Even if you lose a bit of money on the right geo-targeted ad campaign, no issue. Because the people of Texas are aware of your shop, they might become your customers in the future.
Benefits of Hyperlocal Targeting for Business
Local marketing experts don’t reveal the benefits of hyperlocal targeting campaigns for businesses. However, I have found a few strong benefits that help to spread my client’s business in a specific location.
We can run ads on the targeted location through search engines and social media, get closer to the customers, and generate revenue. Also, we can save money, keep customers engaged, understand their needs, and make sales. So let’s see a few notable benefits of hyperlocal targeting.
- Gets Closer to Customers: Suppose you have a shop, now you can get closer to your customers by hyperlocal marketing. You have to reach them through social media or local SEO and help them by providing value.
- Reduce Ads Cost: Hyperlocal targeting ads help to focus on specific locations. So you don’t need to spend much money on random audiences.
- Brings More Visitors: Hyperlocal targeting marketing can attract more people to visit a business site. Then these customers will become genuine and loyal customers of your business.
- Makes a Strong Community: By contributing to social or local events, you can build relationships with your customers.
- Understands Customers Better: A Hyperlocal strategy helps to understand their interests and needs. So, by identifying their problems, you can sell your products or services to them.
- Keeps Customers Engaged: People have a natural habit of changing their interests with time. So when you are actively connected with them, you will take advantage of your marketing opportunity.
- Stands Out from the Competition: Any business can stand out from its competitors by offering special deals to its customers. Hyperlocal helps to understand the market more closely.
- Sees Results: Hyperlocal marketing campaign analytics tracking is super important. Because you will have the option of where to improve your strategy.
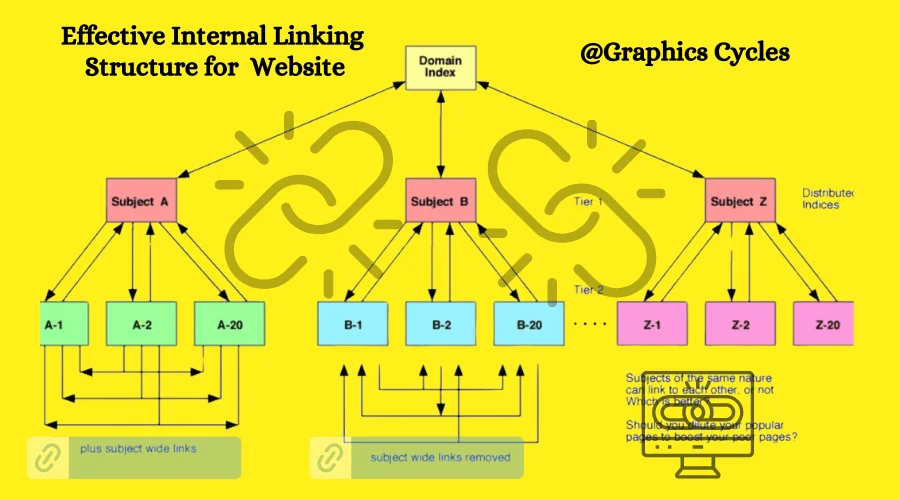
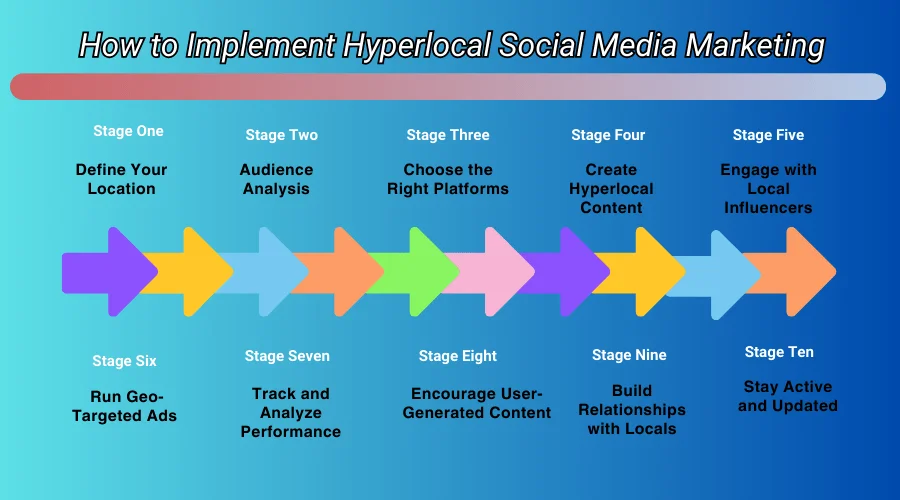
How to Implement Hyperlocal Social Media Marketing [10 Steps]
There are many ways to implement hyperlocal marketing on social media. Such as you can put ads on different social media platforms. Local phone number SMS marketing, push notifications, and more.
Meanwhile, you have selected social media platforms as your local marketing channel. So identify your target audience, make a content plan, and influence them to share their thoughts on your community. Also, you can get help from social media platforms’ advertising options. So, look at the step-by-step guide below on how to implement hyperlocal marketing.
Step 1: Define Your Target Area (Location)
First of all, you have to define your target location and where you want to do business. It might be a neighborhood, city, a particular street, or a district, even if it could be a rural area.
Remember that your products or services are aligned with the people of these areas. If they like your offers, they will remember your brand for their next purchase. But if they don’t like it, they will avoid your brands.
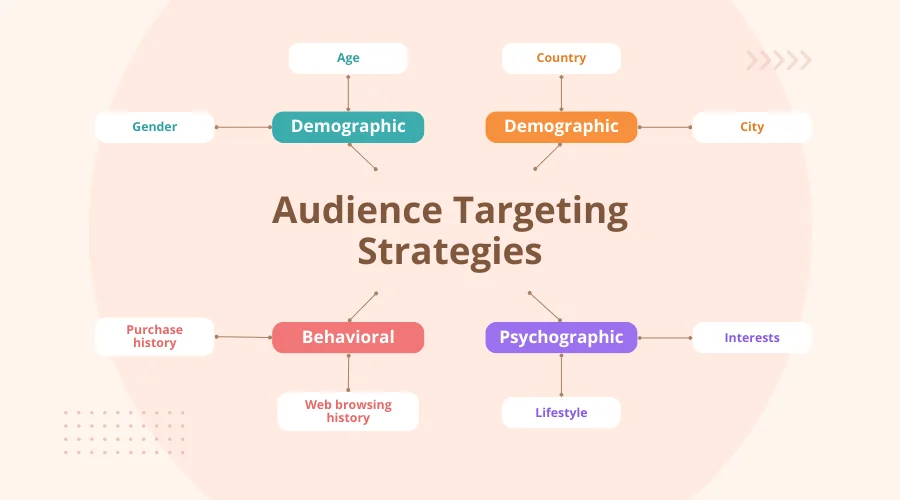
Step 2: Understand Your Audience
Audience understanding is a must for each marketing strategy. Similar to this, hyperlocal social media marketing. So, understand your audience, their interests, needs, pain points, culture, and weaknesses.
Then identify their issues and fix them by offering your services or products. One important thing here to remember, you must have an idea of their economic situation. Because having interest and desire to buy is not called demand. The ability to buy this product is also necessary, as well as their interest.
Step 3: Choose the Right Platforms
Different social media platform has different types of audiences. By analyzing all social media demographics, you have to choose which platform is best for your business. So that you can reach out to your target customers on the right platform where they are.
Besides your primary focus on social media, you can use other popular social media to build authority. Using Facebook, X, Instagram, Pinterest, LinkedIn, or Reddit can boost your business awareness. So, here pick one as a primary focus and 5-10 social media sites as a secondary choice.
Step 4: Create Hyperlocal Content
Now we have a specific location, target audience, and social media platforms. So, develop a content strategy based on the data sheet we have. These contents must be relevant to the local community so that the local audience can relate to them.
Contents should be related to local events, news, history, landmarks, issues, etc. Additionally, use location-specific hashtags and geotags to increase visibility.
Step 5: Engage with Local Influencers
Find your local competitors, community leaders, and local influencers online. They have strong relationships with your target audience. So engage in their content, and share your opinion. As a result, their followers (your target audience) will find your existence in the industry. In my opinion, this is one of the easiest ways of introducing your business to the community.
Step 6: Run Geo-Targeted Ads
Most of the social media platforms offer the geotargeting feature for advertisements. Especially if you are advertising on Facebook or Google, it is easier to set up.
When you have a specific geographic area to target, it is a cool way to reach the target consumers. Besides creating organic content, also run ads on the target locations to improve visibility. Here you can try A/B testing methods for better results and reduce ad costs.
Step 7: Track and Analyze Performance
Track your content and ad campaign performance to get an idea about how people accept your brand. You will have an idea from their reactions, comments, shares/reposts, and engagements.
If most people take your content negatively, then change your content plan. When someone comments and appreciates your efforts, thank them and try to ask something relevant. Try to continue the conversations with at least 5 replies, so that they remember your brand.
Step 8: Encourage User-Generated Content
Build a community around your business; it could be an FB Group, Subreddit, or forum community. When you have a group, your audience can ask questions about anything in the group. In the same group, other experts will answer their answers.
Especially when anyone has purchased products and then shared the experience in the group, other people will be helped. You can promote your products or services through the community. Creating a community is the most effective way to get a loyal customer base.
Step 9: Build Relationships with Local Businesses
Building relationships with local businesses helps increase authenticity. As your brand is new, and you have no customers, you might get traffic from other local businesses. Imagine that you have a grocery business, and build a relationship with a chicken seller.
When a customer buys a chicken, he/she might need a bottle of oil and other cooking essentials. Now the chicken seller refers your shop to his customers for grocery shopping. Here you have got customers for the relationship with local businesses.
You may offer a 2-5% commission to the local businessman, such as an affiliate commission. But be careful and build a quality relationship before offering the opportunity.
Step 10: Stay Active, Updated, and Responsive
Maintain consistency on social media and other content-sharing platforms. Continuously upload relevant content and reply to people’s comments on your posts. The engagements help the algorithm to understand your content value in front of your audience.
Besides that, always stay updated and responsive to your customers’ interests and trends. Understanding the local culture and seasons is also crucial to doing business locally.
By following these 10 steps, you can do effective hyperlocal social media marketing. Now, if you follow these easy steps and maintain consistency, you will achieve success. So, don’t delay, take action right now and start your hyperlocal campaign.
5 Best Practices for Hyperlocal Marketing and Strategies

Besides following all the steps of making a hyperlocal marketing strategy, you have to maintain the best practices of them. So I have added 5 crucial practices that can help you build a successful hyperlocal marketing strategy. Let’s check it out.
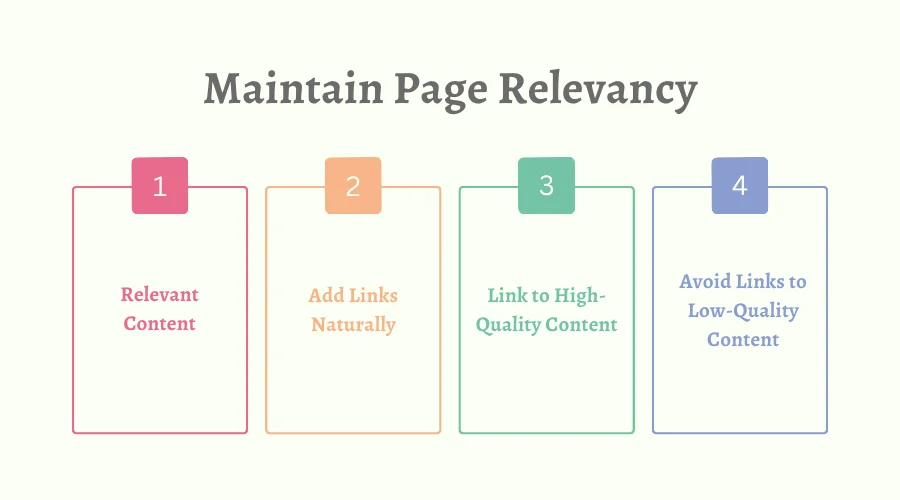
1. Personalization is Key
Customization or personalization is the best thing to implement in hyperlocal marketing. When you have targeted a hyperlocal market, that means you have already narrowed down your market.
Now, if you address an individual by’s name and their exact problem, you will stand out. So try this personalization method in hyperlocal marketing to enhance your brand credibility.
It doesn’t matter which platform you are using for marketing, email, SMS marketing, content marketing, or else. Include a personalization method to increase the conversion rate and sales.
2. Utilize Direct SMS Marketing
Though phone number collecting is a hassle, you might be surprised that the open rate of SMS is 98%. Isn’t it amazing? Where the email opening rate is only 20% in the USA. This hidden marketing channel might be an effective way to generate sales for your business.
Very few marketers use SMS or call marketing right now. So you can put this secret sauce into your marketing recipe. But it is partially dependent on which products or services you are offering.
3. Optimize Your Business Listings (GMB)
We know that Google is the biggest search engine worldwide, and it has countless traffic. Google has a feature called “Google My Business” or GMB listing to connect new businesses with the audience.
First, you have to add your business information to Google. Information like your business location, open hours, weekends, contact information, website link, etc Then Google will approve it if everything is legal. After that, when your consumers search for local keywords, your business will appear in search results.
4. Gather Local Reviews and Respond
Reviews can increase the trustworthiness of your business. When you check any product on Amazon, you must read the title, see pictures, and then scroll down to the review section. But why?
In the reviews section, you will find some people who are using the same products. After checking positive and negative reviews, we buy something. So, the same formula will be applied to your business. Nobody will try your products or services if you have 0 reviews.
So, collect a few reviews for your business on Google listings, FB page, or other platforms if needed. When they provide a review of your products or services, then respond/reply to their reviews.
5. Use Paid Ads in a Specific Radius
This is one of the most sensitive parts of hyperlocal social media marketing in your business. Because it requires a budget and costs to run ad campaigns. So optimize your ad campaign for a specific radius or area. Facebook and Google search ads are the most effective ads for hyperlocal marketing.
However, target a specific area and specific local keywords to boost your visibility. Local keywords like keywords with ‘location name’, ‘near me’, etc, are high-potential keywords for hyperlocal. In a nutshell, if you follow every process I have seen in this article, you will be successful in this path.
Case Studies and Examples of Successful Campaigns

There are thousands of examples and successful campaigns we have in our hands. Nobody can guarantee your success in this marketing campaign. Because there are many failure stories also available. However, I have added two hyperlocal marketing case studies from reputed brands.
Hyperlocal Social Media Marketing of Domino’s Pizza
Have you ever ordered from Domino’s Pizza? Most probably your answer is ‘yes’, but is it after 2018 or before? As of 26 March 2024, Domino’s Pizza has 6906 stores in the USA.
In early 2018, Domino’s Pizza faced negative feedback from its customers. Customers often reported that they were getting damaged Pizza from Domino’s. As a reputed Pizza company, it was shameful for this company.
Then Domino’s Pizza found the reason was road potholes and other defects. Then they launched a hyperlocal marketing campaign called “Paving for Pizza”. They aimed to fix at least one road in all the American 50 states.
After launching the campaign in June 2018, the people of the USA appreciated it. National media also covered their activities, and “Paving for Pizza” went viral. Within 4 months, in October 2018, the campaign was organically mentioned around 54,000 times on Twitter.
Domino’s Pizza won thousands of people’s hearts without spending money on customer service, marketing, or production. Finally, at the last of 2018, they had completed their campaign with the slogan “Oh yes we did”.
Case Study: Starbucks’ Hyperlocal Social Media Marketing Campaign
Starbucks has been another reputable coffeehouse brand in America since 1971. This brand has taken advantage of hyperlocal marketing at various times from many campaigns.
It has successfully implemented hyperlocal social media marketing to promote its seasonal drinks. Moreover, it promotes deals, offers, and events. Also, creates content for a specific store or location to increase the number of customers in the store.
However, innovative Starbucks never depends on a specific marketing strategy. It can bring new things and strategies to the market and succeed many times. “Local Love” was one of the best campaigns of this brand.
Moreover, “Local Stores” offered personalized tastes for different stores (places) and became popular. Also, Community Events, Partnerships, Neighborhood-Specific Promotions, and Geo-targeted Ads are common campaigns.
Starbucks’s hyperlocal marketing effectively engages with local customers. These marketing strategies also increase foot traffic to store locations from social media.
Without Domino’s Pizza and Starbucks, many businesses and brands use hyperlocal marketing. Such as IKEA’s partnership with local influencers and Nike’s “Run Your City” Campaigns. Whole Foods Market is another leader in this market. So analyze their campaigns and become a hyperlocal marketing expert.
Potential Marketing Scope and Challenges
You can use all social media, emails, influencers, and other channels to do hyperlocal marketing. However, connecting the audience with your message (content) is not easy. Implementing hyperlocal marketing strategies using social media is challenging. Here are a few opportunities and challenges you might face in running a hyperlocal campaign.
| Marketing Opportunities |
Potential Challenges |
- Targeted local advertising.
- Geotargeted Promotions.
- Collaboration with Local Influencers.
- Using Location-Based Hashtag.
- PR Build-up in Community Events.
- Localized Content Creation.
- Partnership with Local Businesses.
- Neighborhood-Specific Offers.
- Customer Feedback and Reviews.
|
- Difficult to identify the ideal local audience.
- Hard to select a precise target location from afar.
- Finding Relevant (Niche) Influencers.
- Maintaining consistent brand messaging across diverse locales.
- Competing with Local Businesses.
- Stay updated with social media and the audience.
- Following up on different local trends and cultures.
- Adapting to local culture is a challenge.
- Resolving local customer grievances.
- Handling negative feedback is very challenging.
- Hard to predict the ROI of local sponsorships.
- Managing local brand reputation online.
|
You’ve found these challenges a bit tough, but they’re not impossible. To focus on a hyper-local area for your business, you need to know about the local culture. By understanding what bothers your audience, you can tackle these challenges easily.
Final Thoughts
I have explained all about hyperlocal social media marketing. You have got answers to what it is and what the benefits of this marketing are. Moreover, I have included 10 steps to run a successful hyperlocal campaign.
Additionally, you have got 5 best practices as a bonus from my side. And you can easily overcome the upcoming challenges while implementing hyperlocal marketing.
So, I hope you have no questions in your mind about hyperlocal marketing using social media. But still, if you have any doubts, then feel free to contact us. Anyway, you can check our marketing solutions that can help boost your brand’s online visibility.
Don’t Miss Out-
FAQs
What is the difference between hyperlocal and local?
The term ‘Local’ means a city, state, or region, and the ‘Hyperlocal’ describes a much smaller area than the local. It can be neighborhoods, streets, landmarks, communities, etc, to target for business.
What is an example of hyperlocal social marketing?
The “NiaResturent” in Chicago offers 40% off on the “Eight-Course Chef’s Tasting Menu for Two People” item. The offer will be available and valid till 21 April 2024. I have received the offer from their Facebook page. This is a perfect example of hyperlocal social marketing.
When a shop, store, or business in a specific location promotes its business through social media, this is called hyperlocal social marketing.
What are the benefits of a hyperlocal marketplace?
The Hyperlocal Marketplace allows businesses to connect with a specific geotargeted audience. Then, the business can send personalized messages to specific potential customers. Additionally, it reduces cost, engages, and makes strong connections with customers. Moreover, the Hyperlocal Marketplace increases the sales and revenue of the business.
What are the disadvantages of hyperlocal marketing?
Besides a lot of benefits of hyperlocal marketing, there are also a few cons to consider. These are listed here below:
- Business sustainability issue.
- Limited audience.
- Unpredictable market.
- Hard to stand out.