Guide to Aesthetic Photography – Best Use of It

Aesthetic Photography, Aesthetic Photography Ideas

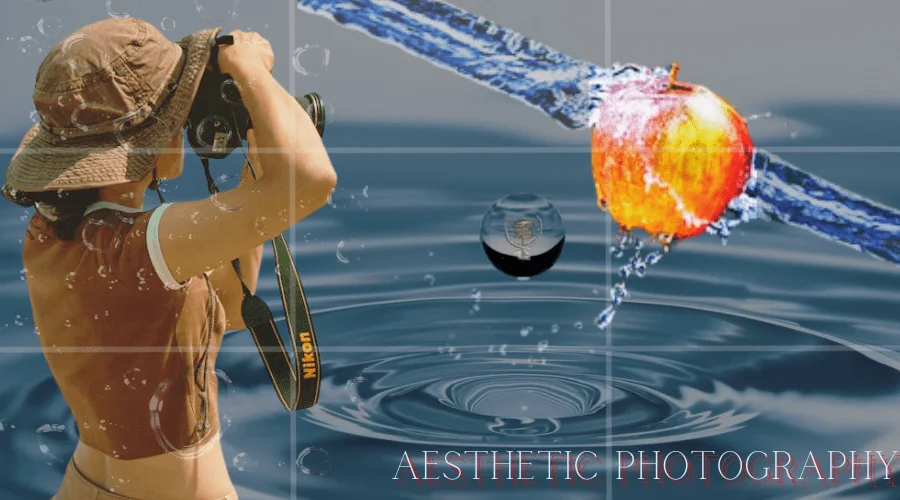
Aesthetic photography is gaining popularity with time. If you are also looking for ways to develop your career in this genre of photography, you are at the right place.Ā 

Here you will learn everything about the ā€˜aestheticsā€™ in photography. I will describe to you all the elements of aestheticism in photography. So, you can cast these elements in your photography.Ā Also, you will get some quick tips for creating mind-blowing photos. So, letā€™s start.Ā 

How Does Aesthetic Photography Differ from Regular Photography?Ā 

Aesthetic Photography

Aesthetic photography is the way of capturing photos that please the eye. The aesthetic photos evoke emotion in the viewer. It makes people thoughtful about finding a hidden fact or beauty.Ā Ā 

Aesthetic photos are not bound to technical aspects. Sometimes a mindful photo catches our eyes even if the conventional rules of photography are absent.Ā Technical photography ensures your picture is clear and well-exposed. But, aesthetic photographer uses that foundation to build something truly captivating.

It is all about the composition, lighting, and color that stirs something within the viewer. However, regular photography is about technically capturing a scene or subject. This could be for documentation, capturing a memory, or even technical purposes.

In aesthetic photography, creative and artistic choices are the main focus. In regular photography, the subject itself might not be inherently beautiful. But the photographer aims to accurately represent it.

So, the aesthetic photographers are like painters. They use the camera lenses to create stunning and emotionally charged images.

What Makes Aesthetic Photography So Important?Ā 

What Makes Aesthetic Photography So Important

Photographers are working hard to gain aesthetics in their photos for several reasons. It allows them to go beyond the technical aspects and show their creativity at its best.

The aesthetics photoshoot helps the photographers to develop their unique style. The focus on emotions allows photographers to connect with viewers on a deeper level. It allows them to make a relationship with the audience. And they will get recognized by their photos. As a result, they can create a place in this field using this genre.

The aesthetic photos are the appreciation for beauty. So, these photos play a big role in visual culture, influencing trends in advertising and fashion. They are more likely to be shared in the online space.

Aesthetic Portrait Photography is popular for promoting brands. So, you can incorporate aesthetic photos for marketing to get more conversions.Ā 

Elements of Aesthetic Photography

The magic of ā€œaestheticā€ in photography lies in its elements. Letā€™s go through them to create visually stunning and emotionally evocative images.

A. Composition

Composition plays a vital role in creating aestheticism in your photography. Here are the key compositional elements of aesthetic photography:Ā 

A.1. Rule of Thirds

Rule of Thirds, Rule of Thirds in Photoshop

It is one of the very basic rules of photography. The rules of thirds will make your work easier to create a mind-boggling composition. You have to place the main components of your photo in one of the intersection points to see the magic.Ā This creates a balanced and natural feel, as our eyes are naturally drawn to these areas.

A.2. Leading Lines

Leading Lines in Photography, Aesthetic Photography

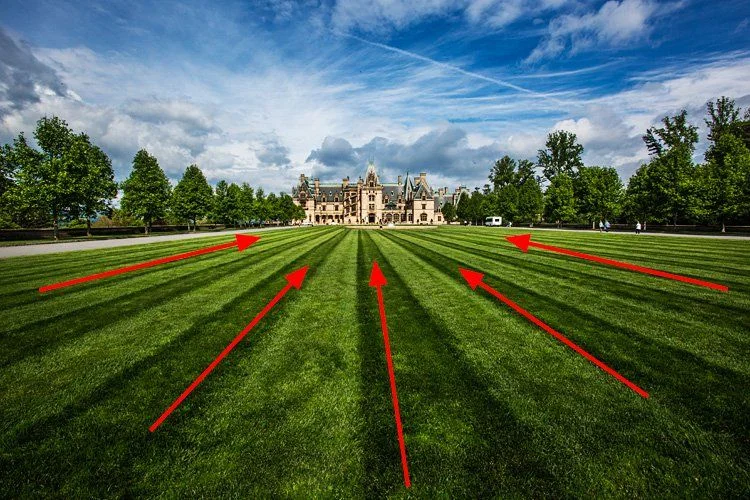
Lines within your image can be powerful tools to attract viewers. So, try to incorporate the roads, fences, rivers, or even a person’s gaze. These lines can lead the eye directly to your subject. As a result, it will add depth and a sense of direction to your image.

A.3. Negative Space

Negative Space in Photography

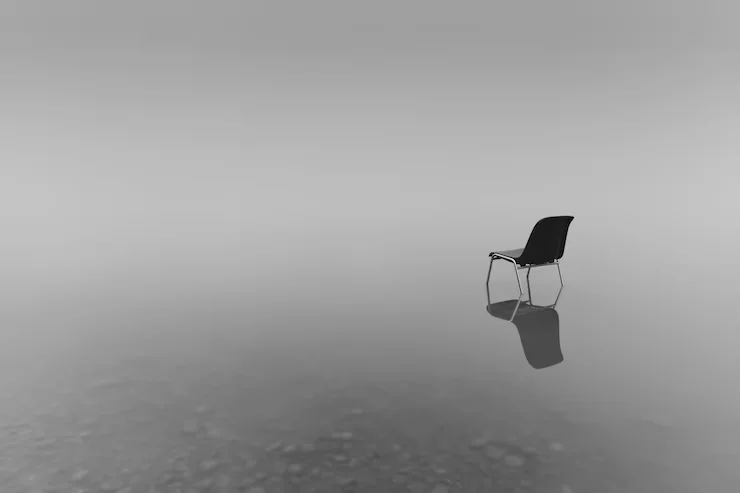
A space around your subject is also important for creating aesthetic photos. It will create a sense of calm. You can isolate your subject to enrich its grandeur. Also, it is helpful in evoking emotion. Casting the subject around a space makes the viewers thoughtful about the concept that lies in the photo.

A.4. Symmetry vs. Asymmetry

Symmetry vs. Asymmetry, Aesthetic Photography, Aesthetic Photoshoot

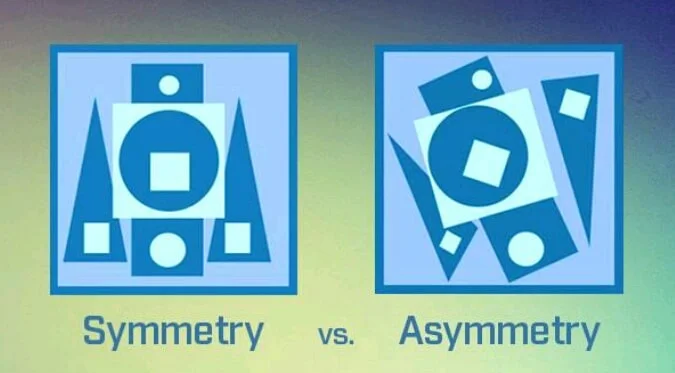
Symmetry means order and balance. Imagine a perfectly centered reflection in water or a building with identical columns on either side. Symmetrical compositions are pleasing to the eye and evoke a sense of peace.

Meanwhile, an asymmetric composition provides a more dynamic and interesting composition. Asymmetric composition is an effective way to portray a specific mood in your photos.

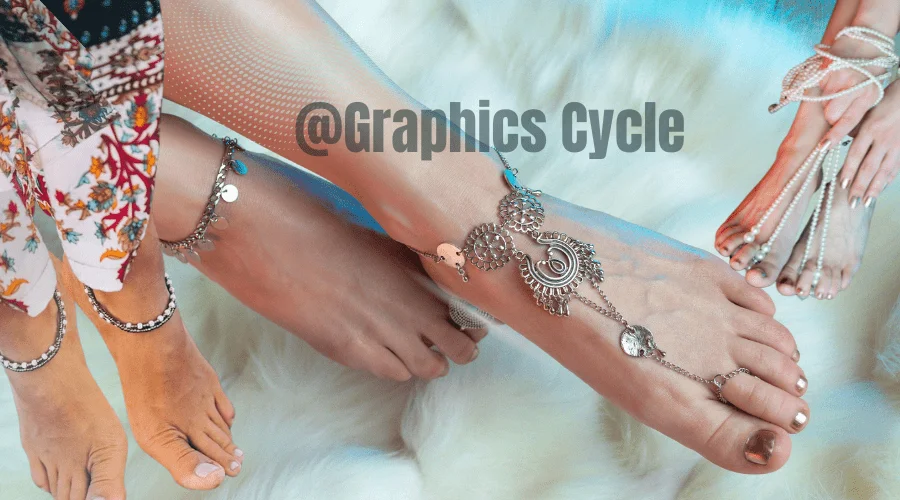
A.5. Headroom and Legspace

Headroom and Legspace

When photographing people, ensure you leave appropriate space above the head (headroom) and below the feet (legspace) to avoid a cramped feeling.

A.6. Patterns and Repetition

Patterns and Repetition

Patterns and repeated elements add interest and create a sense of rhythm within your photo. Look for patterns in architecture, natural formations, or even clothing.

B. Lighting

Here comes the 2nd most vital element in aesthetic photography. Lighting creates the mood, drama, and overall feel of your image. Let’s see how you can use lighting for aesthetic photos:
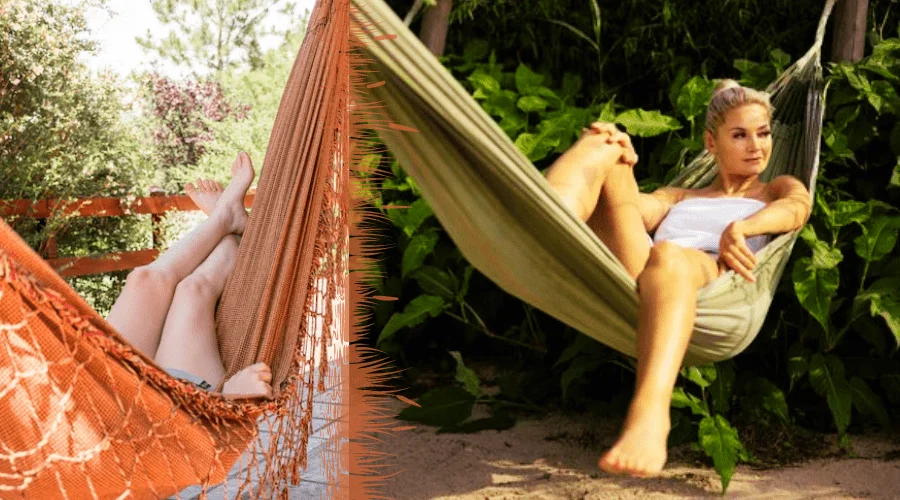
Ā 

B.1. Natural Light

Natural Light in Photography

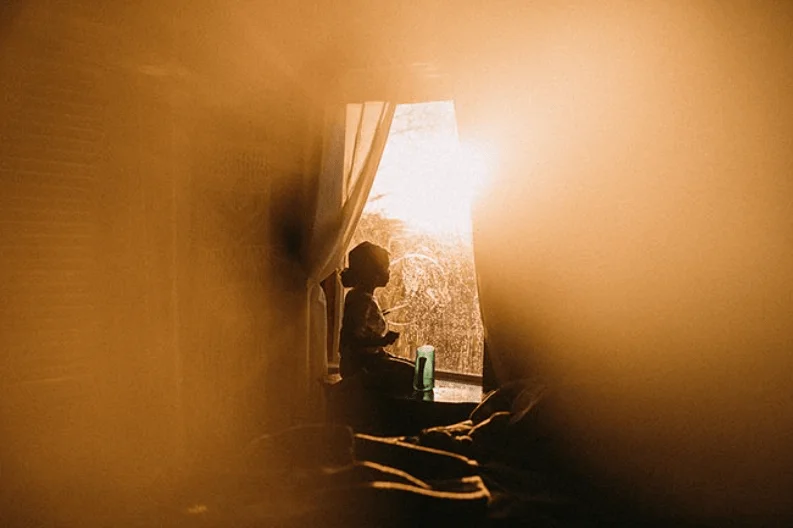
To create aesthetic photos, you must have the skill of using and manipulating natural light. It offers a variety of qualities at different times of the day. For example, in the morning you will get a soft and diffused light. It is perfect for creating a gentle and airy aesthetic.

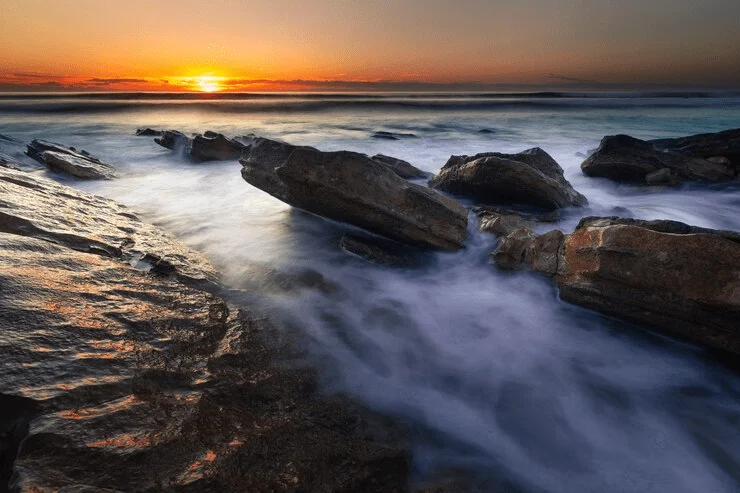
On the other hand, the midday light is harsh. But, it offers a strong shadow which is ideal for bold, graphic compositions. And the golden hour creates magic in photography. It is the hour shortly after sunrise or before sunset. You can manipulate this warm, golden glow to create a perfect dreamy, and romantic atmosphere.

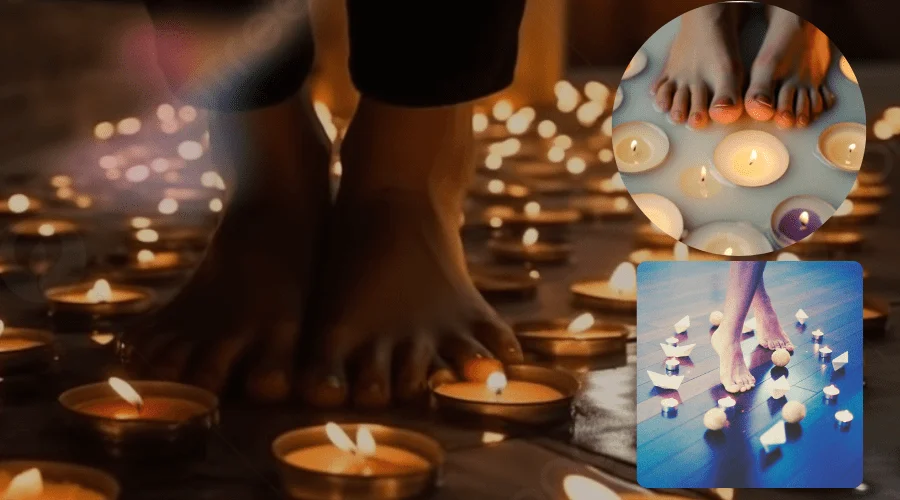
B.2. Artificial Light

Artificial Light in Photography, Aesthetic Photography

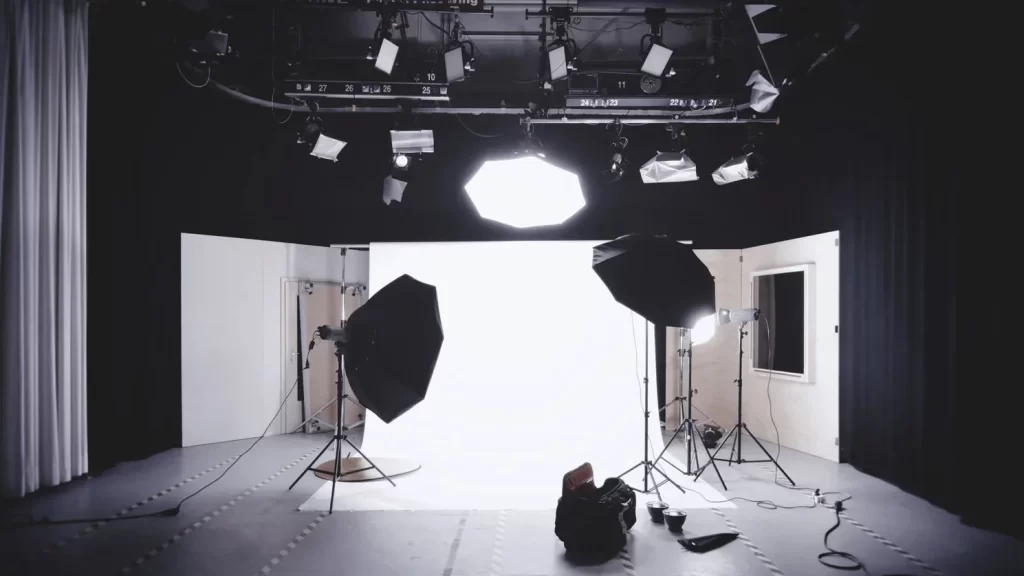
Natural light plays the main role in aesthetic photos. However, you can manipulate the artificial lighting to create drama in the photo. There are several artificial lighting sources available in the market. You can choose any of them based on your requirements.

For example, the Studio Strobes are powerful flashes. you can use them to freeze motion. On the other hand, the Softboxes offer diffuse harsh light sources. So, it helps create a softer and more flattering look.

B.3. Shadows and Highlights

Shadows and Highlights

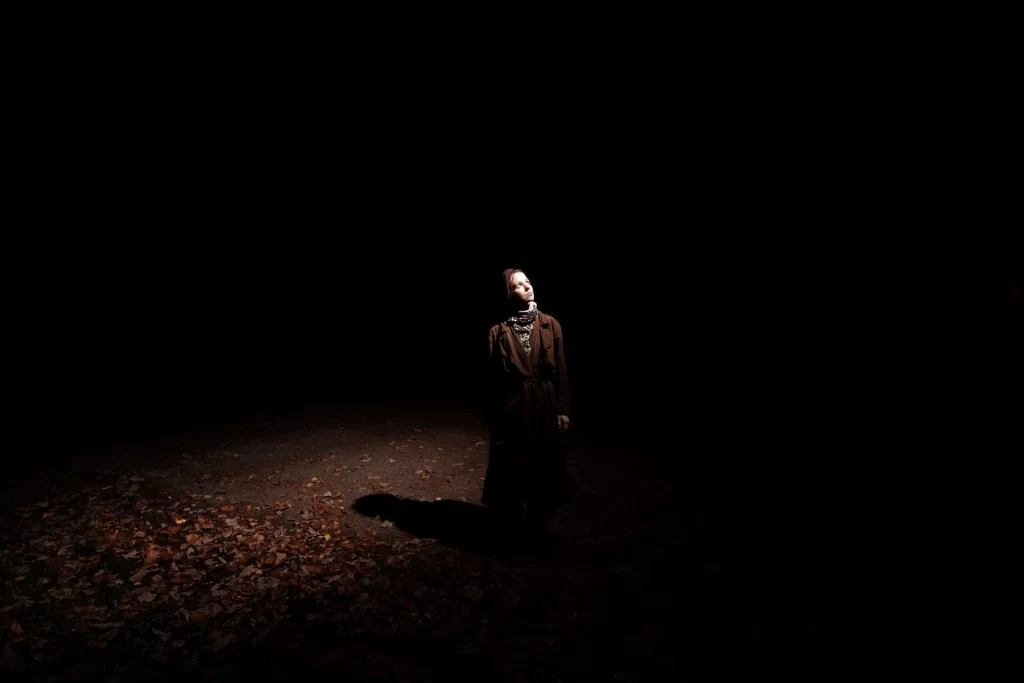
Shadows add depth, dimension, and mystery to your image. You can control them by adjusting your light source or using reflectors. Moreover, highlights are the brightest areas of your photo. So, make the best use of them to draw the viewer’s eye.

B.4. Light Direction

Light Direction in Photography Lighting

Light direction is the key to making the best use of light sources for your subject. So, you will need to experiment with the light direction to understand which direction creates aestheticism for your photos. You can use the front light to illuminate the subject from the front. It creates a flat look.Ā 

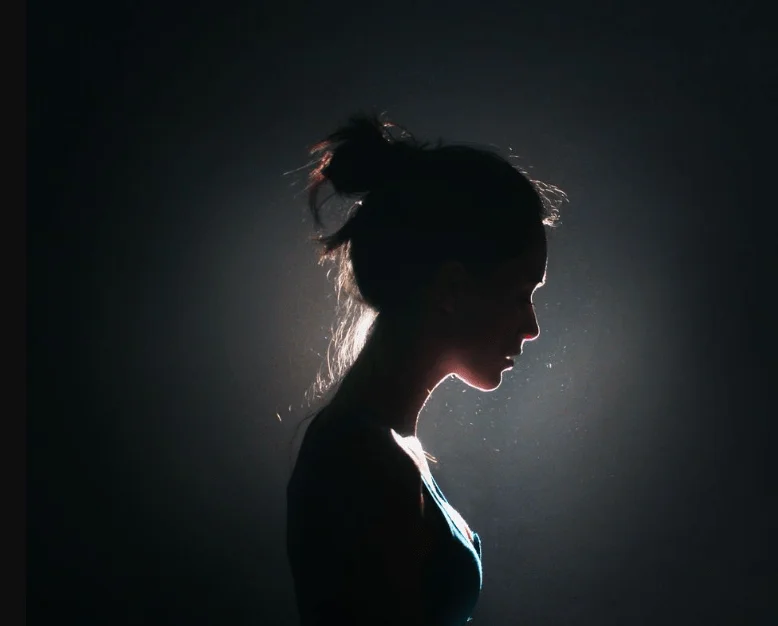
Meanwhile, the backlights are positioned behind the subject. They create a rim of light and a dramatic silhouette effect. You can also use the side lights to create strong shadows and highlight the texture.

C. Color

Color is one of the key differences between an aesthetic photo and a regular photo. Color means life. So, when you cast the perfect colors in your photo, it creates beauty.

C.1. Understanding Color Theory

Color Theory

It is the first step to understanding the rules of playing with colors.

  • Primary Colors: Red, yellow, and blue ā€“ the building blocks of all other colors.
  • Secondary Colors: Green, orange, and violet ā€“ created by mixing primary colors.
  • Tertiary Colors: A combination of primary and secondary colors, offering a wider range of hues.
  • Complementary Colors: Colors opposite each other on the color wheel (e.g., red and green, blue and orange). They create high contrast and visual interest when used together.
  • Analogous Colors: Colors that sit next to each other on the color wheel (e.g., blue, blue-green, green). They create a harmonious and pleasing look.
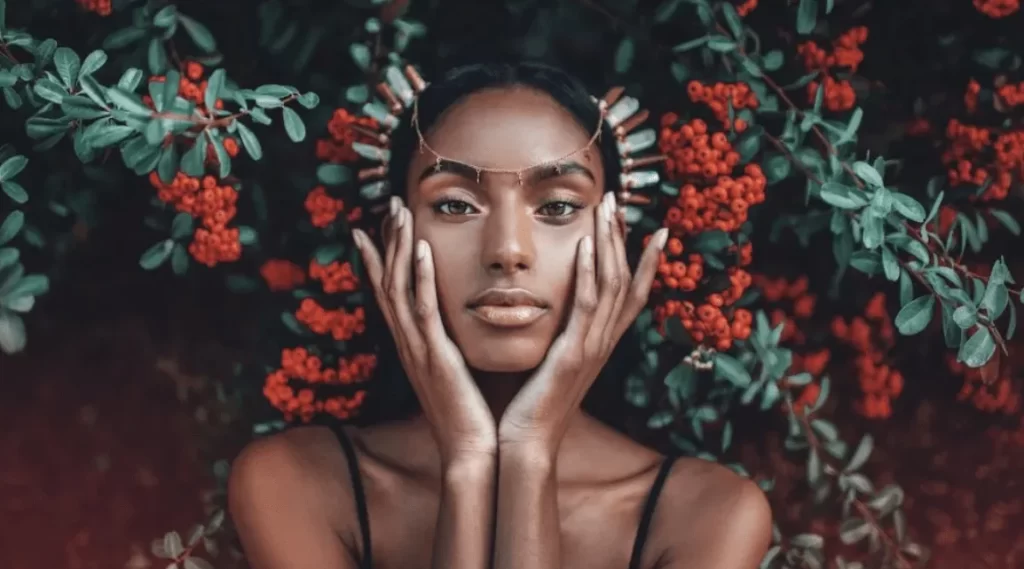
C.2. Color Palette

Color Palette, Aesthetic Photography

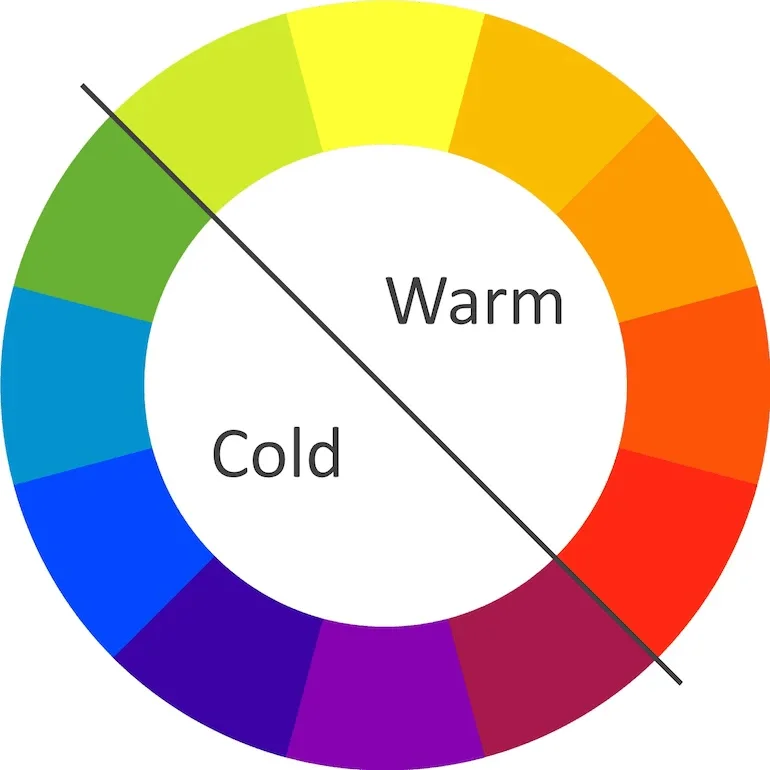
Understanding the color theory, you can go for a color palette that is best for your subjects.Ā  For example, the warm tones, are a combination of reds, oranges, and yellows. This tone is suitable to create a feeling of warmth, comfort, and energy. Perfect for creating a cozy or vintage look.

The cool tones are for the calmness and peace. You can choose this tone for natural aesthetics. The muted tones are the desaturated versions of any color palette. They offer a sophisticated and timeless look.

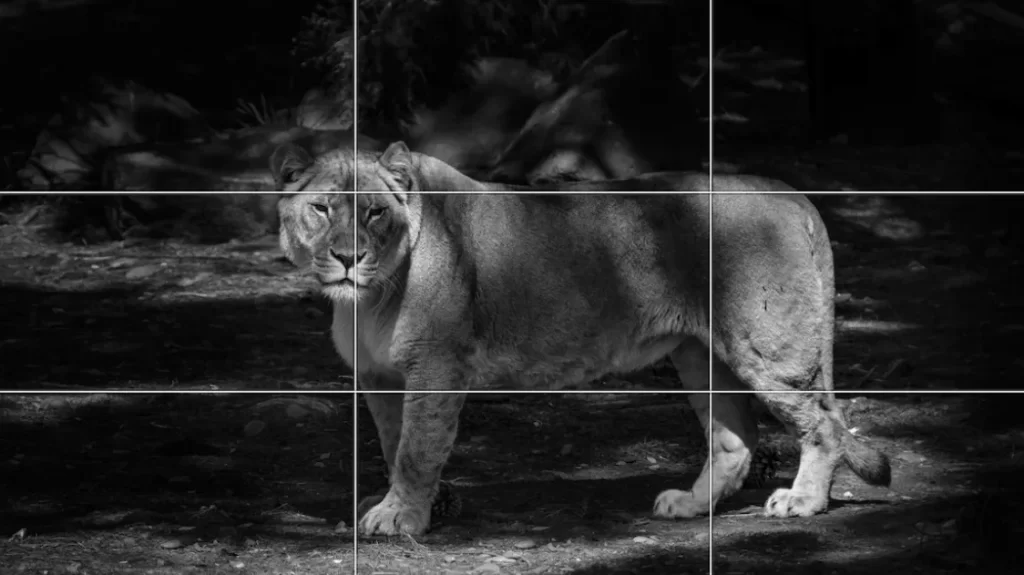
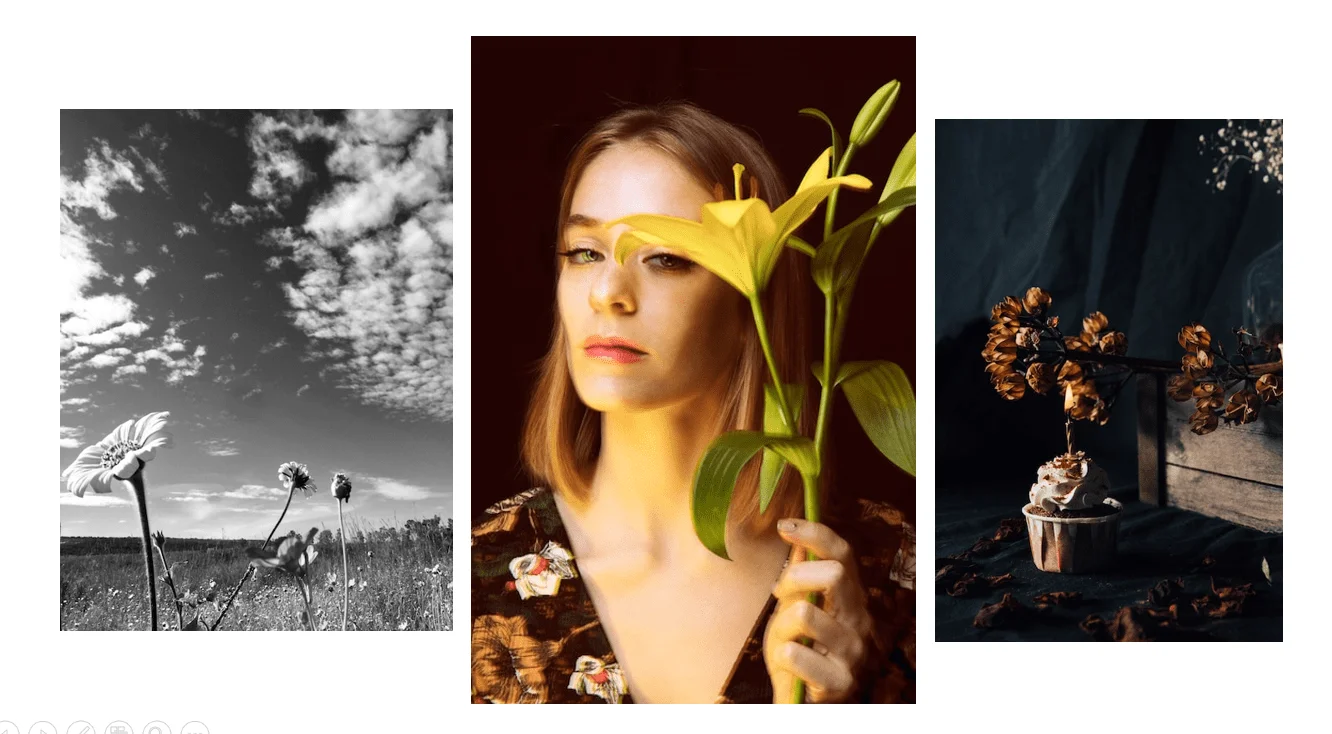
Here is an example of black-and-white photography:
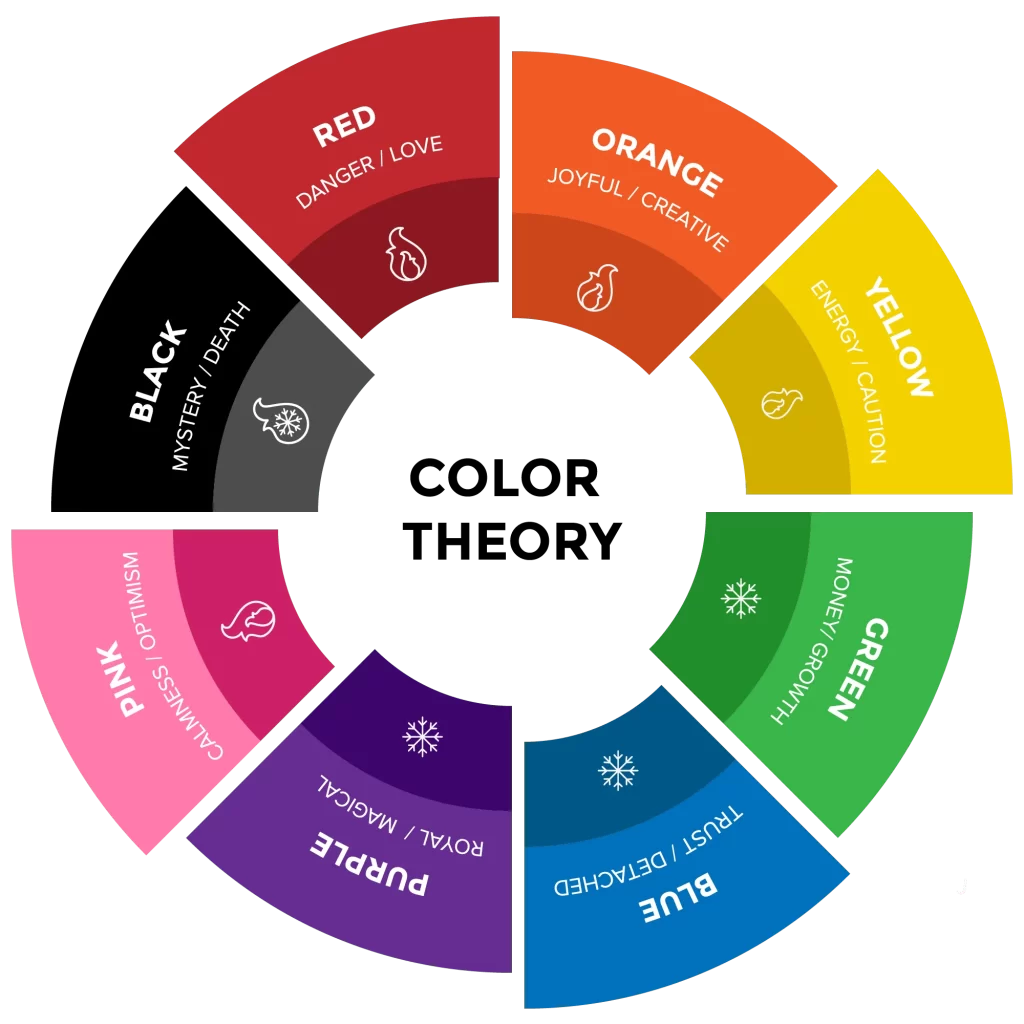
C.3. Set the Mood

Set the Mood of Aesthetic Photography

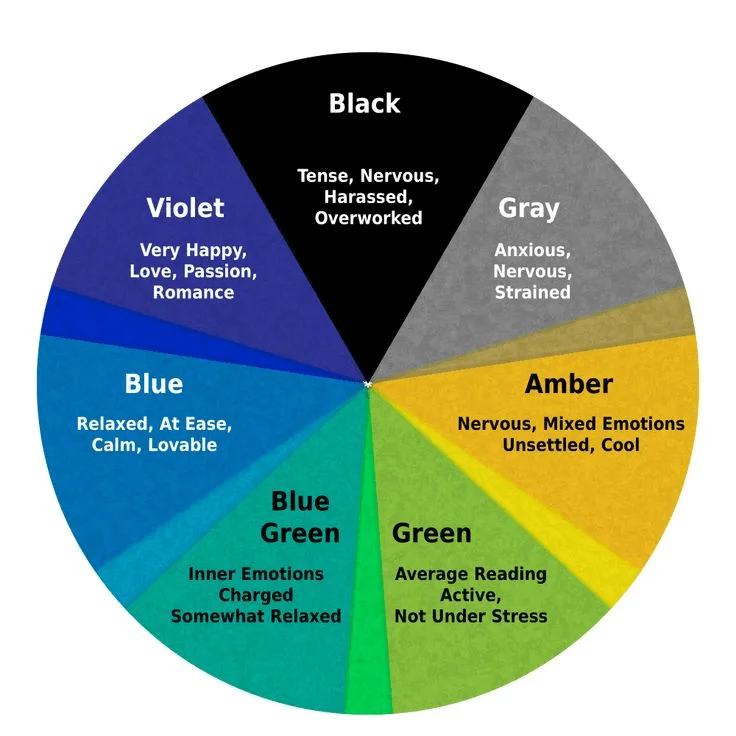
Colors have an inherent relationship with our psychology.

  • Red: Passion, excitement, danger
  • Orange: Enthusiasm, creativity, warmth
  • Yellow: Happiness, optimism, energy
  • Green: Nature, growth, peace
  • Blue: Calmness, trust, security
  • Purple: Luxury, mystery, creativity

So, experiment with colors and set harmony in casting colors in your photo. Thus you can tell a story and build an emotional connection with the viewers.Ā Ā Don’t be afraid to break the rules ā€“Ā  sometimes unexpected color combinations can create truly stunning results.

Styles of Aesthetic Photography

Styles of Aesthetic Photography

The world of aesthetic photography is so diverse. Aesthetic photographers plethora of styles. Let’s see some of the most popular styles in this genre:Ā 

  • Minimalism: Minimalism is about clean lines, negative space, and a limited color palette. It focuses on a simple mood with serenity and elegance.
  • Vintage: It is about warm tones, faded colors, and textures reminiscent of old photographs or films. It creates a mood of nostalgia, romance, and a touch of mystery.
  • Dark & Moody: Focuses on deep shadows, dramatic lighting, and a cool color palette (blues, blacks). It creates a mystery mood.Ā 
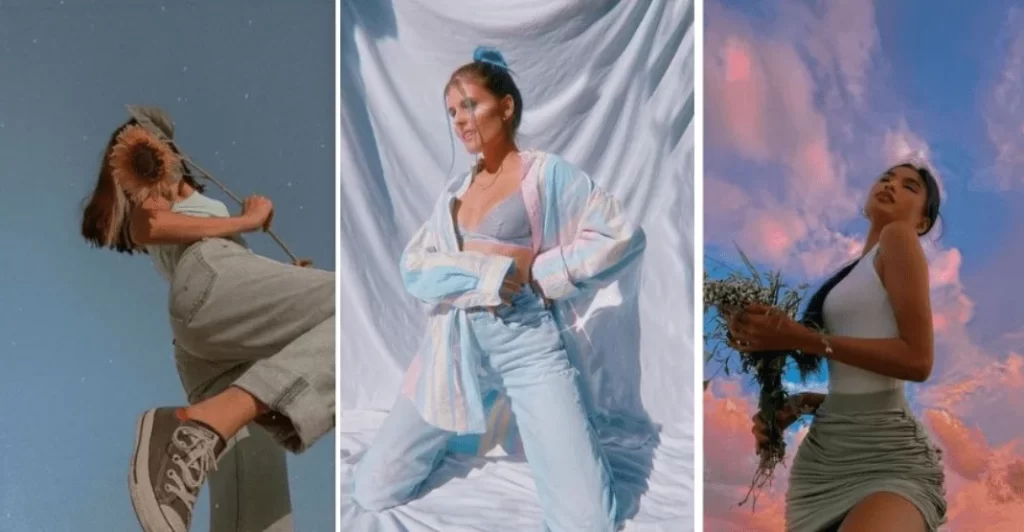
  • Light & Airy: a soft light with airy backgrounds. It creates peacefulness and a dreamy vibe.Ā 
  • Pastel: This style casts soft, muted pastel colors throughout the image. An innocent nostalgic vibe you will get in these photos.Ā 
  • Retro: Foeses on bold colors, and geometric patterns with elements reminiscent of a specific past era. It gives a touch of Skitch in the mood.
  • Cinematic: Dramatic lighting, shallow depth of field, and compositions inspired by film techniques.

Essential Tips for Taking Aesthetic Photos

Let’s see some of the best tips for taking aesthetic photos:Ā 

Mind Your Surroundings

Mind Your Surroundings

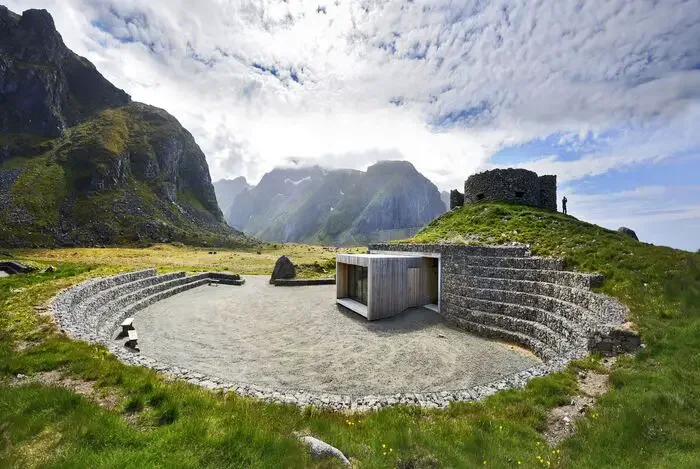
This is where you can find your elements for aesthetic photography. It allows you to create a harmonious and clutter-free environment in your photos. Imagine a workspace with a clean desk, organized shelves, and calming artwork. It promotes focus without any stress on your eyes.

The same goes for your wardrobe ā€“ well-maintained clothes that fit well and are organized by color or style make getting dressed a more enjoyable experience.

Museums and Art Galleries

Museums and Art Galleries, Aesthetic Photography

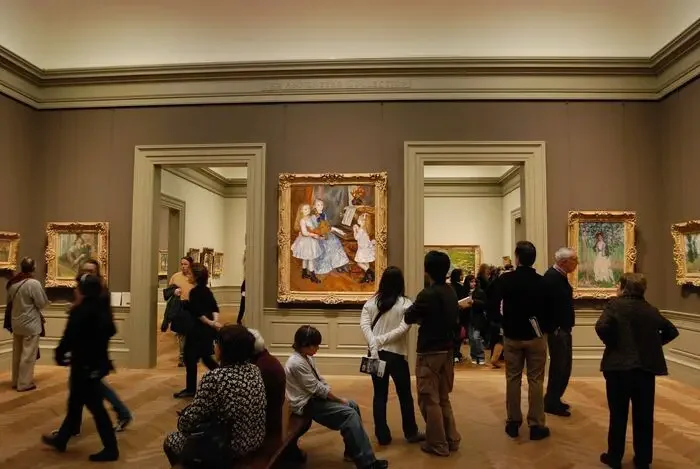
Museums and galleries showcase a wide range of artistic styles. Artworks themselves are masterclasses in composition. You can learn a lot of things by observing this artwork.Ā 

Observe how artists use lines, shapes, negative space, and color to create visually compelling pieces.Ā Meanwhile, you can use these artworks as elements to create aesthetic photos.Ā 

Follow Other Photographers in This Field

Photographers

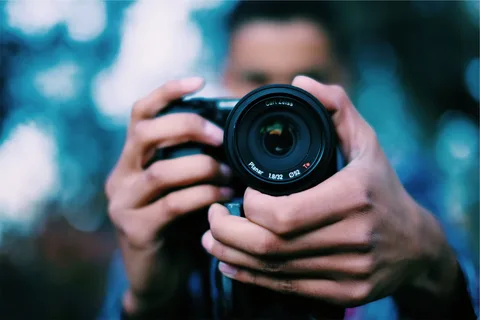
Explore the work of photographers who specialize in aesthetic photography. Thus you will get ideas, color palettes, and subject matter for creating mindful photos.

Following prominent photographers allows you to stay updated on the latest aesthetic trends in photography. This can help you incorporate these trends into your work while still maintaining your voice.

Bottom Line

Creating aesthetic photos requires practice and a particular skill set. Do not lose your home so early.Ā Follow the popular photographersā€™ work to understand their techniques.Ā 

It is all bout how you portray the world through your lens. Experiment with angles, lighting, composition, and colors. These are the elements you need to use to turn an average-looking photo into an aesthetic one.Ā 

Do not worry about the technical aspects while capturing a scene. Fix the inconsistencies in the post-production. Photo editing agencies like Clipping World, the clipping path service provider can help you improve the aestheticism of your photos.Ā 

Check Our Latest Articles
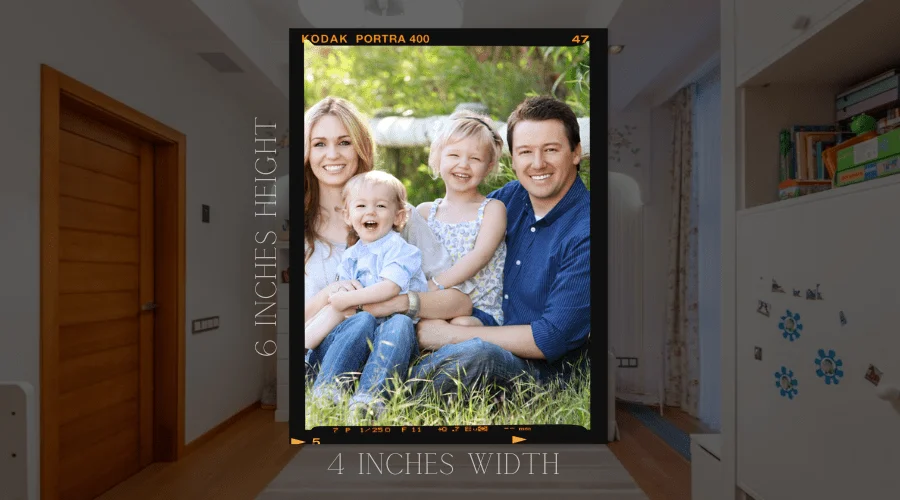
FAQ

How to Find Aesthetic Pics?

Different websites offer aesthetic photos for free. You can visit Pexels, canvas, Freepik, or Unsplash to download your required photos.Ā 

What is the Aesthetic Quality of A Photo?

Aesthetic photos please the eyes of the viewers. So, all the qualities in your photo that appreciate the beauty of nature are aesthetic qualities. The elements like color, composition, lighting, and subject matter are the qualities aesthetic photographers try to bring into their photos.Ā 

Is Aesthetics Important in Life?

Yes, aesthetics in life is important. It allows us to think about our life out of the box. We can explore new things like culture, and beauty and use them in our social community.

Show your love

Internal Linking Best Practices | Strategic SEO Guide 2024

Internal Linking Best Practices, Graphicscycle

Effective rules or strategies for interconnecting pages within a website are internal linking best practices. These practices help to build a website’s authority and increase the visibility of search results.

When you enter a shopping mall, you must have seen a lot of racks of different products of the same categories. Suppose you will go to the Florida beach the next week, so you need to buy a swimsuit to go to the beach. In the shopping mall, when you have picked the swimsuit from Rack No: 3.

Then the Sales Associate comes to you and casually knows about your beach trip. After listening that you are going for a beach trip, the Associate mentioned that you may have a bug spay on Florida beach. Because there are a lot of bugs in there, without having a spray, you can’t stray there in comfy. So you can check our best bug spray at Rack No: 9.

Here, the reference from Rack 3 to Rack 9 is an internal linking in terms of the SEO language. For this reference, the users also get helped, the store has increased sales, and the mall has built a strong authority in your mind. The internal linking strategies work the same way, Page A refers to Page B, and Page B refers to Page A/Page C.

9 Internal Linking Best Practices to Apply in 2024

Internal links help users and crawlers better find new and existing website pages. An SEO professional might have seen a lot of changes in SEO Marketing after the Google March Update 2024. After this update, many ranked web pages have been removed from Google’s search results.

So we must be careful about the authenticity and transparency of the SEO for our website. Interlinking is one of the most important parts of the overall SEO on the site. You must have to know the updated rules and best practices of internal linking.

1. Internal Link Anchor Text Optimization

Anchor Text Optimization, Internal Linking Best Practices

The first practice of all is that you have to add internal links with the perfect anchor text. Because the anchor text is like a cover of your products. Users, or a Googlebot can understand what is inside the link by the anchor text, what you have added here.

There are 8 types of anchor text in SEO, such as Exact Match, Partial Match, Branded, Naked URL, Generic, Image, Long Tail, and LSI (Latent Semantic Indexing). You have to use it based on your preference and appropriateness.

Graphics Cycle doesn’t recommend using Naked URLs, and Generic anchor text for internal links. Because Naked URL anchors aren’t readable, and Generic anchor text requires reading the surroundings of the link.

Using exact match keywords, partial match keywords, or LSI as anchor text is the best way to optimize internal links. Because anyone can easily understand what is inside the links by seeing these texts.

2. Maintain Page Relevancy

Maintain Page Relevancy, Internal Linking Best Practices

The second of our internal linking best practices is maintaining page relevancy. If your internal links aren’t relevant, then the crawler bot and users will not follow these links. Here are 4 things to keep in mind while interlinking one page with another.

  • Relevant Content: Link pages by maintaining the context and value of the target page.
  • Add Links Naturally: Integrate links into content without affecting readability.
  • Link to High-Quality Content: Ensure linked pages offer valuable, accurate information.
  • Avoid Links to Low-Quality Content: Similarly, avoid linking to low-quality content.Ā 

If you follow these four things, you can maintain links to relevant pages. It doesn’t matter, if your links are internal or external, relevancy is a must to keep the quality. So that you can gain trust and build authority.

3. Understand Userā€™s Psychology

Audience Targeting Strategies

You are creating content for your target audience, so it is crucial to understand their psychology. You can link pages to the right place if you can identify their needs, behavior, and emotions. So, to get more page views and click on related pages, you have to understand the user’s psychology.

Sometimes you may use synonyms, alter phrases, related keywords, LSI, or partial match keywords, to get more clicks on internal links. However, people will click those links that are most relevant and useful to them. If they have found value in your content, then they will visit more pages. So, finally, connect with your audience, and solve their issues, they will be with you.

4. Create an Effective Internal Linking Structure

Effective Internal Linking Structure

In December 2023, Graphics Cycle had a marketing service subscriber client called, Emily. She wanted to expand her online presence. Also, determined to make her websites user-friendly and improve search engine visibility. We did an effective internal linking structure to increase the organic traffic and it worked well. Let’s see what we have done for Emily’s website to rank higher on the search engine.

First, we built the internal link-building strategy you have seen in the picture. Implementing this strategy, made navigation smoother for visitors. Also, search engines understand the website’s content and pages better than before. Because it has a well-organized and structured sitemap now. If you want to improve your visibility, you have to adapt internal linking best practices like Emily.

5. Update Existing Pages by Adding Links to New Posts

Update Existing Pages by Adding Links to New Posts, Internal Linking Best Practices

There are two main benefits of updating existing pages by providing links to new posts. The first one is updating, the older content updating is a good practice for your website. The second getting instant traffic to the newer post.

Updating Older Content is a Good Practice

When you add an internal link on your older page to the newer page, that means you have a just covered new topic related to the older topic. So the crawler will increase the value or authenticity of this page. Users will also be helped if they find another solution on the same page.

Get Traffic to the Newer Page

You already have visitors on your order page, when you interlink the new page, visitors will go there. So, you will get ready traffic on your new page. Also, your new page can take the juice pass advantages of the old page. If you don’t know what is link juice and how it works, then continue reading.

6. Take Advantage of Link Juice

Link Juice, Take Advantage of Link Juice, Internal Linking Best Practices

Link juice is a simple but powerful SEO trick, that can help your new pages to rank on search engines and get organic traffic. SEO experts use this trick to enhance the authenticity of new pages. Let me explain the Link Juice, & how to pass it.

Graphic Cycles has a page about the best 8 places to take pictures in Tokyo. Now the page has gained authority on Google by ranking on the first page and getting traffic. Today, we will publish this post about ā€œInternal Linking Best Practicesā€.

If we make an internal link from the old post to the newest post, the Search Engine bot will notice that we have updated our old content. The crawler will see the new post, because of the internal linking. Then it will consider the new page as a valuable page.

In short, an internal link juice pass means getting a recommendation letter from a valuable page of the same domain. It helps the crawler and users to navigate new pages on your website.Ā 

7. Optimize Homepage Links

Homepage Optimization

The homepage is the most important and valuable page of any website. So, Homepage SEO is important for every website. Home page optimization requires everything of on-page SEO, including adding internal links.

Homepage internal links are a bit tricky because people start their journey from this page on your website. This page is like a big map, Crawler/Users will follow your direction from this starting point. If you can provide the right direction (linking) then they will find your destination.

Keep things clear and easy to find any information on your homepage, so that anyone can go anywhere from the main page. Include important internal links such as product/service pages at the top of the page. Then you can include different buttons for different pages with proper call to action. Besides the products or service pages, adding blog pages is also an internal linking best practice.

8. Avoid Too Much Internal Linking

Neil Patel on Internal Linking

Most Famous SEO Expert Neil Patel said that you can add 150 links on a single page, but these all links have to be relevant. In reality, you can rarely add 150 links to a single page naturally, so it will look like spammy content. That’s why adding too many links is not recommended by the Graphics Cycle SEO team.

In general, we add 3-20 internal links and the same external links for 1000ā€“3000 words of content. But it depends on the article, and relevant pages available on the website. Never push links on it, just place natural links where it is suitable.Ā 

9. Track Internal Link Performance

Internal Linking Performance

Tracking internal linking performance is the 9th of our internal linking best practices. It is a crucial part of the best internal link optimization. Because you can see the audience’s interaction and actions with the internal link.

Screaming Frog is an SEO tool that can help you get insights into the website’s internal link metrics. This software is available on Windows, Mac, and Linux, you just need to install it. Also, Google Analytics can help you to explore how internal links performing on your website.

By getting insight data from tools like Google Analytics, or any special software, you can improve your internal links. Shortlist those links which are not performing well, then improve these links. So keeping track of records is essential for a website or a business.

Final Thoughts | Internal Linking Best Practices

Here you have found 9 internal linking best practices that can help to increase your website’s page views. Remember that you have to follow all of these practices to get effective results. From building a strategy for internal linking to observing link performance, every step is crucial.

So, if you miss out on any one of them, you might not get the expected result. However, besides the internal linking, there are a lot of factors to rank your site on search engines. Without having a professional SEO expert or a team, you will not build your SEO or internal linking strategy.

Graphics Cycle has an expert SEO team with more than 8 years of experience. So, if you want to get a FREE SEO Audit Report for your website, feel free to contact us.Ā 

Don’t Miss Out | Latest Content

10 Easy Steps How to Build a Successful Startup

Frequently Asked Questions

What is an internal linking strategy?

An internal linking strategy means linking the internal pages of a website strategically. Strategic linking improves website authority and increases page views of the website. Also, it helps the crawler to understand the relationships between different pages on a website.

Are internal links good for SEO?

Yes, internal links are beneficial for SEO for various reasons. It helps search engines distribute page authority and index new pages. Tier-based internal linking structure helps to understand the power of different pages and rank them based on this structure.

Additionally, internal links provide users with more pathways to explore content. This pathway can enhance user experience and increase time spent on the site.

What are internal linkages examples?

Here are a few types of and uses of internal links in a website:

  • Navigation menus link to important sections or categories of the website.
  • Contextual links within blog posts or articles that point to related or relevant content.
  • Related posts or recommended articles sections at the end of a blog post.
  • Links within product descriptions that direct users to other relevant products or categories.
  • Links from the homepage to important landing pages or cornerstone content.
Show your love

How Big Is A 4Ɨ6 Photo | Best Size in Pixels, CM, & Inches

How Big is a 4Ɨ6 Photo

Understanding the photo dimensions is important to present your photographs perfectly. But we often lose our way of finding the right dimension for our projects. So, how big is a 4Ɨ6 photo? Here you will get the answer.Ā 

A 4Ɨ6 photo has different uses starting from printing to sharing snaps on social media. A 4Ɨ6 photo refers to the width of the photo will be 4 units while the height will be 6 units.Ā 

The unit can be inches, centimeters, millimeters, or pixels. Depending on the unit the size of the photo will also change.Ā For example, you can create a photo dimension of 4 inches in width and 6 inches in height. So, it is a 4×6 photo. Again, a photo can be a photo of 4 pixels in width and 6 pixels in height.Ā 

On both occasions, you will get a 4×6 photo, but the size of the photo is different due to the unit of measurement.Ā 

The 4×6 photo size is versatile as you can use it for different purposes. But, you must know its comparison to other standard photo dimensions. Thus you can make the best use of this dimension.Ā 

Here we will go from its basic measurements to practical applications. If you are a photographer or photo editor, this is the guide to make the most of your 4×6 prints.Ā 

Significance of Aspect Ratio

Different Aspect Ratios

The aspect ratio of a photograph refers to the proportional relationship between its width and height. It is expressed as a ratio of the width to the height, typically written as “width: height.”Ā For example, the aspect ratio of a 4×6 photo is 4:6.

Understanding the aspect ratio is important for the visual presentation. It determines the shape of the photograph. Hence, control the overall appearance of the photo.Ā 

A square photo has an aspect ratio of 1:1. It means its width and height are equal. Meanwhile, rectangular photos like the 4×6 have aspect ratios where one side is longer than the other. The aspect ratio influences the composition and framing decisions.

Moreover, different aspect ratios are important for different purposes. The 4:3 aspect ratio is commonly useful in digital cameras and old television screens. But, the 16:9 aspect ratio is prevalent in modern widescreen displays.Ā So, based on the aspect ratios you can choose the most appropriate format for their planned output.Ā Ā 

The aspect ratio is also important for cropping and resizing the image. You can change the aspect ratio by cropping the image. Photographers often need to consider how cropping impacts the overall aesthetic and storytelling elements of the image.

The aspect ratio also influences how photographs fit onto different paper sizes. For example, a 4×6 photo has an aspect ratio of 2:3, which matches the standard 2:3 aspect ratio of full-frame digital cameras.Ā This compatibility ensures minimal cropping when printing digital images onto 4×6 photo paper.

4×6 Photo Size in Inches, Centimeters, Millimeters and Pixels

4x6 Photo Size in Inches, Centimeters, Millimeters and Pixels, How Big Is A 4Ɨ6 Photo

Have you ever wondered exactly how big a 4×6 photo is? This popular print size might seem straightforward, but there’s more to it than meets the eye! Now, we’ll dive into the world of 4×6 photos, exploring their dimensions in inches, centimeters, millimeters, and even pixels!

4×6 Photo Size in InchesĀ 

4Ɨ6 Photo size has a standard aspect ratio, which is why it is common and popular among everyone.Ā  But sometimes they ask about it, ā€œWhat is the 4Ɨ6 Photo size in inches?ā€.Ā 

Well, the 4Ɨ6 photo size measures in inches.

  • Width in inches=4 inches
  • Height in inches=6 inches

Thus we get a 4×6 photo size in inches.

4×6 Photo in CentimetersĀ 

To convert inches to centimeters, you can use the following formula:

Centimeters=InchesƗ2.54

For a 4×6 photo:

  • Width in centimeters:
    • Width = 4 inchesƗ2.54 cm/inch = 4Ɨ2.54 = 10.16 cm
  • Height in centimeters:
    • Height = 6 inchesƗ2.54 cm/inch = 6Ɨ2.54 = 15.24 cm

So, a 4×6 photo measures approximately 10.16 cm x 15.24 cm.

4×6 Photo in Millimeters

To convert inches to millimeters, you can use the following formula:

Millimeters=InchesƗ25.4

For a 4×6 photo:

  • Width in millimeters:
    • Width = 4 inchesƗ25.4 mm/inch = 4Ɨ25.4 = 101.6 mm
  • Height in millimeters:
    • Height = 6 inchesƗ25.4 mm/inch = 6Ɨ25.4 = 152.4 mm

So, a 4×6 photo measures approximately 101.6 mm x 152.4 mm. This is a 4*6 photo size in mm.

4×6 Inch Photo Size in Pixels

To calculate the size of a 4×6 inch photo in pixels, we need to consider the resolution or pixel density (pixels per inch, PPI, or dpi – dots per inch) at which the photo will be displayed or printed. Common resolutions for digital images range from 72 to 300 pixels per inch, with higher resolutions typically yielding sharper images.

Let’s assume a resolution of 300 pixels per inch (PPI), which is commonly used for high-quality prints:

  • Convert the inches to pixels for both width and height:
    • Width in pixels = 4 inches * 300 pixels/inch = 1200 pixels
    • Height in pixels = 6 inches * 300 pixels/inch = 1800 pixels
  • Calculate the total number of pixels:
    • Total pixels = Width in pixels * Height in pixels = 1200 pixelsƗ1800 pixels =2,160,000 pixels

So, a 4×6 inch photo at a resolution of 300 pixels per inch has a total of 2,160,000 pixels. This is a 4×6 inch photo size in pixels.

How to Create A 4×6 Photo Size in Photoshop?

Photoshop

Talking about creating a 4×6 photo, photoshop stands out with its unique features. Creating a 4×6 is super easy. First, you have to select a unit on which you want to cut your photo by the aspect ratio of 4:6.Ā 

Step 1

launch Adobe Photoshop on your computer.

Step 2

  • Go to “File” > “New” to create a new document.
  • Enter the dimension 4×6 in the New Document dialog box.Ā 
  • If you select the unit in inches, set the Width to 4 inches.
  • Then, set the Height to 6 inches.

Make sure the resolution is set to your desired pixel (e.g., 300 pixels/inch for high-quality prints). Moreover, you will get an option to choose the Color Mode (usually RGB for digital use or CMYK for print). If you are ok with all the parameters, click “OK” to create the new document.

Step 3

Import your image. You can import the image by dragging and dropping it onto the canvas. Otherwise, navigate to “File” > “Place Embedded” to insert the image you want to edit.

  • If your image is larger than the canvas, you may need to resize it to fit.
  • To transform the image, select the image layer,
  • Then press Ctrl+T (Windows) or Command+T (Mac) to activate the Transform tool.
  • Then hold the shift key and adjust the corners by dragging.Ā 

Step 4

Save Your File by going to “File” > “Save As”. Select the desired file type and hit ā€˜saveā€.

In this way, we can create a 4×6 photo size in Photoshop.

Image Resize Option

Image Resizing, How Big Is A 4Ɨ6 Photo

The image resize option is another way to create a 4×6 photo. If you want to create a 4×6 photo in pixels, the width will be 1200 pixels and the height will be 1800 pixels.Ā 

So, navigate Image>image size from the option bar or use the shortcut Alt+ctrl+I from the windows.Ā From the new options bar, set the height, and width, and make sure the constrained aspect ratio (chain icon) is not active.Ā 

Uses and Applications

The 4×6 photo size is versatile. You can use it for different purposes from printing to crafting. Letā€™s learn where you can make the best use of the 4×6 photos:Ā Ā 

Printing Purposes

Portrait Family Photography, How Big Is A 4Ɨ6 Photo

You can use the 4×6 photos for printing family portraits Thus you can share the captured special moments with loved ones. The 4×6 photos are also used for the vacation photos.

The event photographers are usingĀ  4×6 photo capture and creating albums for their clients. The 4×6 photos are suitable for printing professional portraits. It is the standard size for distribution.

Digital Photo Formats and Social Media Posting

Digital Photo Frames

The 4×6 photo size is highly compatible with digital formats. So, you can easily share your photos on social media platforms such as Instagram, Facebook, and Twitter.Ā 

The 4×6 photos are perfect for creating digital photo albums. So, using this photo size, you can preserve memories in a digital format.Ā You can also use this photo size for wallpaper or screensavers for desktops, laptops, or mobile devices. Moreover, they are convenient for attaching to emails.

Scrapbooking and Crafting

Scrapbooking And Crafting

It provides a standard size for printing and arranging photos on pages. Thatā€™s why they are frequently used for scrapbooking.Ā  Ideal for creating collages for parties, events, or home decor projects. We also see their application for creating handmade cards or invitations.Ā 

Comparison with Other Standard Photo Sizes

The 4×6Ā  photos are so compact compared with the larger sizes like 5×7 or 8×10 photos.Ā 

Photo Size Dimensions (in) Dimensions (cm) Dimensions (cm) Aspect RatioĀ  Use Case
4×6 4 x 6 10.16 x 15.24 101.6 x 152.4 2:3 Wallets, scrapbooks
5×7 5 x 7 12.7 x 17.78 127 x 177.8 7:5 Desks, nightstands
8×10 8 x 10 20.32 x 25.4 203.2 x 254 4:5 Wall displays, larger albums


How to Choose the Right Photo Dimension?

Choosing the perfect dimension is the first step in making a perfect composition. However, the selection of a photo dimension depends on several factors.Ā 

At first, you need to understand your purpose. Is it for printing, digital sharing, web use, or something else? If you’re printing a photo to frame and hang on a wall, you might opt for a larger dimension for better visibility.

But, you need a smaller dimension for sharing photos on social media.Ā Then you have to consider the platform to display your photos. For example, you may need a different dimension of photo to share on Instagram than placing it on a photo frame.Ā 

Understand the aspect ratio for choosing a photo dimension.Ā 

  • 4:3 is standard for many digital cameras
  • 3:2 is standard for 35mm film
  • 16:9 is a widescreen format

Then you have to think about the resolution of the photo. Resolution determines the clarity and detail of the image. Higher resolutions are suitable for printing and large displays. Meanwhile, lower resolutions may be used for digital sharing on social media on smaller screens.

Moreover, a higher resolution and larger dimension for displaying your photos in the gallery. The viewers can get up close to it, the larger dimensions work here.Ā 

Don’t Miss Out

Final Thoughts

Creating a perfect photo composition requires a perfect dimension and resolution. In this post, I have tried to give you an insight into the world of photo dimensions. Now you know how big is a 4Ɨ6 photo.

You have learned the conversion procedures of a Ā 4Ɨ6 photo in different units. Here you have also learned the applications of the 4Ɨ6 photos to use them according to your requirements.Ā 

Still, if you think about creating a professional-level photo, you should consult with a professional photography and photo editing agency. The Clipping World is doing an excellent job in this field.Ā 

FAQ | How Big Is A 4Ɨ6 Photo

Can I use a photo resizer to create a Ā 4Ɨ6 photo?Ā 

Yes, you can use an online photo resizer to create a Ā 4Ɨ6 photo. But, the resolution may be deteriorated. Thatā€™s why I prefer using Photoshop to resize the photos. And here you have got a way to resize photos in Photoshop.Ā 

Can I use aĀ  4Ɨ6 photo as a social media profile picture?

Yes, you can use a 4×6 photo as a social media profile picture. However, it may require some adjustments depending on the platform’s requirements.

Show your love

Best 20 Feet Picture Ideas and Pose Inspiration in 2024

Feet Picture Ideas, Best Feet Picture Ideas

This is good news for individuals who love to take pictures of different parts of their body but can’t find ideas on how to pose for feet pictures. After reading this blog post, you will have 15+ creative feet photography ideas in 2024.

Sometimes ideas aren’t enough to capture a perfect photo that looks great. Because pose idea execution is a major issue when taking feet pics. So we will guide you to the easiest way to get attractive photos with minimum effort.

You can share these stunning pictures on Instagram and other social media platforms to get more engagement. Not only that, you can earn money by selling these photos online at a good price.

20 Good Feet Picture Ideas And Poses

We have included 20 poses in different places, poses, and situations. So that you can use each of these poses for various purposes. Most of the poses are free feet, which means you don’t need anything without a camera or mobile.

Also, you will find here indoor and outdoor poses, using props, sand, water, or colorful lights. Additionally, we have added a few feet poses in your bathtub to seduce your partner. So, don’t miss these interesting, cute, and creative feet picture ideas.

01. Standing on Tiptoe for Bare Feet Photography

Standing on Tiptoe for Bare Feet Photography, Feet Picture Ideas

Standing on the tiptoe looks very exciting in pictures because it looks like you are doing something. That’s why viewers of the photo will be curious about when you will lift down. Also, it shows off the flexibility and strength of your ankles.

You can capture amazing feet pictures indoors on the floor or outdoors on the green grass with a natural background like a tree. This feet pose is one of the best feet poses for pictures because of its compatibility and ease of shoots.

02. Bare Feet on a Sandy Beach

Bare Feet on a Sandy Beach

There are a lot of foot photography ideas on the sandy beach by playing with sand and water. You are walking or lying down on a sandy beach to express relaxation of your mind and soul. If you can capture feet photos between the golden hour, you will get the best result. And try to capture photos from various angles.

03. Feet on Sand Water Beach

Feet on Sand Water Beach, Feet Picture Ideas

You will have huge creative feet picture ideas on the beach with sand, stone, water, and more. If you love walking on the beach, where minimum water on the sand is available, you can capture amazing photos. You will have various ways to pose in this place, such as standing, walking, sitting, or even lying on the beach.Ā 

04. Beautiful Female Feet Pictures on Beach Stone

Beautiful Female Feet Pictures on Beach Stone

Everyone likes nature and peace, the combination of water, sand, and stone on the beach is mind-blowing. It gives relaxation and self-satisfaction while capturing outside feet pictures with beach stone.Ā Ā 

05. Feet Dangling at the Edge of a Pier Dock

Feet Dangling at the Edge of a Pier Dock, Feet Picture Ideas, Foot Poses for Photography

Piers, Wharf, or Dock are such places where the couple goes to spend quality time with their partner. Friends go for chill and families go for refreshing their and their kid’s mental health. Doesn’t matter who you are, you can capture stunning photos of dangling feet at the edge of the pier.

You can create variations of poses in the same place by changing the camera angle, crossing feet, touching water, and more. This is one of the most popular feet picture ideas with high demand in the stock photo market.

06. Feet on a Lush Green Lawn

Feet on a Lush Green Lawn

Sitting with legs straight out on a lush green lawn is the most popular foot pose for photography. Also, you can try the folded legs by sitting on the lawn to try different poses with the same background.

07. Grassy Field

Grassy Field, Feet Picture Ideas

The green natural and grassy field is a great background to take men’s and women’s feet pictures. You have various options for foot poses for photography, such as wearing shoes, without shoes, folding, straight, and more. Early morning is the perfect time for feet photography in grassy fields. Because during this time, grasses have dew points that enhance beauty.Ā 

08. Feet With Colorful Nail Polish

Feet With Colorful Nail Polish

Nail polish originated in China in 3000 BC, but modern nail polish was invented in 1932. By getting inspiration from the automobile car pain, the Revlon company has established a modern nail polish brand. It has been a popular way of boosting beauty for thousands of years. So, using this beauty material, you can capture stunning photos of your feet.Ā 

09. Use Temporary Tattoos or Art on Feet

Use Temporary Tattoos or Art on Feet, Feet Picture Ideas, Feet Picture Poses

Many people paint tattoos on different parts of the body, but a permanent tattoo can’t be removed. Also, It can be harmful to the skin, so it is a risky material. However, temporary tattoos, skin stickers, or skin painting can be some of the best feet picture ideas for beautiful female feet pictures.Ā 

10. Feet in socks, Resting by a Fireplace

Feet in socks, Resting by a Fireplace

This is one of the most popular foot poses for pictures to capture resting by a fireplace in winter. Young people and couples are fans of this pose to take pictures. You will need a tea table to foothold on it, and a fireplace. If you haven’t a table, you can capture popular feet pics by wearing shocks in your bed.

You have a lot of different poses and styles for feet photography. Such as straight legs, folded legs, crossed feet, interacting with your partner’s feet, etc… You can do this photography on a trip or camp that can be outside feet pictures.

11. Feet Peeking out From the Blanket

Feet Peeking out From the Blanket, Female Feet Picture

It is an indoor feet photography, using a blanket without having any extra props or anything. Peek your feet out of the blanket and take pictures as you want, such as couple, single, laying, or sitting on the bed.

12. Elegant High Heels

Elegant High Heels, Most Popular Feet Pics

The high heels symbolize luxury and elegance, even nowadays luxurious high heels can carry your status. So, this is such a beauty fashion product that can be best for beautiful female feet pictures. If you capture a photo with your iPhone and then share it on social media, it can be the most popular feet pic.

There are a lot of female feet picture ideas around the high heel, including indoor and outdoor photography. Also, you can capture stunning photos on the street by wearing high heels. You will get the best view by capturing from the side and behind the heel. However, you can try from the front side of your feet in different places.Ā 

13. Feet Adorned With Anklets or Foot Chains

Feet Adorned With Anklets or Foot Chains, Feet Picture Ideas

Cosmetics and Jewelry are the favorite things of any girl or woman. The cute feet picture ideas by adorning with anklets or foot chains are great. You can capture stunning photos of your feet by wearing these beauty materials. Not only that, you can upload these photos on social media and sell them on online platforms.

14. Feet on Desk (Professional Attitude)

Feet on Desk

Feet Picture Ideas about capturing on the desk are great for a professional attitude. You can these pictures on Instagram or Pinterest as lifestyle photography. But remember that never disrespect any person or profession.

If you are capturing feet photos to sell online, never share these photos on LinkedIn. Because LinkedIn’s marketing strategies are different from other social media or platforms.

However, a few audiences can stay against you for the picture of feet on the working desk. So be careful about it. But you can capture good and stylish and the most popular feet pics to sell online.

15. Feet Intertwined With a Partner’s Feet

Feet Intertwined With a Partner_s Feet

Intertwining two pairs of feet expresses your happiness with your life partner. A happy couple is always interconnected with each other physically and mentally. If you capture this posed picture, people will appreciate your love. The biggest advantage of these pictures is going to be memories that you couldn’t forget ever.

16. Feet Dangling off of a Hammock (Outdoor)

Feet Dangling off of a Hammock

This is another unique idea for them, who love to explore different places and things. Imagine, in a natural place, looking like a jungle, where you are in a hammock with dangling feet. Then your partners capture your dangling feet in this romantic place. The photos might be stunning because of the natural places, and the happy feeling.

However, you can capture photos on a hammock indoors also. Within a short time, you can complete the photo session, but you will not get the feeling of camping in a natural place. Visiting different places and exploring various cultures expands your knowledge and provides relaxation. So try to arrange a tour at least two times a year, and take pictures to save memories. Here are the 8 best places to take pictures in Tokyo, you can check it out.Ā 

17. Dangling off Edge Feet in a Bathtub

Dangling off Edge Feet in a Bathtub

Who doesn’t like traveling or camping, but would like to capture foot photos dangling, this idea is only for them. Dangling feet in a bathtub can be the most popular feet pics to sell online. So, you can earn extra money from your passion for photography.

If you don’t want to sell then, it’s fine you can seduce your partner, when he is not with you. He would feel you and miss you. Many women are finding only fans’ feet picture ideas to get more views and earn more money, you can try uploading these photos.

18. Close-up Soapy FeetĀ 

Close-up Soapy Feet, Feet Picture Ideas

Soapy feet look very cute, if you add a few leaves of flowers or a natural red rose to your bathtub then it becomes the next level. The white color’s soapy vibe is eye-catchy and gets the attraction of people. You can easily arrange these foot poses for photography and share them on Instagram.Ā Ā 

19. Feet Washing in the Bathroom

Feet Washing in the Bathroom, Feet Picture Ideas

Men/Boys are often interested in the bath of the opposite gender. That’s why there are a lot of platforms on the internet, where women are selling their feet and other body parts photos. Graphics Cycles never promote nudity, we don’t recommend selling them.

But you have responsibilities to satisfy your husband. Here you can press the trigger to seduce your partner. If you can perfectly capture the feet washing picture in the bathroom, then he must be seduced.

20. Feet Surrounded by Candle

Feet Surrounded by Candle

Candles are the most useful and beautiful things, especially used on different occasions. Look at the picture above, how sweet is it! If you can manage a huge quality of candles of various colors and photoshoots in this location, then you will realize how cute is it.

5 Important Tips on Foot Poses for Photography

There are a few things that you need to keep in mind before posing for feet photography:

  • Clean and groomed feet: First of all, ensure feet are clean, nails are trimmed, and your skin moisturized for a smooth and healthy look.
  • Adjust to the Environment: Observe the environment and adapt which feet pose is perfectly aligned here.
  • Footwear: Most of the poses don’t require footwear, but if you think that here footwear is needed, then wear it. For example, barefoot for a natural look, or elegant heels for a more formal setting, etc.
  • Highlight Unique Features: Showcase any distinctive features of your feet, such as tattoos, jewelry, or nail art. Also, you can add any props to add personality to the feet photos.
  • Experiment with Angels: Try different angles and perspectives to capture the best photo. However, crossed feet, feet in the air, and standing on tiptoe are common poses, you can try anywhere.Ā 

In a Nutshell

You might need to capture feet photos for keeping memories, social media sharing, or earning money by selling online. You can capture 1000+ poses by following these 20 best feet picture ideas here. Whatever the purpose you are looking for foot photography ideas, this post has helped you. After seeing these feet poses for pictures, you have ideas about the best feet photos.

However, you have to do professional photography to sell on Feetify, FeetFinder, OnlyFans, etc.Ā Feet photo editing or post-production is more important to boost your photo’s sales.

Don’t Miss Out

Frequently Asked Questions

Who buys feet pics and why?

To make the questions easier, you have to understand where people buy feet pics among various platforms. For example, if a person buys foot photos from OnlyFans, that means he is a foot fetish.

Foot fetish buys feet photographs for their sexual feelings and pleasures. On the other hand, if anyone buys pictures from iStock or Shutterstock-type sites, that means, they are going to use these for commercial uses. Finally, if any people are busy from Etsy, then you have to understand that will use printed pictures

What kind of feet pictures sell best?

Images that combine creativity, high quality, visually striking backgrounds, and a focus on feet are proven to be highly successful. Also, bare feet in a natural setting and beach feet photography are the most popular photography categories in the feet photo-sharing platforms.

What is the best pose for feet pictures?

There are a few popular feet pics poses and ideas that you need to know for selling feet photos online. Such as lifting your feet in the air, toe pointed, and bottom of the feet showing off. Also, remember about the color and background setting while ready for foot poses for photography.

Show your love

How to Format A Memory Card | A Complete Guide

How To Format A Memory Card

Sometimes, formatting is the only option left to make your memory card work again. At other times you need to format your memory card to remove all the old files at once. Here is ā€œHow To Format AĀ  Memory Cardā€ to help you resolve this issue.Ā 

Formatting a memory card erases all the data stored on it. So, you will get a fresh and clean space to store your files again.Ā  Formatting the memory card seems to fix the problems of corrupted files and reading problems.

Meanwhile, you should format the appropriate file system to the card compatible with new devices. So, how can you do it on your camera, computer, and phone? Here you will get the detailed procedure to safely format your memory for different devices. Letā€™s start.Ā 

When Do I Need to Format My Memory Card?

Memory Card

You may need to format your memory card in several situations. Letā€™s discuss this one by one:Ā 

You need to format the memory card before using it for the first time. You may get a brand-new memory card, but to get its full efficiency format it before storing a file.Ā  Also, this ensures the card’s file system is compatible with your device. You also have to format the card if it is full. Formatting it will allow you to capture new photos, videos, or files.Ā 

Moreover, it is important for maintaining the performance. When your card is full, it raises the possibility of having unwanted files. Eventually, it affects the health of the card, making it slow and corrupted.Ā  Thatā€™s why it is recommended to format your memory card occasionally. You can do it once a month if you store many files.Ā 

Thus you can prevent file system fragmentation and improve the card’s performance. And, I already mentioned formatting the card before using it on a new device. So, keep that in your mind.Ā 

Things to Consider Before Formatting

  • Formatting erases all data. Once you start, there is no guarantee of complete recovery. So, back up important files before formatting.Ā 
  • Excessively frequent formatting can reduce the lifespan

So, try error-checking tools to find the error and solve it to avoid formatting. Proper file management is also an alternative to full format.Ā 

How to Format a Memory Card on Your Phone?

Huawei Smartphone, How to format a memory card

Formatting a memory card on your phone is super easy if you know the process. Letā€™s see how to format an SD card on Android, iPhone, and other operating systems:Ā 

Andoird

[Reminder: Back up your important data before starting formatting. ]

Here is how to format an SD card Android:

  • Step 1: Go to Settings. You can access it from the notification panel or search on the app drawer.Ā 
  • Step 2: Under “Storage” in Settings, you will get an option related to Internal storage or SD card management.
    Step 3: Tap on the option for “SD card” to access its management options. However, some devices name it “Portable storage”.
  • Step 4: Find the Format Option by clicking on the three vertical dots or tapping on the SD card.
  • Step 5: Confirm formatting and it will begin.Ā 

iPhone

Well, iPhones don’t have built-in storage for SD cards. Here you will get internal storage and iCloud for storing your data. So, you cannot format an SD card directly on your iPhone.

However, the iPhone has a Lightning port to connect with the SD card reader and transfer files. Thus, you can then view, copy, or move files between the SD card and your iPhone’s storage.

So, you will have to insert the memory on other devices to format the memory card.

Huawei

Here is how to format an SD card Huawei:

  • Step 1: Insert the SD card into the SD card slot on your Huawei phone.
  • Step 2: Open the Settings app on your Huawei phone.
  • Step 3: Locate “Storage”:
  • Step 4: Find “Format”
  • Step 5: Confirm Formatting

On some Huawei phones, you can also format the memory card from the files app. Navigate to the SD card within the Files App. Then tap and hold on the SD card to select the SD card and select Format from the three dots.Ā 

Format an SD card for Samsung Galaxy

Samsung Galaxy

Here is how to format an SD card for Samsung Galaxy:

  • Step 1: Go to settings. To find the settings, you can swipe down from the top of your screen and gear symbol.
  • Step 2: Find the Device Care option. You will get it under the battery or device optimization option.
    Step 3: Tap on “Storage” to find the SD Card. Swipe left to enter into the SD card management screen. Then click three dots from the top left corner and select Advanced.Ā 
  • Step 4: Now tap the SD card to get the format option. Then click ā€œFormatā€.Ā 
  • Step 5: Confirm Formatting

How To Format A Memory Card Using a Computer

How to Format A Memory Card

There are different ways to format a memory card using a computer. Letā€™s learn how to format an SD Card on a PC:

Using CMD on Windows

Formatting Using DiskPart:

  • Step 1: Insert the memory card into a card reader and connect it to a USB port.
  • Step 2: Open the Command Prompt by typing “cmd” in the search bar (Windows key + S).
  • Step 3: Right-click on “Command Prompt” and select “Run as administrator.”
  • Step 4: Type “diskpart” and press Enter to open the DISKPART utility.
  • Step 5: Type “list disk” and press Enter to display all connected disks.
  • Step 6: Identify the disk number corresponding to your SD card.
  • Step 7: Select the SD card by typing “select disk X” (replace X with the disk number).
  • Step 8: Optionally, clean the SD card by typing “clean” and pressing Enter.
  • Step 9: Create a new partition by typing “create partition primary” and pressing Enter.
  • Step 10: Format the partition by typing “format fs=Y (quick)” (replace Y with the desired file system) and pressing Enter.
  • Step 11: Optionally, assign a drive letter by typing “assign letter=Z” (replace Z with the preferred drive letter) and pressing Enter.
  • Step 12: Exit Diskpart by typing “exit” and pressing Enter.

Format an SD Card on Windows 10 and 11

Formatting Using File Explorer:

  • Step 1: After connecting the card reader, go to This PC to look for your SD card drive.
  • Step 2: Right-click the SD card to select it.Ā 
  • Step 3: Choose “Format”
  • Step 4: Click “Start”

Mac

Here’s how to clear an SD card on a Mac using Disk Utility:

  • Step 1: Insert your SD card into your Mac’s built-in SD card slot or a USB card reader connected to your computer.
  • Step 2: Navigate to “Applications” > “Utilities” and select “Disk Utility”.
  • Step 3: Select the SD card
  • Step 4: Click the “Erase” button: This button is located in the top toolbar of the Disk Utility window.
  • Step 5: Choose a format named “FAT32″. Compatible with most devices, but has a 4GB maximum file size limit. AND “exFAT” Supports larger files than FAT32
  • HFS+: This is the default format for Mac drives but may not be compatible with other devicesĀ 
  • Step 6: Click “Erase”

Chromebook

  • Step 1: Insert your SD card into the SD card slot on your Chromebook.
    Step 2:Open the Files app
  • Step 3: Locate the SD card in the Files app
  • Step 4: Right-click the SD card to select the SD card driveĀ 
  • Step 5: Choose “Format device”
  • Step 6: Click “Erase & format” (or “Format”)

How to Format Memory Card on Camera

Digital Camera

You can easily format the memory card directly on your camera. Here’s a general guide on how to format SD card in Camera:

  • Step 1: Turn on your camera and access the menu settings.Ā 
  • Step 2: Navigate to the setup menu or settings. It might be represented as a briefcase icon.
  • Step 3: Find the format option. In some models of cameras, you may find it as:Ā 
    • Format (most common)
    • Format Memory Card
    • Memory Card Tool > Format
    • Initialize
  • Step 4: Select the memory card
  • Step 5: Confirm formatting

GOPro

You can do it by using the camera’s menu or using your computer.

Formatting Using the GoPro Camera (HERO5 and Later):

  • Step 1: Turn on your GoPro and insert the memory card.
  • Step 2: Access the GoPro menu by swiping down on the touchscreen.
  • Step 3: Find “Preferences”:Ā 
  • Step 4: Select “Format SD Card”: It might be directly labeled “Format SD Card” or under a sub-menu like “Storage.”
  • Step 5: Confirm Formatting

Why Does It Show ā€œCamera Can not Format the SD cardā€?

Why Does It Show ā€œCamera Can not Format the SD card-min

Here are the reasons that may cause the formatting failure:

  1. The SD Card may be write-protected.Ā 
  2. The low battery issue may cause this problem.Ā 
  3. The camera can’t read the card’s format. Try formatting to FAT32 on your computer.
  4. The SD card may be corrupted.

Format Write-protected Memory Card

Write-protected Memory Card, How to Format A Memory Card

Sometimes, it appears that the memory card is write-protected. In this situation, first, you have to remove the write protection.Ā I suggest you first unplug your memory card and look for a small physical switch in it. Check if the switch is in the “locked” position (usually down). If so, slide it to the “unlocked” position (usually up).

If there is no physical lock, gently rub on the pins of the SD card using an eraser. Then insert it again.Ā  If this solution does not work, use a card reader and try to insert it into other computers.Ā 

  • You can also use write protection removal tools such as AOMEI and EaseUs.Ā 
  • Removing write protection using Disk Management (Windows):
  • Open the Start menu and search for “Disk Management”.
  • Locate your memory card drive in the list.
  • Right-click the drive and select “Properties”.
  • Go to the “Security” tab.
  • Ensure the “Write” permission is allowed for your user account.

Using Command Prompt (Windows)

Type the following commands one by one, pressing Enter after each:

  • disk part
  • list disk (This will show a list of disks)
  • select disk N (Replace N with the number corresponding to your memory card)
  • attributes disk clear read-only (This attempts to remove write protection)
  • Type exit to close Diskpart.

How to Retrieve the Formatted Data?

How to Retrieve the Formatted Data

Well, it may happen that you have removed your important data during formatting the memory card. Do not worry. You can retrieve the deleted data.Ā 

However, there is no guarantee of retrieving the data in the same order. It depends on the previous storage occupancy of the card.Ā 

Here is How to Recover the Data

  • Using Data Recovery Software: There is a lot of data recovery software available in the market. You can download any of them and scan your memory card for traces of deleted files. These programs have varying degrees of effectiveness, and some may require purchase.
  • Professional Data Recovery Services: If the data recovery software can not give you a satisfying result, you can go to the companies that specialize in retrieving information from formatted storage devices. However, it may be expensive.Ā 

Final Thoughts

So, this is how to format a memory card on different devices. Here I have tried to provide you with generalized information on this issue.Ā  However, when you try to format your memory card, back up the important files. Also, do not format your memory at an excessive frequency. It will affect the cardā€™s performance.Ā 

Don’t Miss Out

FAQs | How To Format A Memory Card

Do I have to format a new memory card before using it?

Yes, it’s a good idea. When you get a new memory card, formatting it helps make sure it works smoothly with your device. It also clears out any stuff from before, so you start fresh.

What if my camera or phone can’t format the memory card?

If your device is having trouble formatting the card, try a few things. Check if the card has a little lock switch on it and make sure it’s not locked. If that’s not the issue, try formatting it with your computer instead. If all else fails, the card might be broken, and you might need some help to fix it or get your stuff back.

Show your love