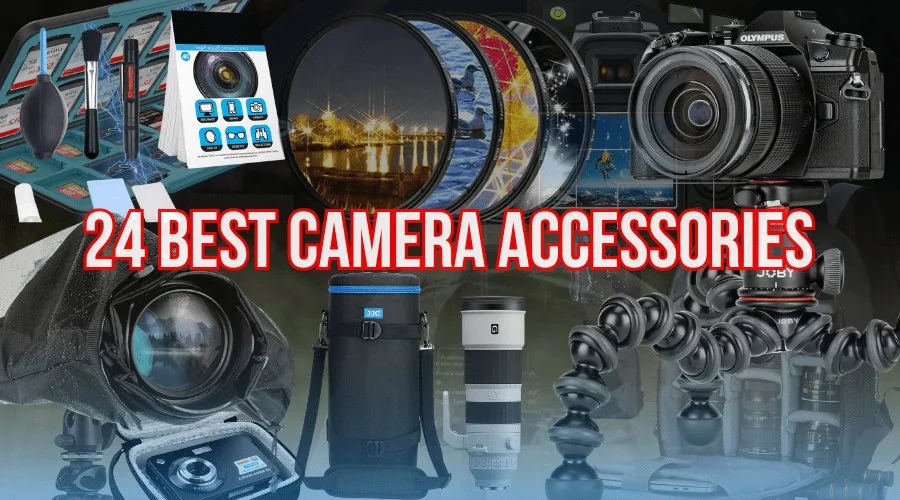
If you are not using the best camera accessories, you are missing many opportunities. Not only that, but you are also at high risk for your camera’s durability, photo or video quality, and lens safety.
I met a photographer, Claire, in Delray Beach, who had not bought her camera accessories and came there with only a camera and lens. She was capturing stunning photos and videos. My friend and I had seen her work and were impressed, so we had also done a photo session.
Suddenly, it started to rain, and we were extremely happy because we could capture a few photos in the rain. But Claire felt worried because of the waterproof bag or lens protection. We had lost the amazing rainy weather and tried to protect her camera and lens.
Good luck! Within a few minutes, the rain had stopped, and the photographer found something special on the lens. She found raindrops that might add additional beauty to photos. We had tried, and yes, we were pleased to see those pictures of us with raindrops.
As a photographer, you may feel the importance of the best camera accessories for safety. Also, many accessories are available to improve the quality and provide other benefits. In this article, you are going to learn all about the best gadgets and accessories for cameras in 2025.
5 Best Camera Accessories for Safety
It is most important to keep your professional camera safe. But after your best try, it still scratches or has other problems. Don’t worry, a few accessories can help you protect from thieves, bad weather, and other issues. Bags with locks, special straps, and GPS trackers help against theft. Rain covers, lens hoods, and UV filters shield your camera from rain and other issues.
1. Camera Rain Cover | Photography Accessories Kit
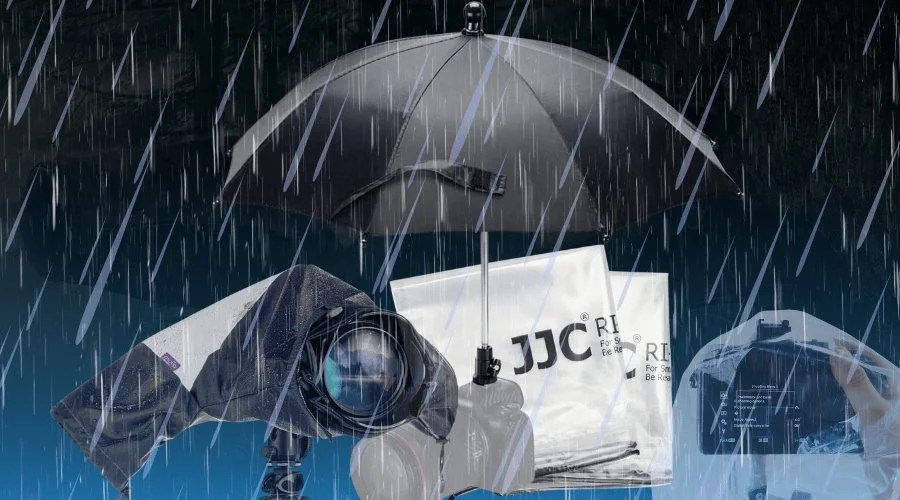
The Rain cover is one of the most important accessories for your professional camera. Because you don’t know when it starts to rain. If your clients ask for a rainy photograph, you can’t shoot without having a camera rain cover. You must have the rain cover when you are planning for outdoor photography.
Best Camera Rain Covers in 2025
- Our 1st Choice: Altura Photo Waterproof Rain Cover for DSLR Cameras
- Our 2nd Choice: Umbrella Rain Cover Protector Sunshade
- Our 3rd Choice: 2 Pack Camera Lens Rain Cover Raincoat Clear Sleeve Protector
Remember that you have to choose your rain cover based on the model of your camera. So that it perfectly fits with your camera and you feel comfortable with the camera cover.
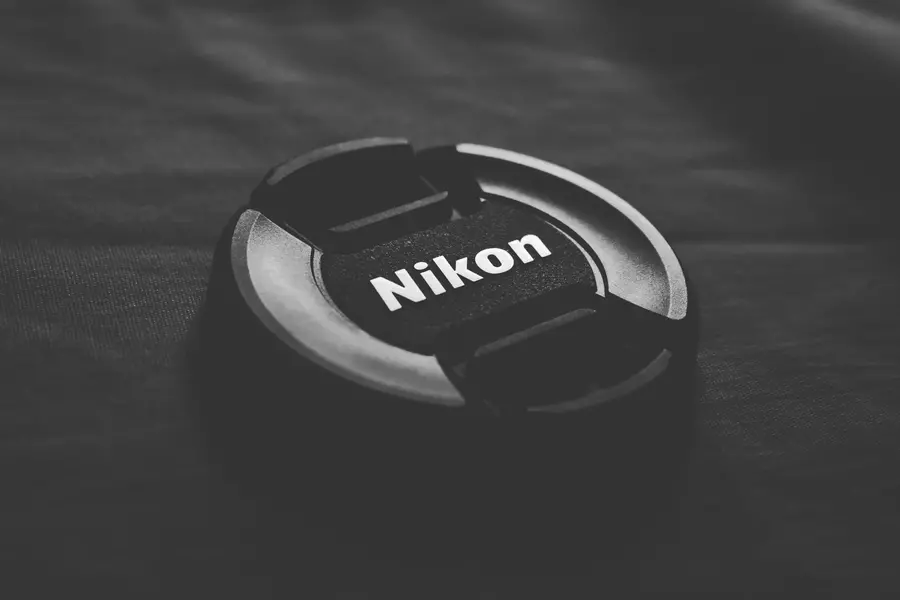
2. Camera Body & Lens Cap or Lock
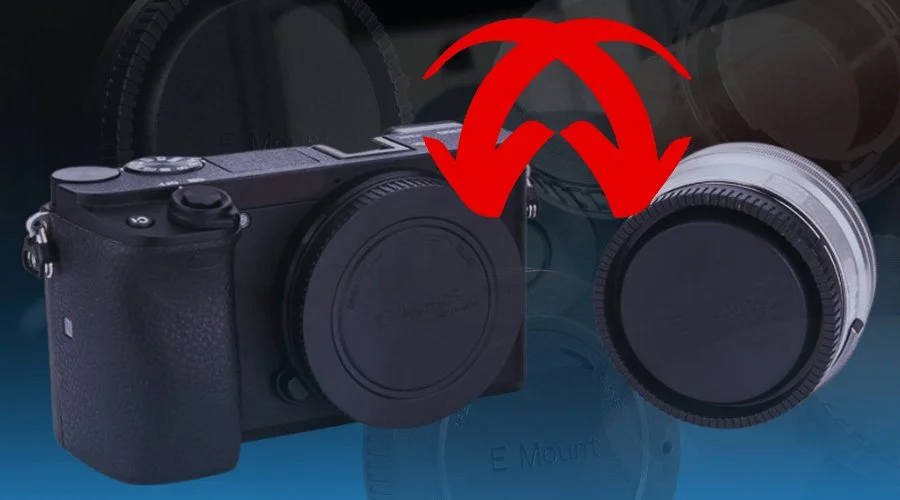
Camera Body & Lens Lockers are the best camera accessories to save your camera from dust. Also, it can help to reduce the chances of scratches on your camera. It keeps your camera body and lenses safe from sand or bad stuff, especially when you are a beach or street photographer.
Best Camera Body & Lens Locker
- Our 1st Choice: ULBTER Front Body Cap and Rear Lens Cap Cover
- Our 2nd Choice: Sony ALCB1EM NEX Body Cap Black for various models
- Our 3rd Choice: JJC E-Mount Body Cap & Rear Lens Cap Cover Kit
Check the compatibility of your camera and lens model before buying any cap. If it isn’t compatible with your lens or camera body, it will not be worth to prevent scratches on these sensitive places. So be careful about it.
3. Lens Hood to Prevent Sunlight | Best Camera Accessories for Canon
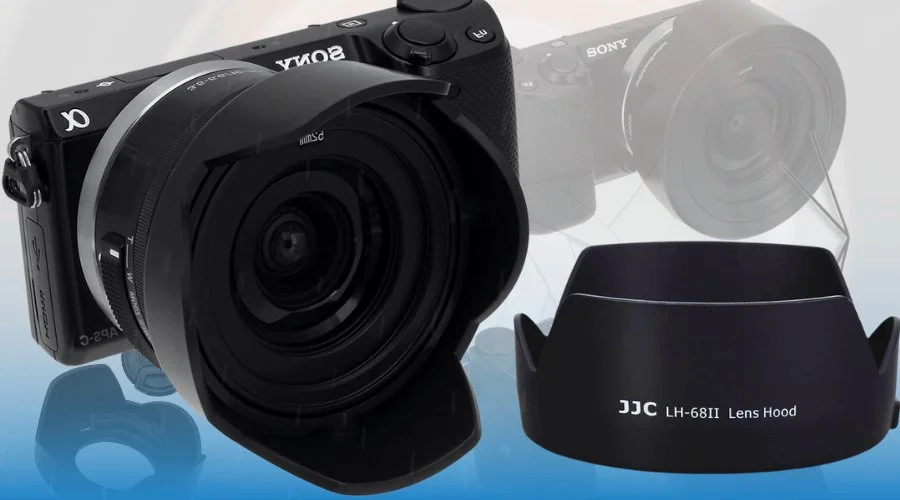
A lens hood is a must-have accessory for outdoor photographers. Even sometimes it can help to capture better photos indoors also. It prevents the extra light on your subject. That’s why your photo’s color gets original and deep, which looks awesome.
Also, the lens hood works like a lens cap. It can prevent any accidental bumps or scratches to the lens. So a Lens Hood is one of the best camera accessories to keep your lens safe. And prevent sunlight that boosts your photograph quality and color.
Best Lens Hood for Your Camera in 2025
- Our 1st Choice: 50mm Reversible Lens Hood for Canon EF 50mm f/1.8 STM Lens
- Our 2nd Choice: Fotodiox Reversible Lens Hood Kit for E-Mount for Sony
- Our 3rd Choice: JJC Camera Lens Hood Shade Fits for Canon
We have listed here three designs for various models of Canon cameras & Sony E. But if you are a user of other brands, don’t worry, you can easily find out on Amazon.
4. Screen Guard Shield for Camera
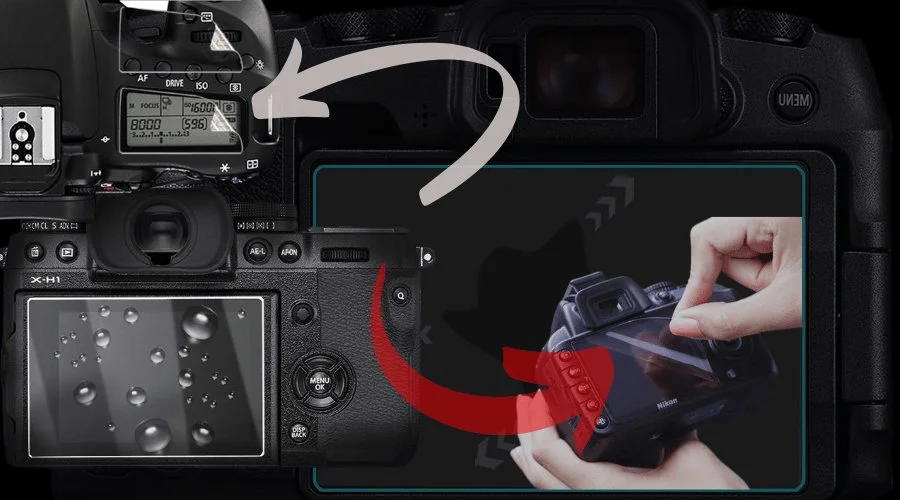
The display screen and the camera screen of a camera are both the most sensitive spaces. If those get spots or scratches, it might affect your photography. So the right maintenance and sincere use of the screen is mandatory. But we can’t do it every time. Especially if it is about outdoor, travel, street, or beach photography. These screen guards keep safe from any accidental cases for your camera.
Best Screen Guards for Your Camera
- Our 1st Choice: Crystal Clear Screen Guard for Fuji film X100V Camera
- Our 2nd Choice: Crystal Clear Screen Guard for Sony A7R IV
- Our 3rd Choice: Glass Screen Guard Compatible for Canon EOS & Digital SLR
Remember these things in your mind before buying a screen guard for the back or front part of the camera. First, specify the size of the screen guard of your camera model. Second, the screen quality of the guard shield. Ensure the screen guard will not affect your photo quality and viewfinder.
5. Water-Resistant Memory Card Case
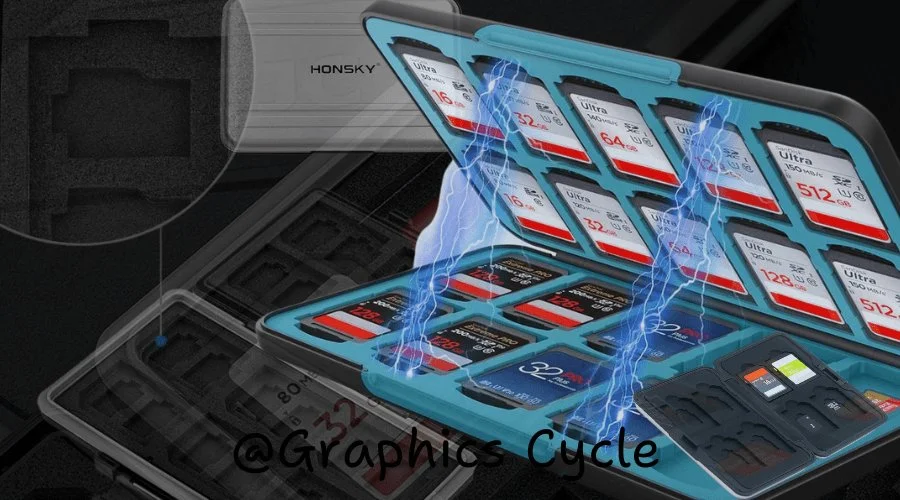
The size of memory is generally small, but it is one of the most important assets for a photographer. Because everything is stored in this memory. If you lose your memory, that means you have lost your career. It is not only about your memory card, but it is also your client’s life memories, which are most important.
Most of the time, you may need to use multiple memory cards for different types of photography. If you put these in your bag normally, they might be broken or possibly lost. So use the best camera accessories and memory organizer.
Best Memory Case or Memory Organizer
- Our 1st Choice: JCC 36 Slots Memory Card Case Water-Resistant
- Our 2nd Choice: HEIYING Memory Card Case for SD Card and TF Card
- Our 3rd Choice: Honsky Aluminum SD Micro SD SDHC SDXC TF Memory Card Case
You can choose any one of these three top-rated memory organizer cases in 2025. You can use these for a long time to keep your memory card safe.
These 5 camera safety accessories are a must-have for a professional photographer. If you are a professional photographer, you must try these useful accessories so that your camera looks brand new.
5 Best Camera Lens Accessories in 2025
Photographers know the value of a lens for their profession. A lens can add extra value to photographs and make photos stunning. But the problem is, sometimes its price might be higher than a camera. So the right maintenance is a must for this important and costly camera partner.
There are a few accessories for lenses that can help us to clean and keep better condition of the lens. Here are the 6 best camera accessories for lenses in 2025.
1. Lens Cleaning Kit for High-Quality Images
Lens cleaning is very important to capture dust-free and fresh photos or videography. Some photographers use their shirts, clothes, or paper to clean the lens. But it can harm your lens, so you need to use a professional lens cleaner and clean it.
However, you can easily find a lens cleaning kit or microfiber clothes to clean it. It doesn’t break the bank; you need to spend a bit on a tea or a coffee.
Best Cleaning Kits for Professionals
- Our 1st Choice: Lens and Screen Cleaning Kit: 2X Cleaning Spray & 2X Microfiber Cloth
- Our 2nd Choice: 15 Pack of Microfiber (6”x7”) Cleaning Cloths
- Our 3rd Choice: Carson Stuff-It Pro 8.0” x 8.0′ Microfiber Lens Cleaning Cloth
Recommend checking Walmart, besides Amazon, for better quality microfiber clothes. Before using a microfiber cloth, ensure its softness. Otherwise, it may cause scratches on your camera lens. So be careful about it.
2. Eco-Fused Camera Lens Pouches Bag
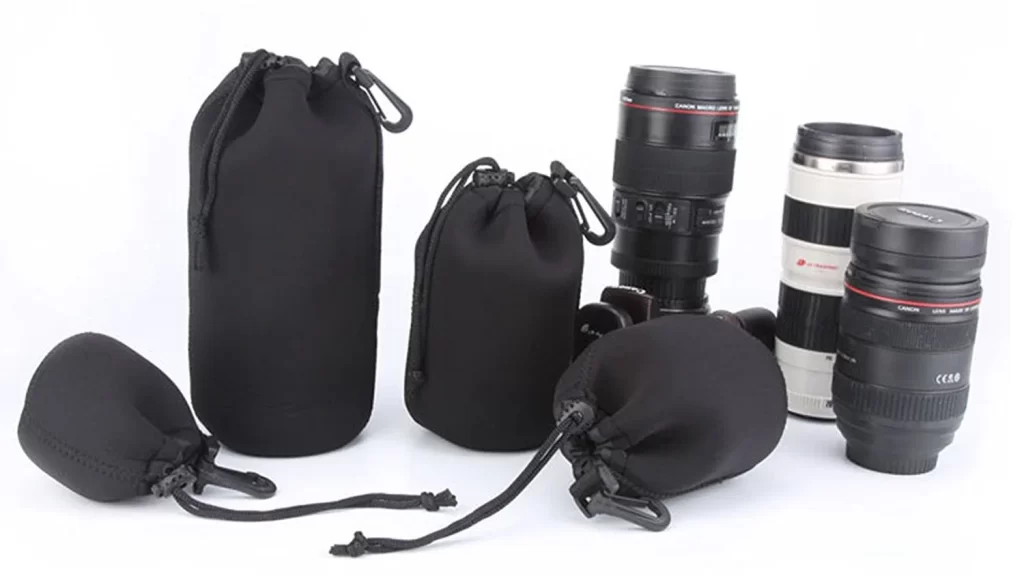
A Camera lens pouch bag is one of the best camera accessories for your lens. It can protect the lens from any dust. Not only that, but it can also help to clean your lens with the built-in cleaner. So if you have a lens pouch bag, you don’t need any additional cleaner for your lens.
Best Eco-Fused Camera Lens Pouches Bag
- Our 1st Choice: Magic Fiber Microfiber (3 Pack) Camera Lens Pouches
- Our 2nd Choice: Soft Interior GEAR FlexARMOR-X Large Lens Case Pouch
- Our 3rd Choice: 4 Pack Eco-Fused Microfiber Lens Cloth Bag & Pouches
These environmentally friendly pouches are used for keeping your camera lens and other accessories safe and clean. Also, it is not harmful to the planet, so enjoy the photography.
3. Camera Lens Cap Keeper/Holder
We have already informed you about the camera or lens cap in the ‘safety’ section above. But these lens caps are missing, which is a common problem for photographers. That’s why we have found a solution for you to never lose your lens cap again.
A camera lens cap holder can keep your lens cap safe. You don’t need to worry about it again. This is one of the best camera accessories for those who have lost lens caps. This tool can hold your cap, even if you are shooting.
Here are the 3 Best Camera Lens Holders
- Our 1st Choice: Altura Photo Tether/Lens Holder 5 Pcs Lens Cap Keeper
- Our 2nd Choice: Foto&Tech Camera Lens Cap Keeper Holder
- Our 3rd Choice: 52 mm Front Lens Cap Cover & Deluxe Cap Keeper
Here are the three most popular cap holders for camera lenses in 2025. You can choose anyone from these holders, which are compatible with your camera lens.
4. UV Protector Filter for Lens
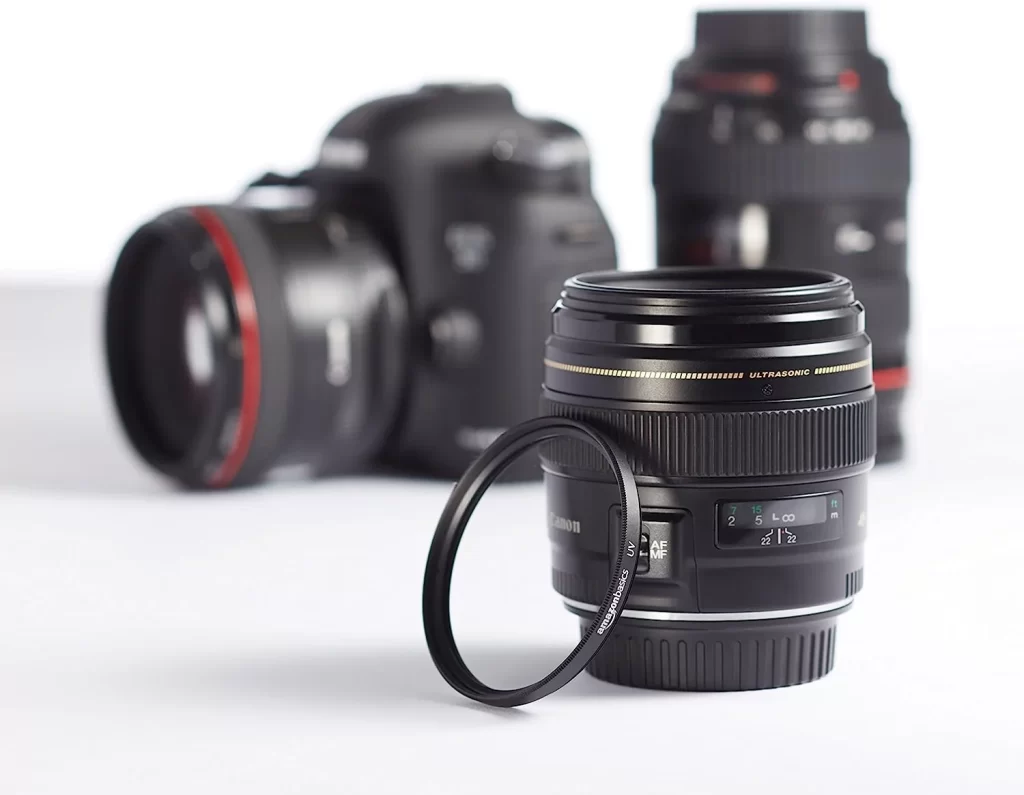
UV Protector Filter for Lens is a must-have accessory for outdoor photographers. When the harsh sunlight shines on the camera’s lens, it can ruin your good photos. Even these protectors can help you capture the best photos indoors, without any natural light.
However, it doesn’t matter if you are an indoor or an outdoor photographer; if you don’t have a UV filter, you must have it.
Best UV Protector Filter for Lens
- Our 1st Choice: Amazon Basics 72 mm UV Protection Camera Lens Filter
- Our 2nd Choice: Tiffen 67 UVP 67 mm UV Protection Filter
- Our 3rd Choice: K&F Concept 67 mm MC 28 Multi-Layer Coatings UV Protection Filter
Remember that you don’t need to use it. Observe the condition of the Ultraviolet lights and use these UV protector filters.
5. Auto Focus Camera Lens Mount Adapter
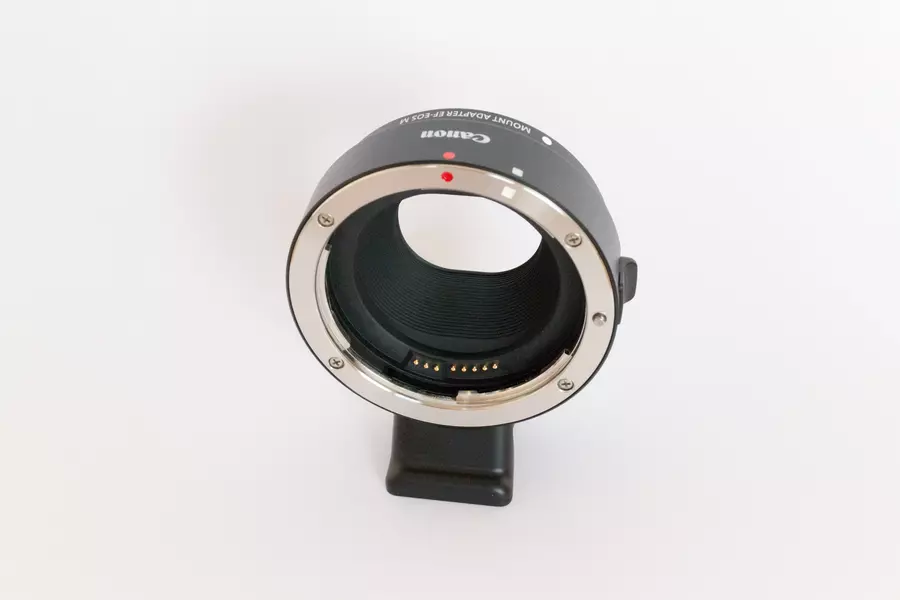
The lens mount adapter is one of the best camera accessories for a professional photographer. A professional photographer needs to use different lenses for various photography. So if your camera isn’t compatible with the best lens for photography, you can’t capture it. Then the client will not like your photography.
These mount adapters can help you in this situation. They will provide you with the compatibility of various lenses. Additionally, you can use the autofocus feature with these lenses.
Best Camera Lens Mount Adapter
- Our 1st Choice: Canon EF-EOS R Compatible Mount Adapter
- Our 2nd Choice: EF-EOS M Lens Adapter & Auto-Focus Lens Converter
- Our 3rd Choice: K&F Concept Lens Mount Adapter for Canon EOS (EF/EF-S), Olympus Pen, and Panasonic Lumix Cameras
Remember that most of the lens mount adapters are compatible with Canon and Nikon Cameras. So, ensure the adapter is compatible with your camera before purchasing it. Though its price is a bit high, it will be worth it. Because it will give you the best lens-compatible options for your best photography.
5 Best Camera Accessories for Better Lighting
A studio photographer or a photographer who needs to capture photography at night knows how important lighting is for a good image. There are a few lighting accessories like flashlights, diffusers, reflectors, and more.
As a professional photographer, you must have these lighting accessories. They help to produce better photographs. These are very helpful for perfect lighting images. Now we will see some essential lighting accessories for a camera that help to take the best photos.
1. External Flashlights, Flashguns, & Speed Lights
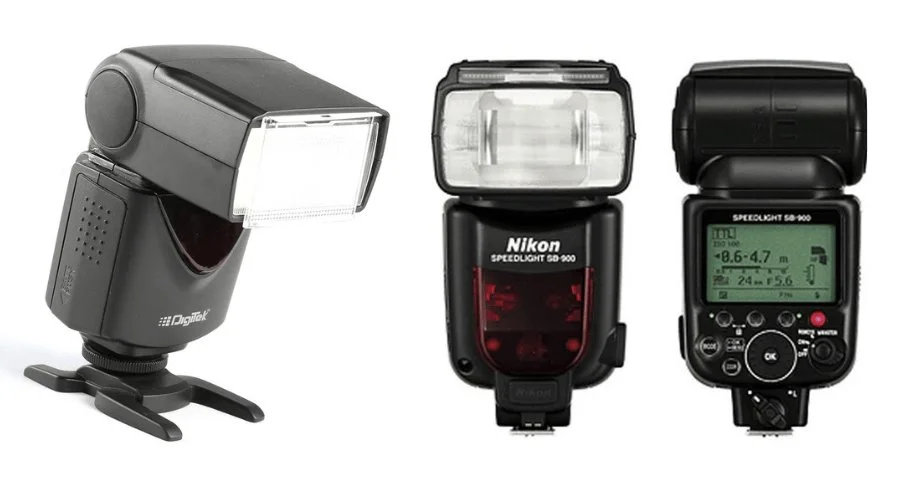
External flashlights are the most useful and best camera accessories for a studio. Not only about studio, indoor, wedding, even, and night photography also requires an external flash. When you face the challenge of low light, an external flash helps to prevent it.
Sometimes you may have heard about the speed light or Flashgun Zoom lights. These are also the same (External Flashlight) but differ in branding only. Nikon and Canon named their external flashlights “Speedlight”. But it is not different from usual flashlights. Let’s see some special external flashlights for 2025 to make your photos awesome.
Best External Flashlights or Speed lights
- Our 1st Choice: Neewer TT560 Flash Speedlight for All Brand DSLR Standard Hot Shoe
- Our 2nd Choice: PHOTOOLEX FK300 Camera Flash Speedlite for Digital Cameras
- Our 3rd Choice: Altura Camera Flash W/LCD for DSLR & Mirrorless Cameras
These 3 external flashlights are the most popular and handy, easy to carry, and compatible with all cameras. Most people like these cameras on Amazon. Graphics Cycle has covered the 15 best Action Camera Flashlights to boost your lighting for photography.
2. Speed Light Flash Diffuser
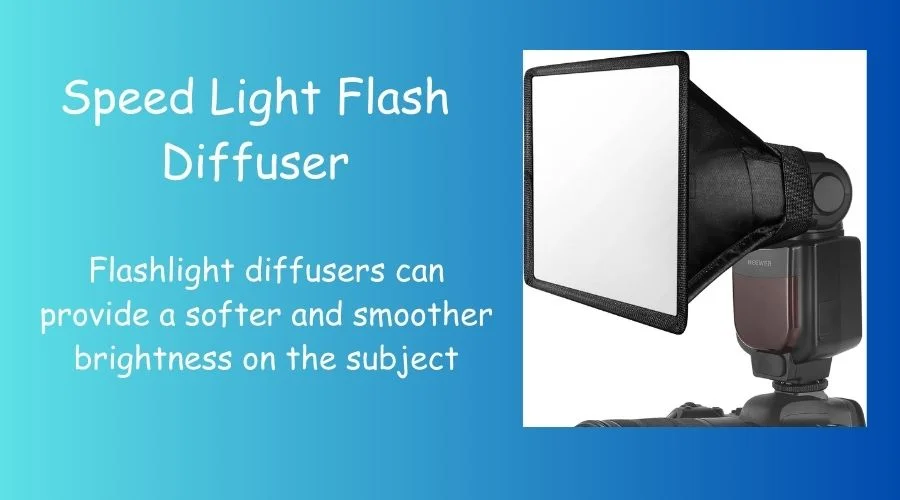
The harsh light from an external flashlight can burn your subject’s skin in the photograph. So you need to provide a light in a softened way from your external sources. Direct light from the speed light can’t provide able to provide a good picture. So use the best camera accessories for your perfect lighting.
Flashlight diffusers can provide a softer and smoother brightness on the subject. That’s why pictures of flash diffusers look better than other pictures. As a professional photographer, you just need to use a flash diffuser for your flashlight.
Best Camera Accessories Flash Diffusers in 2025
- Our 1st Choice: Altura Photo 6×5” Flash Diffuser Light Softbox
- Our 2nd Choice: Neewer Universal Soft Mini Flash Bounce Diffuser
- Our 3rd Choice: Godox AK-R11 Dome Diffuser for Godox Flashlights
These all are best for providing a softer and smoother brightness on the subject of your camera’s focus. So having a flash diffuser is worth it to improve your photography skills and professional career.
3. Flash Trigger | Best Accessories for Camera
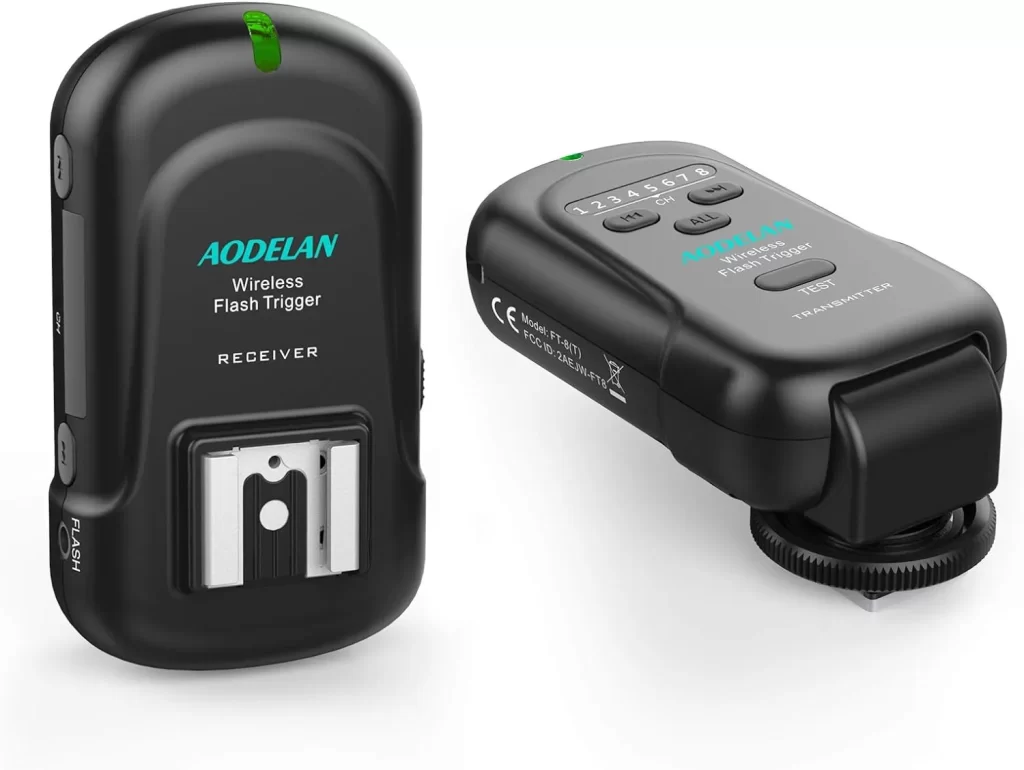
Flash trigger is a useful tool for photographers. The tool ensures your camera and external flash work together perfectly. The trigger commands the flash when it needs to turn on or off. So that your photo’s subjects get the best brightness. You can capture very beautiful pictures even in low-light conditions.
However, there are different types of flash triggers, like with wires or without (wireless). The latest version of wireless ones uses radio signals to connect the camera and flash. It is easier to use than older versions. If you’re in a studio or outside, a good flash trigger helps you control the light. And finally, it will give you better-looking pictures.
Best Camera Accessories Flash Trigger for Better Lighting
- Our 1st Choice: Godox Xpro-C TTL 11 Customizable Functions Wireless Flash Trigger
- Our 2nd Choice: Neewer 3 RECEIVERS 16-Channel Wireless Flash TRIGGER
- Our 3rd Choice: AODELAN Transmitter and Receiver Wireless Flash Trigger
These are the best quality wireless flash triggers for you. If you want to get one to enhance your perfect lighting, you can buy a compatible trigger on your camera.
4. Light Reflector Disc for Better Photography
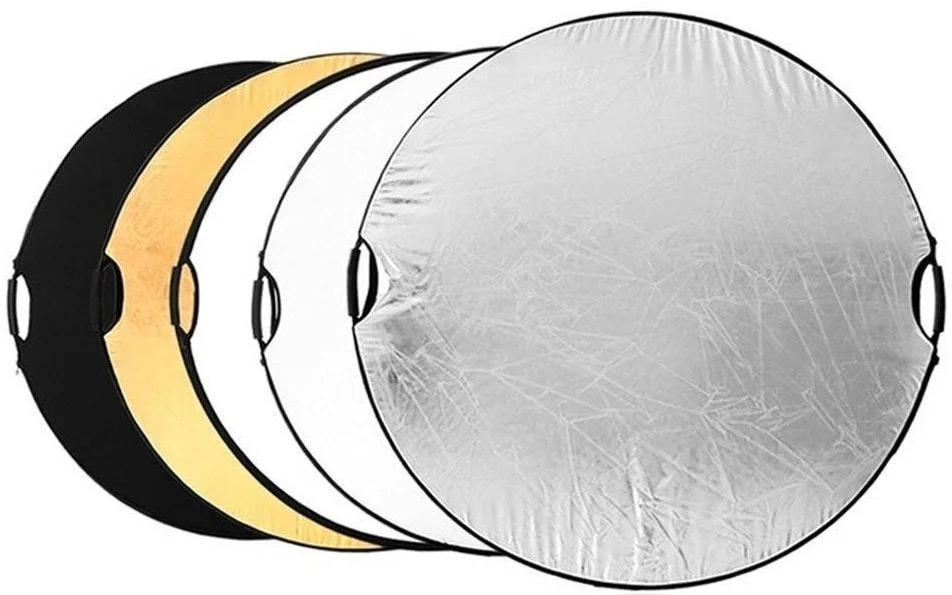
The Light Reflector Disc is a cool hack to warm up, sharpen, lighten up, and more for indoor photography. There are a lot of reflector discs available in various colors. And all of these colors have different uses. Such as the golden-colored reflector disc used to warm up the picture. And the silver color to increase contrast.
Best Light Reflectors for Better Photography
- Our 1st Choice: NEEWER 43 Inch/110 CM Multi Disc with Bag Light Reflector
- Our 2nd Choice: NEEWER 24″x36″/60x90cm Light Reflectors for Photography
- Our 3rd Choice: 24x35inch Photography Light Reflector with Clip 5 in 1
These are the best camera accessories to boost your lighting on the subject. So you must have a set of light reflectors in your studio.
5. Camera Flash Stand | Best Camera Accessories for Photography
The flashlight stand is important to hold the flashlight and focus on the subject. It is like a tripod for your flashlight to stay stable. Without a stand for your flashlight, it is very hassle. So if you are a professional photographer, it is mandatory to use a flashlight stand.
Here are the 3 Best Camera Flash Stands for Perfect Lighting
- Our 1st Choice: Neewer Professional Universal Type E Camera Flashlight Mount Stand
- Our 2nd Choice: Anwenk Camera Flash Speedlite Stand Bracket Umbrella Reflector Holder
- Our 3rd Choice: Anwenk Camera Flash Stand Flash Speedlight Hot Shoe Mount Stand
We have randomly selected the best 3 camera flashlight stands for your studio. But you may need a specific large, medium, or small-size flashlight mount stand. However, any flashlight stand is available on Amazon; you can search there.
5 Best Camera Accessories for Cleaning and Maintenance
Cleaning and maintaining your camera, lenses, and all accessories is significant to getting better pictures. Especially, the lens and screen are the camera’s most important and sensitive parts. Because they directly impact your photoshoot. If your lens has dust and is not cleaned well, it can’t provide good images.
However, cleaning and maintenance are a must to get the best performance from your lens. Also, it is crucial for durability, better performance, and longevity. Here, we have discussed cleaning and maintaining the camera, lens, and other accessories.
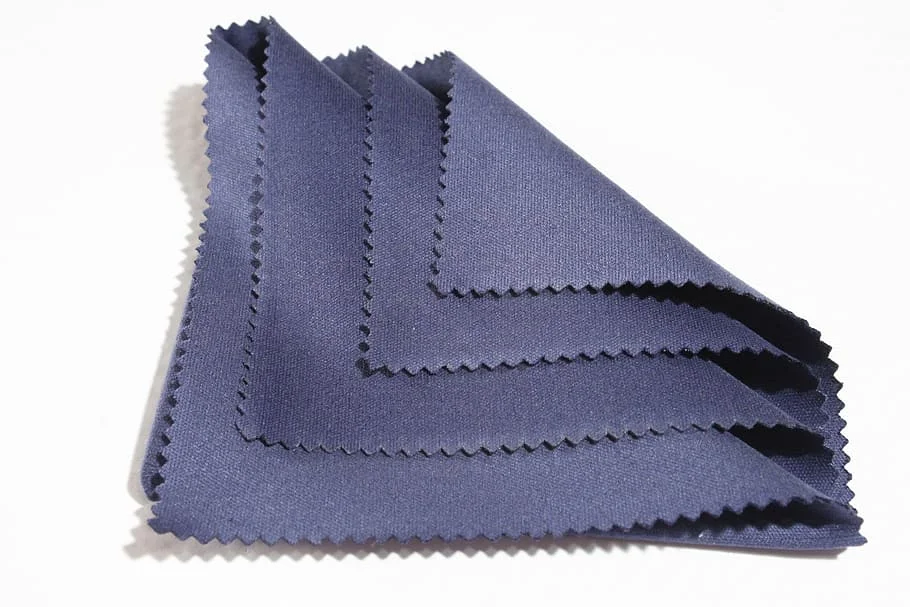
1. Lens & Screen Cleaning Spray with Microfiber Clothes

There has been a popular way to clean a camera lens and the screen in recent years. Two materials you will need to clean your camera lens with this method. The first one is fiber clothes, and the second one is lens cleaning spray.
First, you need to clean the screen and lens as much as possible. Then, apply a few drops of spray on the screen and the lens from your cleaning spray bottle. Finally, clean with a lens microfiber cloth. This is one of the best camera accessories to get a dust-free camera and lens.
Best 3 Camera & Lens Cleaning Spray
- Our 1st Choice: Koala Lens Cleaner Spray (2 Cleaner Spray & 2 Microfiber Clothes)
- Our 2nd Choice: ZEISS Lens Cleaner Kits 2 Bottles of Lens Spray, 2 Microfiber Cloths
- Our 3rd Choice: Crizal Lens Cleaner Spray with Microfiber Cloth
Be careful about the lens spray and clothes quality because it can be harmful to your lens glasses. We have suggested these three for you, with high quality and the most popular in the USA.
2. Camera Sensor Cleaning Swabs
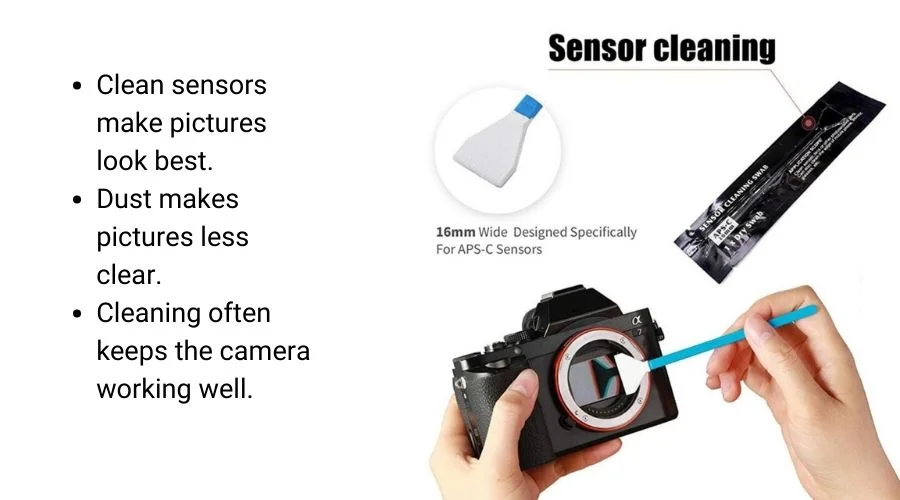
The Camera Sensor is another sensitive place for a camera. If it is clear, you can take fresh pictures. So, it is crucial to have a fresh and clean camera sensor. But is it okay to clean your camera sensor with your t-shirt, shirt, any normal clothes, or a normal tissue? No, you have to clean the camera sensor with the professional sensor kit. Specially designed for cleaning your camera sensor cleaning swabs.
Best Camera Sensor Cleaning Accessories:
Camera sensor cleaning swabs are very useful for cleaning the sensor of your camera. You may wonder why we have included only one camera sensor cleaning swab. The Graphics Cycle never compromises on quality. For this reason, you have limited options here.
3. Lens Pen | Best Buy Camera Accessories
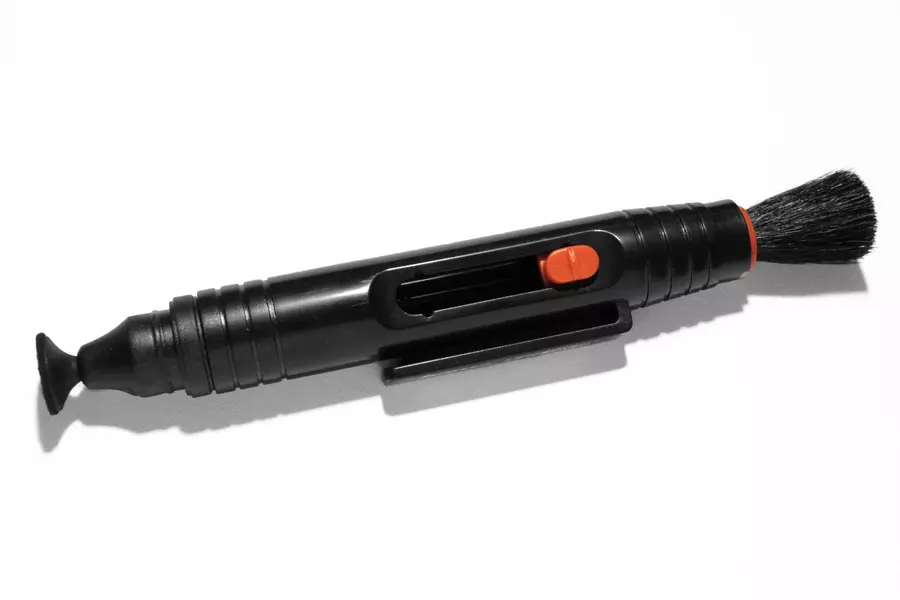
Lenspen is a tool for cleaning the camera lens. When you use a spray and a cleaning cloth, it might take a bit of time to dry the spray. But if you use this pen, you can capture it again immediately. This lens pen is one of the best camera accessories for your outdoor photography.
Best Lens Pen in 2025
- Our 1st Choice: LensPen NLP-1 Black
- Our 2nd Choice: LensPen Official Websites
- Our 3rd Choice: LensPen DSLR Pro Camera Cleaning Accessory
Additionally, you will have a small brush on the opposite side of the pen. The cool design, cleaning flexibility, and simplicity make this pen the best gadget for a camera.
4. Best Camera Air Blower
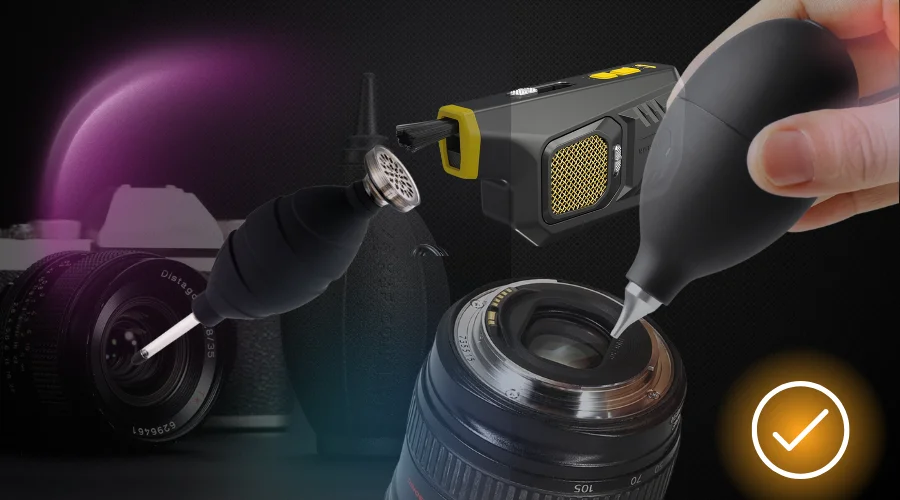
The air blower is another tool for cleaning the lens and camera. When your camera’s mirror or the lens becomes dirty, you can clean it with the help of an air pressure system. In reality, to clean the lens or camera, you have to hold it at 45 to 45-degree angle, then pump the air blower from the other hand.
Best Air Blower for Camera Lens
- Our 1st Choice: Zeeion™ FlexoNozzle anti-static bulb blower for digital camera sensor
- Our 2nd Choice: K&F Concept Air Blower for Digital Camera Lens, DSLR, SLR
- Our 3rd Choice: Soft Tip Silicone Air Blower Pump Dust Cleaner with Micro Fiber Cleaning Cloth
It will clean the lens or mirror of your camera with the help of air. So you don’t need to worry about any scratches or any issues in the cleaning process.
5. Camera & Lens Cleaning Kit: All-in-One Package
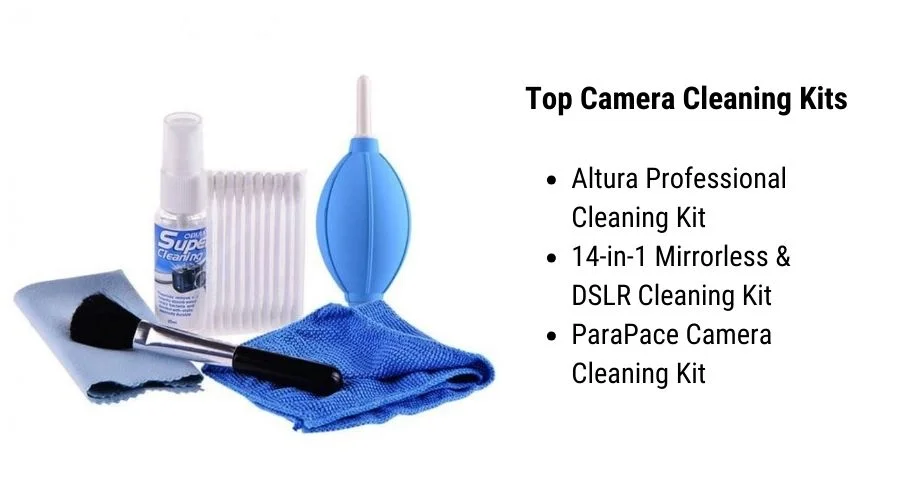
These are the best camera accessories for cleaning your camera. But this cleaning kit is a special one for them. Because you will have all your cleaning materials within this one package. Some of these cleaning toolkits have 14 or even more cleaning accessories within one pack. You don’t need to worry again about your dirty and dusty camera. Now it will be fully enjoyable.
Most Favorite Cleaning Kits For Camera and Lens
- Our 1st Choice: Altura Professional Cleaning Kit for DSLR Cameras & Lens
- Our 2nd Choice: 14-in-1 Mirrorless & DSLR Camera Lens Cleaning Kit
- Our 3rd Choice: ParaPace Camera Cleaning Kit Swabs/Lens Pen/Air with Waterproof Case
We have covered here the 5 most useful camera cleaning accessories. But you don’t need to buy all of these. If you purchase the “number 5: Camera Cleaning Kit, All in One,” you will get everything in this package. Don’t miss out on this chance to boost your photography to the next level with a clean camera and lens.
4 Best Miscellaneous Camera Accessories
Every photographer has a goal to take great pictures for their clients. But it is not possible without having a few must-have accessories. We have discussed different topics above; here we have listed the 4 best miscellaneous camera accessories. Let’s take a look at these useful accessories.
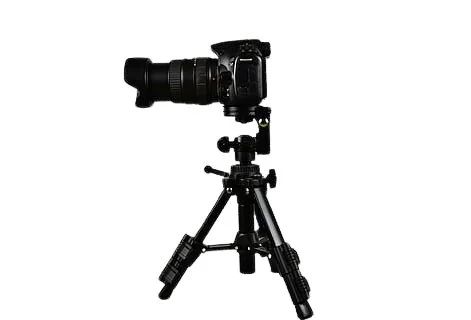
1. Tripod | Best Camera Accessories Amazon
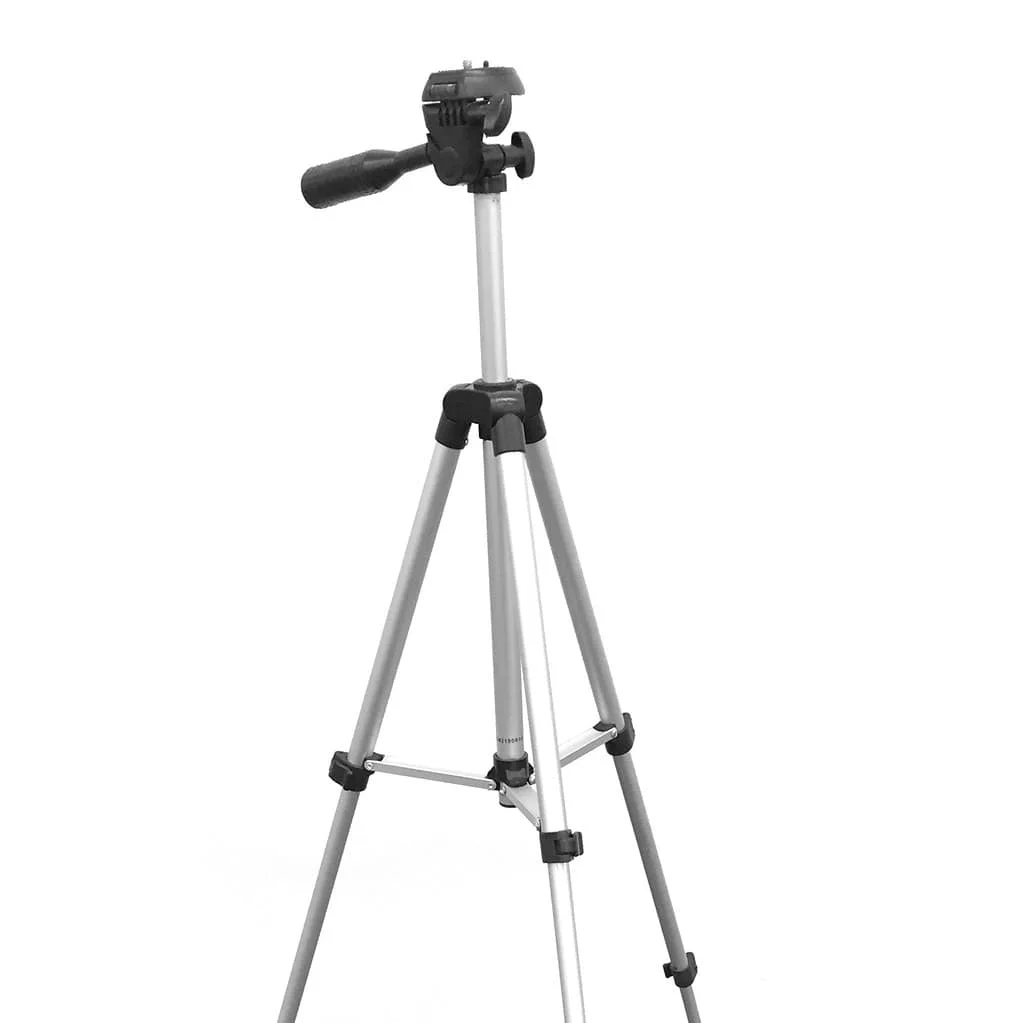
It doesn’t matter where you are doing photoshoots, a tripod is a must for every photographer, even if you are a beginner. This is one of the best camera accessories for professionals. The tripod locks the camera to a stable position and takes steady photos. It is very popular among all types of photographers who are professional. Remember that sometimes using a gimbal is better than using a tripod.
Best Tripods to Use in 2025
- Our 1st Choice: JOILCAN 74″ Tall Camera Tripods Stand for Professional
- Our 2nd Choice: SmallRig 16″ to 71″ Foldable Aluminum Camera Tripod
- Our 3rd Choice: RAUBAY 70.8” Professional Heavy Duty Aluminium Camera Tripod
There are a lot of tripods available in the market for various photographers. Short, Long, small, large, aluminum, steel, and a lot of variety you will find on Amazon. However, choose any one specific tripod based on your requirements and choice, Such as Best Travel Tripods.
2. Camera Battery Replacement Grip
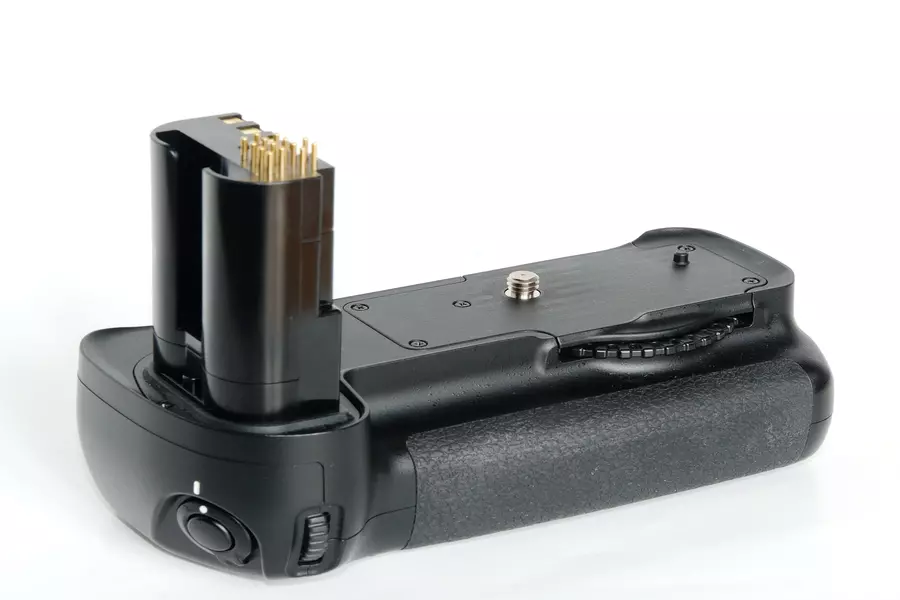
If you are an outdoor photographer, you must be worried about the charge of the camera. Imagine that you are on a beach, and there are a couple who want to photoshoot. You have done your session, and they liked your job.
Now, a few couples or groups of friends want to take pictures with your Camera. But you have no charge on the battery of your camera. What will happen? You will miss highly interested clients and your professionalism.
Get Rid of Charging Problems on Your Camera
- Our 1st Choice: Neewer Battery Grip Replacement 2 Pieces Li-ion Batteries
- Our 2nd Choice: NEEWER Battery Grip with Shutter/Function Buttons & 6 PCS AA Batteries
- Our 3rd Choice: Neewer Replacement Battery Grip for Canon EOS SLR Cameras
These Neewer battery replacements and charging grip can help you to use your camera for an unlimited time. You don’t need to worry about the charge of the camera. That’s why we have considered this gadget as one of the best camera accessories for photographers.
3. Professional Camera Accessories, Bags, or Camera Case
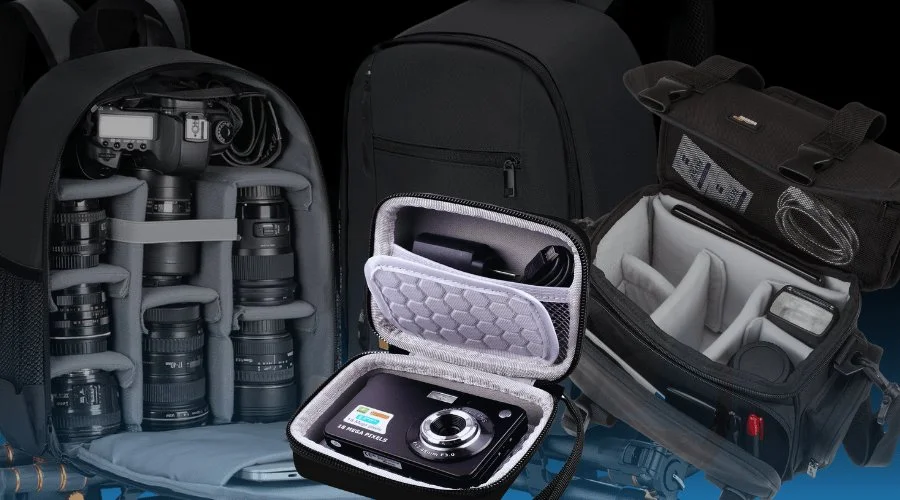
A professional backpack or small camera case is a must for your camera’s safety. It depends on your choice between these two types. The camera case is only for the camera’s safety, but the large-sized bag or backpack is best for carrying all accessories with the camera.
If you choose to buy a camera case, you can carry the camera easily, but you have to carry another bag for accessories. On the other hand, if you pick the professional backpack, you can carry your camera, lens, memory card, battery, and other accessories.
Best Camera Accessories Case or Camera Bag
- Our 1st Choice: Basics Large DSLR Gadget Bag
- Our 2nd Choice: TARION Professional Camera Backpack Bag Small
- Our 3rd Choice: AbergBest Protective Case for Digital Camera
When you need to travel for photo or videography, then you should buy a backpack or a large bag. Otherwise, if you are a studio photographer, then you can buy a simple, small-sized camera-fit bag.
4. Camera Strap | Best Camera Accessories Amazon
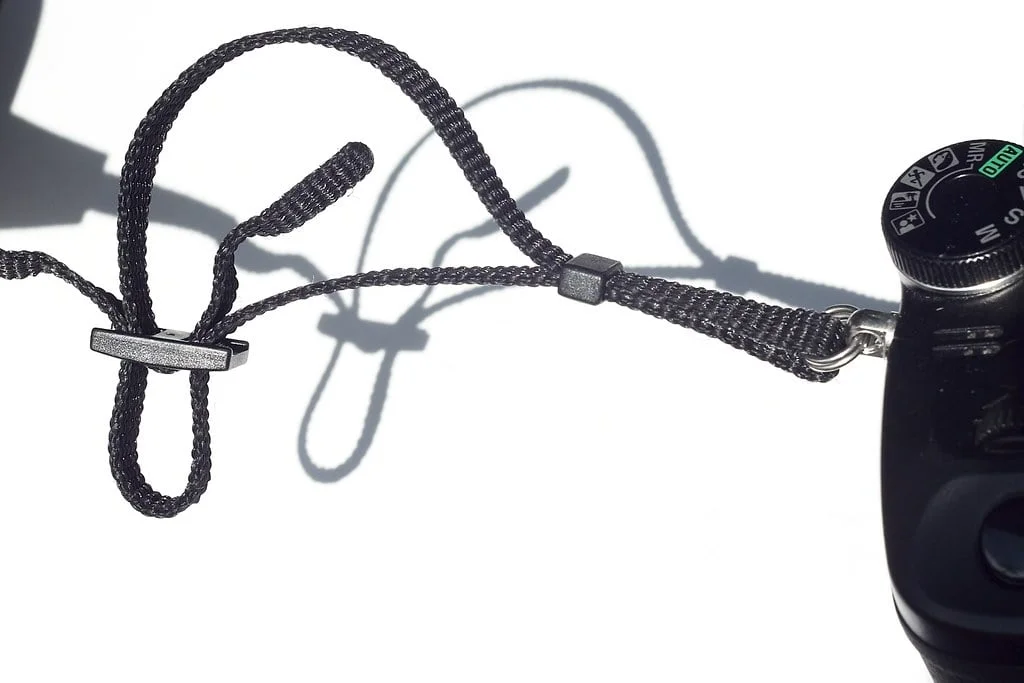
A camera strap helps a photographer capture great photos by providing comfort to grab. When you wear the strap around your neck or your shoulders, you look more professional, and you feel more comfortable. Not only that, but people also consider identifying you as a professional photographer. If you want to increase your style, you can use a stylish strap to add it.
Best Camera Straps for Photographers
- Our 1st Choice: Waka Rapid Adjustable Camera Neck Strap
- Our 2nd Choice: MegaGear Genuine Leather Camera Shoulder or Neck Strap
- Our 3rd Choice: Altura Rapid Fire Photo Camera Hand Strap
Choose any camera strap that can help you to grab the camera and also ensure the look is stylish. Enhance your photography confidence and get more clients.
These 4 best camera accessories that you need to use to enhance overall photography performance. Hope you have found the helpful piece in this list of the top miscellaneous accessories in 2025. Now enjoy two special tips for free for staying in a safe zone.
Bonus Tips: Utilize Free Tools to Improve Photography Skills
In this digital age, you have to utilize the internet to explore trends and creative ideas. Especially, use Instagram and analysis photos that which types of photos that are trending. Also, you can use other photo-sharing sites, depending on your niche. Let’s take a look at other free resources to utilize them.
Cloud Storage Services

Besides the best camera accessories for your profession, if anyone asks, what is the most important asset for you? What will be your answer? It should be the “Memory Card”. Yes, the memory card is one of the most valuable parts of the photographer’s profession.
However, there are a few problems with a physical memory card. It is not compatible with all devices, so you can’t share your photos easily. Another issue is that you can’t access previous/old pictures. So we recommend using Online Cloud Storage Services like Google Drive or Dropbox. You will have huge storage, share any file with one click, access from any device, and more beneficial features.
GIMP Photo Editor Software
Just taking pictures is not enough to deliver these photos to your clients. If you want to fulfill the client’s expectations, you have to edit their photos. Because raw pictures are not attractive, clients expect better from a professional.
So, you can use Adobe Photoshop or Lightroom to edit photos. But this software is not free; you have to pay to get it. Maybe you do not have enough ROI to purchase this paid premium software. So go for alternative free options.
GIMP is a free and the most strong photo editing tool called the GNU Image Manipulation Program. You can change colors, add filters, and create cool graphics without paying anything. It’s easy to use, whether you’re just starting or already know a lot about editing. GIMP can help with things like fixing photos, making art, retouching, and more.
Remember never to use AI photo editor tools. These photos are unrealistic and fake. Anyone can understand that the photo is edited with AI or something. So if you have no time to edit them, simply outsource them. Graphics Cycle is one of the best photo editing companies that helps thousands of photographers and e-commerce owners. Our expert team uses all premium software for advanced editing.
In A Nutshell | Best Camera Accessories for Photography
We have covered the 24 best camera accessories for a photographer in this post. Some of these are a must to use, and a few are beneficial to use but not mandatory. Whether you are a beginner or an expert photographer, you need to use these accessories.
However, besides including the 24 best accessories, we have also provided bonus tips. If you use these top-notch camera accessories and follow these bonus tips, you are one step ahead. We appreciate your time and passion for reading this complete article. Now it’s time to improve your photography skills with the easiest methods.
Frequently Asked Questions
What are accessories in photography?
Accessories are additional tools that are used in photography to enhance the functionality of your camera. This equipment is very helpful for covering various types of photography. Also, these accessories can help capture stunning pictures.
What are the three important accessories for a digital camera?
There are a lot of the best camera accessories to boost your photography, but the most important three for digital cameras are:
- Tripod: Provides stability for steady shots.
- Camera Bag: Provides safety and easy carrying of all accessories.
- Cleaning Kit: Helps to clean your camera, lens, mirror, and everything.
Why are camera accessories important?
There are numerous reasons for camera accessories are so important. A few of them are below:
- Functionality: Accessories make your camera better. They help you try out new ways of taking pictures.
- Protection: Things like camera bags and lens pouches keep your camera safe. They protect it from getting broken, dusty, or damaged by bad weather. This makes your camera last longer.
- Versatility: Accessories like lenses, tripods, and external flashes provide the best quality photos in various situations.
- Convenience: Accessories such as memory cards, extra batteries, and camera straps make taking pictures easier. They make sure you’re ready for long photo sessions without any problems.